Balcony wall decoration with laminate
Having a cup of coffee while enjoying the view is always a pleasure. Well, when there is a porch near a private house where it can be done. But in high-rise buildings, everything is different. To do this, look for a suitable place, for example, a balcony. To make it more comfortable, it is recommended to finish laminated balcony walls.
What to choose

Colors and various design options are replenished with new collections. In order not to get lost in this abundance, it is necessary to know the basic principles and differences. All castle systems are divided into:
- Lock - has a thorn-groove connection, which is fixed by punching it with a rubber mallet or an ordinary hammer through a safety pad. When laying this type of laminate requires special attention, if there are any surface irregularities, then over time the lock can disperse and gaps form. One of the drawbacks is the inability to remove and redo, because after such operations the protrusions are being worn down.
- Click - an improved model of the previous version. It is also performed by milling. The difference is that the version of the flat hook is involved. Sheet joining occurs at an angle of 45 ?. After the plank is lowered into the horizontal plane, a characteristic click is heard, indicating successful fixation.
For the ceiling and walls on the balcony and the first option. But for the floor is better to use the second. In addition to the ways of joining laminate differs in quality and durability.

The main components of the laminate board are:
- The base, it is usually made of various materials: MDF, fiberboard, HDF. Plates are laid on a substrate that is impregnated with resins to ensure moisture resistance.
- On the basis the paper with a print is laid. Drawing can be any, up to your photo, but it will have to be very expensive to pay the manufacturer.
- Above is a plastic coating, thanks to which this flooring got its name.
Note! Previously, lamination was used to ensure long life of dental fillings. One of the doctors noticed that after he had covered the photo with his wife with this composition, it acquired new properties. Further, this method was transferred to the flooring.
The whole coating can be from 6 to 12 mm thick with a step of 2 mm.
By resistance to liquids are distinguished:
- Normal - possesses standard properties that are provided by the topcoat.
- Moisture-resistant - based on the HDF-plate, and the joints are additionally covered with a composition that repels moisture.
- Water resistant - this option has got its properties due to the fact that instead of a wood board, a PVC substrate is used, which does not react at all to water. To provide sound insulation, which is worse than wood, additional air chambers are organized.
By resistance to stress, there are several classes:
- 31 - a bad option for offices, but good for the house - will last about 10 years.
- 32 - withstands average loads, at home will last 15 years.
- 33 - the best option for intensive loads.
- 34 is the most stable option, with a large load will live for about 30 years. At home, stand the feet of more than one generation.

According to the method of mounting on the walls distinguish laminate, which is fixed:
- in aid of a cloak;
- using clamps. These are special brackets that easily enter the lock and do not prevent the fixing of the next plate. There is a separate subspecies with prongs for the end edge;
- using screws.
If you are faced with the task of choosing the optimal solution, then take a moisture-proof option. In terms of strength, it makes no sense to dwell on the most expensive, because a balcony is not a courtyard.
Note! The color scheme should not be overweight. The ideal is the option where there is a maximum of three shades. Analyze what the windows will be like and what is already on the balcony from the decor, what you will not clean up. Well, if between the main room and the balcony will not be a big difference in color.
Insulation above all
Bought laminate is best brought to the apartment and folded in the room so that it passes acclimatization. And the next step before the trim will be insulation. Such preparatory work is very important - the quality of its implementation will directly affect the appearance of the laminate and the duration of its service life.
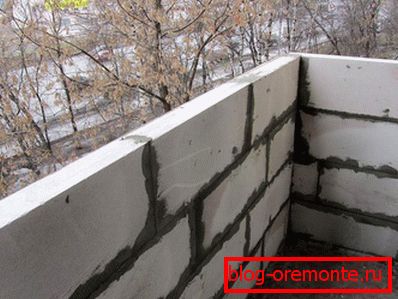
The first thing that needs to be done is to glaze the balcony. A practical option would be metal-plastic windows, which are made to fit your size and are mounted by the field crew. But even before installing them, some refinement may be required - parapet reinforcement. In new buildings, it is usually laid out of stone.

If in your case it is impossible to use an already installed metal structure, then you will need to take care of the following:
- Remove the old railings. This can be done using grinders or hacksaws.
- Clear territory.
- Calculate what area you need to put.
- Buy foam block sizes 60? 25? 7.5 cm or 60? 25? 10 cm (can be another, which is available in your area).
- To fit it in size, you will need a hacksaw.
- Before proceeding to the laying, it is necessary to cover the floor with waterproofing material. It can be thick plastic wrap. It is important to observe 10 cm overlap on the walls.
- Next, prepare a solution of 3: 1 (sand-cement). For greater efficiency, first mix the dry mixture, and then topped up with water. Mandatory will be the use of various plasticizers. An ordinary shampoo can be used in this role.
- We put blocks with bandaging of seams so that they are well fixed. It is important to lay a reinforcing mesh in each horizontal seam to form a monolithic structure. Do not forget to provide a ligation with side bearing walls. This can be done by drilling holes in them and inserting small segments of reinforcement that will coincide with the future seam.
- Using a level, constantly monitor the horizontal and vertical lines. The horizon can be leveled by slightly increasing or decreasing the slurry layer.
- The last row is better to strengthen with metal corners on the inside and outside.

After the glazing has been carried out, you can start the main work. The process of floor insulation can be combined with the preparation of the base for laying laminate.
- We carry all the excess from the balcony, dismantle all the structures that are on the walls.
- If the base for the glazing is laid out with us, then you can proceed to the manufacture of flooring on the floor. If it is made of a metal lattice, then the insulation should start with it. The bars are first sheathed with moisture-resistant OSB on the outside (this can also be done with siding or clapboard). It can be fastened directly to the bars with steel wire.
- On the inside, the gaps can be blown out with foam. After that, lay a layer of foiled insulation.
- We proceed to the manufacture of sex cover. Lift the laid film and apply an antiseptic solution on the concrete base. Give dry and cover again. After that we lay a layer of foiled insulation.
- Cooking lags. For this, rectangular bars with an aspect ratio of 2 to 1 can be used. We stack them in 40–60 cm steps. Fasten them to the base with anchor expansion dowels. To drown the head, you will need to make sweat.
- In the formed niches between the lags we place expanded polystyrene (mineral wool can be used), large gaps are blown out with foam.
- From above we make flooring from plywood, OSB of a plate or from boards which keep within but one to another. It will be necessary for a comfortable laying laminate.
- Use a level to control the plane so that the base is level.
- Further along the entire perimeter of the walls and ceiling we install insulation with a reflector made of foil.
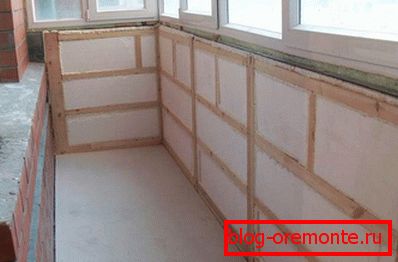
- Now you need to crate the walls and ceiling. We will need bars with dimensions of 30? 40 or 50? 60 mm. They must be secured with dowels and screws at a distance of 30? 40 cm from each other. The direction of their location should be perpendicular to the location of the seams of the future flooring. Be sure to try to keep the level to get a flat plane.
- In the resulting voids lay styrofoam, blow out the gap foam.
Note! Metal profiles can be used for the batten, which are used for drywall. But in the case of metal there is a high probability of the formation of cold bridges.
Laying laminate

With the right approach to warming, we have greatly facilitated the process of laying laminate, which has already acquired the temperature and humidity of our room.
Work is always better to start from the ceiling. We have already installed the crate and insulate it. Laying laminate is desirable to produce perpendicular to the window. So, the room will be visually expanded (although the longitudinal location is no worse. The more difficult work can be more painstaking work in adjusting the corners and projections).
- Measure the size of the future slats. We cut the element of the required size with a jigsaw, hacksaw or electric miter saw.
- When using the tool for trimming, try to find the right tooth pitch. It is important that the material does not vomit at its dissolution.
- On the edge, which will be closer to the wall, we cut the spike in order to better join the surface.
- Fix the bar with clips, screws or glue. If these are clamps, then we drive in the element with a sharp end to fix the edge without a spike. On the bar with a length of 1 m you will need 3 mounts, if the size is smaller, then 2.
- Next cut the next bar. On the ceiling, the lock does not play such a big role, therefore, in order to make it easier to dock the plates with each other, you can cut off the hook for a click system. If the walls are well aligned using the batten, then you can immediately prepare all the necessary strips and make their installation.
- In order to secure the last bar, it will need to be cut to the width and at the end to drive the clamps with teeth. After that, put it in place and in the special holes of the fasteners to drive a nail or screw the screw.
- Do not forget to leave a gap of 10? 15 mm from the wall. It is very important, because the base of the laminate is capable of deformation under the influence of changing humidity and temperature.
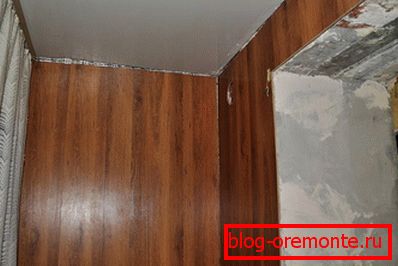
- Then you can go to the walls. The mounting method will be exactly the same as for the ceiling. Only here there is no need to trim the hook of the lock. It is always better to move in such a way that the whole strips remain near the openings, and the trimming moves to the corners. We recommend choosing the far left corner and moving clockwise.
- If you chose the laying method parallel to the window, then you need to make sure that the junction of several rows of slats falls on a wooden support. It is important to be able to fix it, as well as to avoid deflection in the place of articulation.
 Laying is always from top to bottom. So much more convenient to perform the fitting of various parts. To make it easier to observe the gap, you can use special wedges. For the ceiling it will be difficult, but for the walls and the floor everything will be much easier.
- Before you put the laminate on the floor, it is necessary to clean everything from dust and debris. The substrate is laid on the prepared surface. Its thickness can be 2? 3 mm.
- Before laying the first plank, spacer wedges are installed along the entire perimeter. We cut the required size and place it on the floor. We fix with the help of one of the systems mentioned earlier.
- If you choose to lay parallel to the window or perpendicular to the plane, but the width of the area is large enough, then you need to cover the joining seams. This means that the second bar will need to be cut into 2 halves, the third will again be whole and so on until the end.
- The slopes are sewn with long slats that fit to the size. For greater convenience, they can be fixed with glue.
- The final stage will be the installation of baseboards and all sorts of corners.
Note! In order for the distribution of the laminate to be uniform, it is necessary to measure the total length and determine what size the last plank will have. If it is less than 5 cm, then the first and last boards should be cut to the same width.
After finishing all the work, you will be surprised how cozy your balcony or loggia has become. Do not miss the opportunity to enjoy the sunlight and get a charge for the whole day.
Video
To sheathe a balcony with a laminate is simple, you can see this by watching the video: