Leveling the floor chipboard most
Conducting repair or construction work can not ignore the floor. Their design will significantly affect the comfort of further residence and the attractiveness of the appearance of the home. But in order for the flooring to be ideal, it is necessary to have a solid and, most importantly, even foundation. To achieve this goal, you can use a variety of materials. This article focuses on chipboard and how to make a chipboard floor leveling with your own hands.
What is chipboard

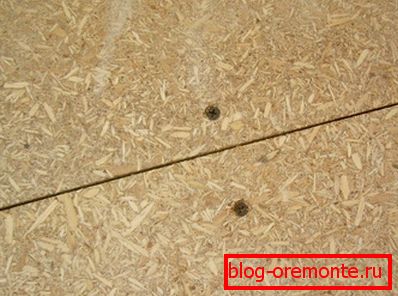
First of all, it is necessary to talk about the material itself, its positive and negative sides. So, chipboard is a product made of small sawdust mixed with adhesive resin. After mixing the components, the mixture is subjected to high pressure. As a result of pressing and obtained chipboard plates.
This material has its advantages and disadvantages. The advantages of chipboard sheets include:
- low cost;
- ease of processing and installation;
- high strength and reliability;
- high rates of heat and sound insulation;
- can be used as a fine finish.
There are practically no drawbacks to chipboard. The only thing that can be attributed to the minuses is the appearance - it is not much like wood. Also disadvantages include the presence of formaldehyde resins. During operation, formaldehyde may be released into the air, which is toxic. But the use of modern technology can reduce this detrimental effect. So, the type of a chipboard of the class E1 possesses high indicators of environmental friendliness.
Note! There are some limitations on the use of the material. So, it is not advisable to use chipboard plates where there are significant loads. Even heavy furniture can deform the material, which will lead to the penetration of moisture and further release of chipboard.

Chipboard is produced in various versions. The cheapest type is the so-called “bare” slabs. They do not have a coating and are most often used for leveling floors. Also for the arrangement of the floor covering, moisture-resistant chipboard is used. This material contains paraffin, which prevents moisture from penetrating inside the slab. But such material cannot be used in rooms with high humidity (bathroom, bath, etc.).
Chipboard or plywood
При возникновении необходимости выравнивания пола многие задумываются о том, чем это сделать. Специалисты могут предложить два варианта: использовать DSP или применить фанеру. Чем эти материалы отличаются?

Plywood is a fairly durable and reliable option. In addition, the sheets have properties to return to their original forms after drying (if you accidentally flooded the floor). Such an effect on chipboard is absent. In addition, plywood has a more aesthetic appearance.
But such positive qualities lead to higher material costs. A sheet of plywood of the same parameters as a chipboard, will cost more. And if the leveling layer will not be a finish, then the appearance is not so important.
Wood floor leveling

Листы DSP прекрасно монтируются на любую основу. Но, наверное, самой легкой работой будет монтаж плит на деревянные полы. Сам ход работ будет выглядеть следующим образом:
- First, the surface is prepared. All furniture is taken out of the room, and the floor is thoroughly cleaned of rubbish. You need to carefully inspect the board. If there are rotten areas, they must be replaced. In addition, the creaking of the boards is eliminated. If there are significant irregularities, then you need to get rid of them. Then it is desirable to treat the surface with an antiseptic.
- After preparation of the base plate chipboard laid out on the surface without fastening. At the same time, it is necessary to keep the distance from the walls within 1–1.5 cm. Also, follow the horizontal position with the help of the construction level. To adjust, you can enclose sheets of thin plywood.
- Once all the plates are laid in their places, they can be fixed with screws using a screwdriver.

After installation, the joints between the slabs are puttied. You can also cover sheets of chipboard varnish, it will protect from moisture penetration. After that, you can begin to install the finishing flooring.
Laying chipboard on a concrete base
If there is a concrete draft floor in the room, its alignment using chipboard sheets can be done in two ways:
- no lag;
- using racks (or bars) and lag.
The first option is the simplest and it is most often used. But many experts recommend the use of racks and logs, especially if the base is prepared for laminate.

Laying without lag is as follows:
- The first step is to examine the base. If there are small depressions and protuberances (up to 10 mm), then chipboard can be laid immediately. Only pre-should close up all the cracks. If the irregularities are more significant, you will have to lay the tie. After it dries, you can mount chipboard.
- Sheets must first be soaked in antiseptic, which will protect them from rotting. Then all the rubbish is removed from the concrete base, and the plates are laid without fasteners.
- После того как для каждого листа определено свое место, можно проводить крепеж. Для этого используются дюбеля (в плите DSP предварительно просверливаются отверстия).
Можно выровнять бетонный пол (да и другие основания тоже) при помощи стоек и лаг. Такой метод позволяет не проводить предварительное выравнивание чернового основания, что существенно ускоряет работы. Единственное, что необходимо учесть – это то, что данный способ «украдет» у вас 5–10 см высоты комнаты. Сами стойки плюс лаги и листы DSP приподнимут пол на некоторое расстояние.

The very course of the work of leveling the floor on the lag will look like this:
- Special racks are installed on the base. They are attached with bolts lags. The resulting structure is aligned horizontally using the building level. To adjust, adjust the bolts and enclose the wedges.
- Then the entire surface is covered with chipboard. Each sheet is firmly fixed with screws, so that during further use it will not budge. For this it is convenient to use a screwdriver, especially if the area of the room is large.
- If the chipboard sheets do not have sufficient thickness, then they are laid in two layers with offset joints. When laying the plates, it is necessary to provide seams between them with a thickness of 1–2 mm. This is necessary to avoid squeaking or swelling of the surface during further use. Also leave a gap near the walls to avoid further deformation.
Such raised floors are great as a base for almost any floor covering both under the laminate and linoleum. The surface is perfectly flat.

Laying floors using lags can be done without the use of racks. In this case, wooden bars of the desired thickness are used. Adjusting the horizontal surface is carried out using the lining of the rails or chips.
If it was decided to level the floor using logs, additional protective work should be carried out. Firstly, all wooden elements of the structure should be treated with an antiseptic to prevent rotting. Secondly, it is desirable to mount a waterproofing layer on a draft basis. As a rule, the usual polyethylene film is used as such. It unfolds across the concrete floor.
In addition, the use of lag allows you to further warm the floor. In the free space between the lags, you can lay the insulating material. This additional protection will increase comfort and reduce heating costs.
See also:
Adjustable floors on logs with their own hands