Laying laminate in the bathroom
Among the materials widely used for arranging floors in residential premises, special place is occupied by special laminated coatings based on fibreboard or particle board. At the same time, such a material is usually not used in the bathroom, since it absorbs moisture well (it is not waterproof enough). Despite this limitation, laying the laminate in the bathroom is still possible, provided that special grades of material are used that have the appropriate characteristics.
Features and types of waterproof coatings
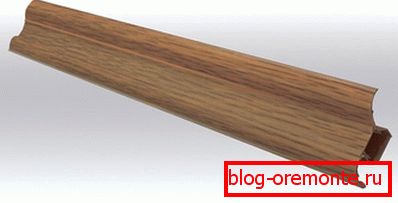
Of the variety of known types of laminated coatings for bathrooms, only those products that are classified by manufacturers as waterproof are suitable. At the same time, they may differ in the material of the base, the method of realization of the protective properties and, as a result, the degree of moisture protection.
In addition, materials chosen for flooring in the bathroom should have the following special properties:
- high wear resistance and resistance to deformation;
- low thermal conductivity;
- good protection of seams from moisture penetration;
- resistance to chemicals;
- potential compatibility with the “warm floor” system.
According to their performance, all products of this class can be divided into two types: moisture-proof and waterproof laminates.
The basis of the first is a classic MDF plate, impregnated with special water-repellent additives. Additional protection against moisture is provided by the use of materials based on silicone or natural wax in the processing of grooves.

Note! Such material is allowed to be used in bathrooms with a constant temperature level and equipped with exhaust ventilation, ensuring the maintenance of humidity in the normal range.
The second type of water-repellent flooring is highly resistant to wet evaporation and is more suited to its intended use. This is explained by the fact that the waterproof laminate is made on the basis of polymeric materials that do not react to water and do not change their structure even after prolonged contact with it.

In addition, the decorative layer of this material is treated with a special polymer that provides additional waterproofing and allows you to use it without any restrictions.
Laying laminate

The technique of laying laminate do-it-yourself involves the implementation of a series of successive operations performed in the following order:
- preparation of the basis (draft floor);
- laying laminate board;
- installation of decorative elements (plinths and powder).
Consider each of these operations in more detail.
Preparation of the draft basis
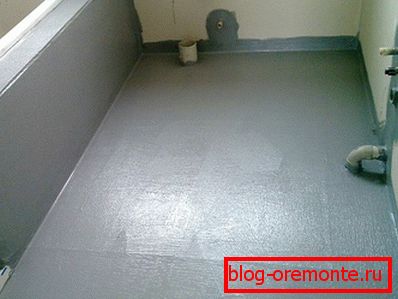
An ideally even base is a prerequisite for high-quality laminate laying, because on poorly prepared surfaces its composing straps will deform under load, which may cause them to peel off from the base and cause unpleasant squeaking when walking.
For the preparation of a perfectly smooth surface for laminate, special cement-based leveling compounds are most often used (sometimes binder, such as bitumen, epoxy resins, latex, etc.) are used as the basis.
Note! The best result is achieved through the use of so-called self-leveling mixtures (screeds). Since these coatings are applied with a thin layer, it is not always possible to smooth out large irregularities with their help. That is why these mixtures are most often used as finishing, which is preceded by leveling the surface with other compounds.
After applying each leveling layer, wait until it is completely dry (the time for which the screed hardens depends on its thickness, composition, and also on the ambient temperature). And only after the final setting of the last leveling layer will it be possible to proceed to laying the laminate.
Laying laminate board
Immediately, we note that the plastic laminate (as, indeed, any other) should be mounted on a special substrate that performs the function of a soft lining under the material, which does not allow the floor to creak and sag under load. (As a rule, such substrates are made of polystyrene, foamed PVC or cork).

Before installation, the substrate sheets are laid out on the prepared subfloor subfloor, and then securely fastened together with tape to form a solid coating.
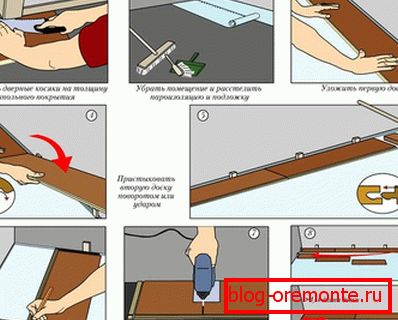
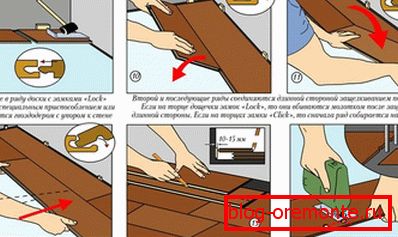
It is recommended to start laying the first strips of the laminate from the corner of the room, which ensures the inconspicuousness of the joints formed in the process. The order of installation of the second and subsequent strips depends on the locking mechanism used in your chosen type of laminate board. Thus, the elements of the “Lock” lock system should be connected to one another in a parallel plane, and the dies with click-type locks should be at a small angle to each other, followed by pressing in the direction of the substrate.
Installation of thresholds and plinths
Laying laminate in the area of the doorway is carried out taking into account the possibility of its joint with the material of the hallway, which design leaves a small gap. In order to hide this gap, a special threshold is made in the doorway, protecting the edges of the material from wear and at the same time performing a decorative function.
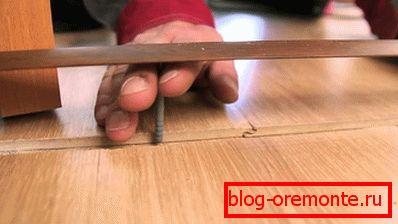
Mount the sill to the base of the floor in two ways: external and hidden. External mounting is carried out with the help of screws, twisted through the holes in the dowels prepared in advance in the floor.
Hidden mount nut, consisting of upper and lower parts, looks more aesthetic. When mounting with screws, only its lower part is attached to the floor, while the upper part is superimposed on it and fixed with a special latch.

As for the plinths, their installation is almost no different from the installation of the nut. It will be possible to proceed to it immediately after removing the limiters installed against the wall when laying the first composing elements. We note especially that the plinths are fixed only on the walls of the bathroom, while the laminate itself remains loose.
See also:
Floor waterproofing