How to put tile on a wooden floor
For laying tile it is necessary to carefully prepare the base. The surface must be flat and durable. Otherwise, about any long service of a new flooring and the speech cannot be. Properly prepare the foundation of concrete is quite simple. But what if the draft floor in the room of wooden boards? What actions need to be taken in this case? The article will describe how to put tile on a wooden floor.
How to "make friends" with wood tile

The tree is quite "capricious" material. With a lack of moisture, it dries out, and with its excess begins to swell. Especially such processes are observed in the bathroom or in the kitchen. Any changes to the wooden base can be invisible externally, but they are very detrimental to the monolithic structure.
Note! When the tree dries out or swells up to just a few millimeters, the laid tile may begin to crack and, as a result, flake off.
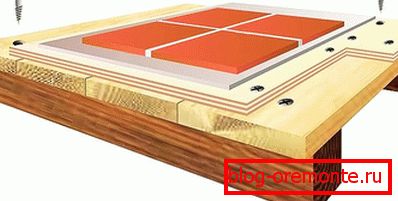
To avoid all these troubles, you need to make a kind of solid strip between the wooden floor and tile. Such works are quite laborious and are performed in several stages:
- revision of the wooden floor;
- base leveling;
- easy screed installation;
- installation of tile.

We inspect and repair wooden coating

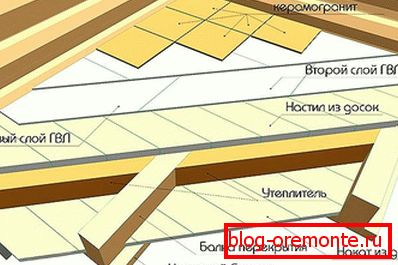
First of all, it is necessary to understand that the wooden floor is not alone boards. This design has a rather complicated structure. In its composition there are beams, logs, and, of course, floorboards. All this must be carefully inspected before proceeding with the installation of light screed.
With this inspection, you must perform the following work:
- We remove all boards of the sub floor and inspect them for the presence of rot. We conduct inspection of beams and log. If spoiled are noticed, they must be replaced. Also look at the distance between the lags. If it is less than 50 cm, then you need to shift everything. Otherwise, the floor structure can not withstand the weight of the screed and ceramic tiles.
- Check the horizontal laid beams and log.
- We treat all wooden elements with antiseptic. Such impregnation is obligatory, otherwise the tree may begin to rot, and all work will go down the drain.
- After the antiseptic has dried, you can put a layer of insulation. As a rule, in this case, use of expanded clay. Its layer should not reach 5 cm to the level of floorboards - this space is necessary for ventilation.
- After such work, you can lay the board in its place. At the same time it is necessary to leave small gaps between them, no more than 3-5 mm. Fastening is best done with galvanized screws.
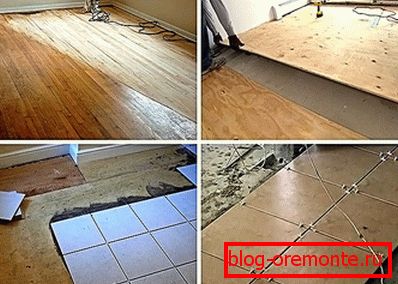
- Now proceed to the alignment of the base. First of all we putty all holes and gaps. Now you need to work with a grinding machine or, if there are no large irregularities, just sand the surface. The gaps between the boards are filled with foam.
If the room is dry, then it is possible to use plywood sheets to level the base. In this case, they are laid over the entire area and fastened to the screws.
We lay the facilitated coupler

Tile laying должна проводиться на прочное основание. Именно поэтому проводится заливка облегченной стяжки. Ее можно сделать тремя разными способами. А именно:
Fill the usual sand-cement mortar. In this case, the mixture is made in the usual way, but the screed is poured with a thickness of not more than 30 mm.
You can use the adhesive KS with a base of liquid glass. Also apply a mixture made by hand. To do this, take one part of clean drinking water, two parts of sifted and purified sand (preferably coarse fractions) and mixed with two parts of liquid glass. This mixture is poured onto the subfloor and creates the desired layer, which will prevent the detrimental effect of the deformation of the boards.
Note! In dry rooms, you can use DSP boards or moisture-resistant gypsum board as a solid base (“dry” screed) for the subsequent installation of tiles.
Tile laying

After preparation and hardening of the base, it is necessary to start laying the tile. Pre-surface degreased and cleaned of pollutants. Then a dry layout is performed. So you determine where to cut the tiles, and which of them, where it will lie.
Now prepare the glue mass. Its volume should be enough for 1 m.2, more at a time is not worth doing, as the glue dries quickly. The prepared solution with a spatula is applied to the floor. Then the tile is laid with the installation of plastic crosses between them.
Note! When laying you need to strictly follow the transverse and longitudinal direction. You also need to immediately align the tiles horizontally. For this it is better to use the construction level of at least one meter in length.
If the glue remains on the surface, they are removed with a wet cloth. If you wait until the glue mass dries, then it will have to scrub. This can ruin the look of a tiled floor.

Maybe you will be interested to learn information about:
- How to make a wooden floor scraping
- How to level the floor with plywood
- How to make a floor out of plywood by yourself
- How to make a cork floor
Video
These videos provide information on how to make a lightweight tie on a wooden base: