How to make an infrared floor yourself
Each of us wants an apartment or house to be warm and cozy. You can achieve this with the help of central heating, or to do otherwise - install a film underfloor heating in your apartment.
Warm floor systems are no longer considered a novelty, and until recently, two types of such systems were the most common.
- Electric floor. When using this option under the floor covering fit heating cable.
- Water floor Here the coolant is water, which circulates through the pipes laid before the foundation.
Both options are good in their own way, but relatively difficult installation makes such systems not quite acceptable for self-installation. In contrast, infrared heat-insulated flooring is simpler to install and, when used, infrared radiation radiates heat better through the room.
Infrared floor functionality
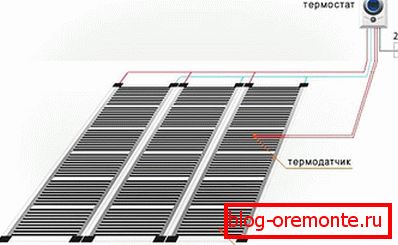
If you draw a line between the electric warm floor and the infrared system, the second option heats the room not by heating the air. The principle of operation is to generate heat radiation in the infrared spectrum.
Note! Such systems do not heat the air in the room, but objects that are located in it.
The structural component of a warm floor includes a multi-layer structure, which consists of the following materials:
- copper or silver alloy.
- carbon or graphite-carbon composition.
- polypropylene films.
When turned on, the system generates infrared rays that heat not the air, but the objects in the room, and the whole room is already warming up. During its work, a favorable atmosphere is created, since the oxygen inside the room is not burned, and it will be much easier for you to breathe even with the system constantly turned on.
According to the methods of the device, such systems are divided into several types.
Rod

In fact, the structure of this option is not film. In appearance, it is similar to a rope ladder with longitudinal and transverse elements, where the longitudinal part is a conductive bus and the transverse part is carbon fiber rods in a protective sheath.
Сплошной Carbon based IR floor

In this embodiment, the system is represented as a continuous carbon fabric, protected by several layers of special film and filter. Such a film is very simply cut to any size and is characterized by the greatest safety and efficiency of work.
Striped infrared floor
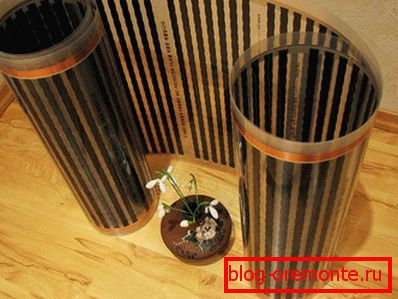
In this embodiment, the heating system is recruited from individual cut strips, and at the same time they can be cut only in special places. Here, not the whole strip, but some parts containing a mixture of graphite or carbon, work as heating.
Note! When installing this option, heating experts do not advise to put heavy furniture on a warmed surface to prevent damage to the bands.
If we talk about which infrared floor is better, then the second option is more convenient for self-assembly, both in terms of the quality of heating and the simplicity of work.
What is good system of infrared warm floors
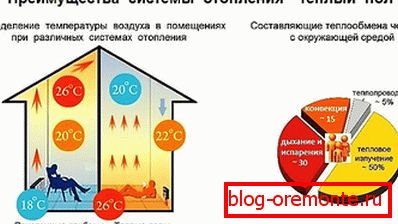
- First of all - reliability. Even if one of the sections of the heating strip is damaged, the rest will still work thanks to a parallel connection system.
- Easy installation system. This was possible due to the fact that for its installation is not necessary to carry out complex preparatory work.
- Can be installed under any coating, even with small slopes.
- Low power consumption. This is achieved due to the high thermal conductivity of carbon.
Note! In addition to all the advantages of installing infrared floors, there is another positive factor - ease of disassembly with the ability to transfer the system to another location.
It was said above that the installation of such a system does not require special skills, but, before you make an infrared floor with your own hands, you should still read the tips for installing it.
Installation instructions
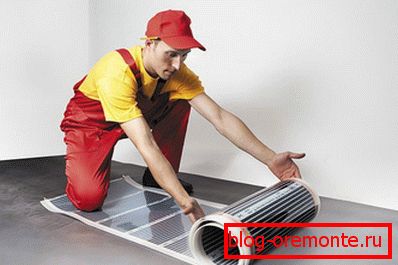
The first step is to prepare the foundation.
The beginning of all work will be cleaning the surface and preparing for installation. Align all differences (allowable minimum - 3 mm), clean and dry the floor.
Laying heat and waterproofing
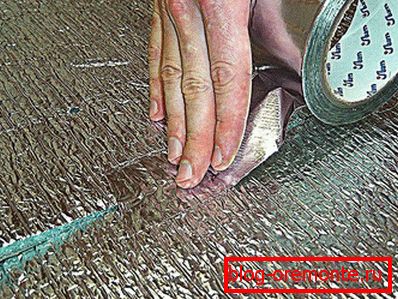
This is necessary to protect the system from moisture, which can form when temperature drops. Heat insulation will minimize heat loss. Simply put - it will not let him go down and will maximize heat transfer in the right direction.
Note! If you use tile as a topcoat, it is better to use a technical cork for waterproofing. Under other floor coverings, you can choose any materials, the main thing is to stack them with the metallized side up, sizing the joints with duct tape.
Where to locate the thermostat

The thermostat is called the sensor enable and adjust the operation of the system. It should be placed immediately before the laying of the heating film. Experts recommend installing it no higher than 15 cm of the flooring level.
Make a map of the location of the film

It is needed to minimize the risk of damage. After all, as noted above - the system can not be placed under the bulk and heavy objects. Therefore, keep in mind this fact and before laying the infrared floor, mark the places of the future location of the furniture, so as not to lay a film in this place.
Note! If you plan to install an infrared heat-insulated floor as the main way of heating a room, then note that in this case it should not occupy less than 70% of the floor space. For auxiliary heating you need to use at least 40% of the floor area.
Film laying
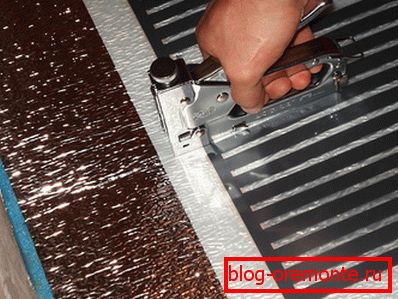
- It is necessary to lay the heating film so that the copper side of the contacts is facing down towards the location of the thermostat.
- Carefully connect the contacts (clamping) to the copper strip and connect them to the wires.
- All joints and cuts are carefully insulated with special mastic.
- In order to prevent the closure of the contact clips, the laying of the heating webs should be done with a distance of 0.5 cm from each other.
Note! When marking and cutting strips, please note that the maximum length of one strip should not exceed 8 meters.
System connection
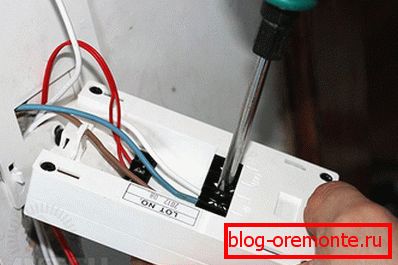
After laying the heating elements, the entire system is connected to a single chain. First, the thermal sensor connections are connected to the lower part of the heating film and qualitatively isolated.
After connecting all contacts mounted thermostat. Experts advise to mount it permanently, but you can use the connection in the form of a regular outlet.
System testing

Before finishing the flooring, check the infrared floor for quality work.
- Visually inspect the surface for the presence of film breaks and the reliability of the connection of the contact clips.
- Measure the resistance of the heating strips (the minimum allowed value is 1 MΩ).
- Turn on the system and run it by hand. The film should warm up evenly.
If everything went fine, cover the surface with plastic film and proceed to the finishing finish.
Anyone who has basic skills to communicate with the instrument will be able to independently mount the infrared heat-insulated floor. After studying the instructions and using our advice, you will easily carry out such work yourself. And if you already have experience in self-installation of IR floors, then you can share it with our readers.
Video
This video will tell you about the most economical heating:
From this video you will learn how to install installation of underfloor heating under laminate and linoleum: