How to make a water-heated floor yourself
Recently, during the construction of various facilities, considerable attention has been paid to energy-saving technologies. This is mainly due to rising fuel prices and high heating costs. However, only the thermal insulation of the premises will not allow to achieve the desired effect and create an optimal microclimate. Therefore, for several years, new technologies have been developed that allow to obtain and maintain uniform distribution of heat in buildings.
One of them is the system of warm floors, which, when heated, simultaneously heat the room. That is, a certain temperature gradient is created, allowing the room to feel quite comfortable. This technology is new for the domestic market, while in the foreign market it has long established itself only from the best side.
In this article we will explain how to make a water-heated floor with your own hands in a private house, and also demonstrate the video installation instructions.
Benefits
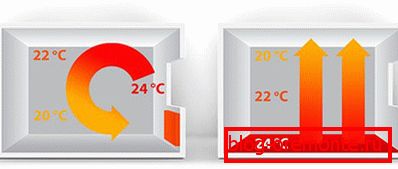
The main advantage of warm floors is uniform heating of the entire heated room. The maximum temperature is at the bottom, and the colder air is at the top. Due to the movement of air masses, the effect of heating is manifested. The better the insulation of the room, the lower the temperature gradient and can be up to 3-4? WITH.
No heating device can achieve such a result, since it heats the air near the heating surface of the radiator and effective circulation does not occur. That is, drafts can walk freely on the floor even when the battery is warmed up to +100? C, and the opposite space in general can remain cold. As a result, it turns out that the heat emitter is small, and it takes a lot of energy to warm up the room, while the comfort zone is small. In the rooms where heated floors are installed such problems are absent.
Such floors can be installed even in rooms with a high degree of fire hazard, any type of floor covering and flooring material. The system can be completely autonomous or connected to a centralized heating system. Its power is enough to completely abandon the auxiliary heaters. Savings when compared with other heating systems can reach 30%. The installation procedure will not require significant financial investments, and the installed equipment will be able to serve for a long period. A complete list of the advantages and disadvantages of underfloor heating systems can be viewed on the video.
Installation Features
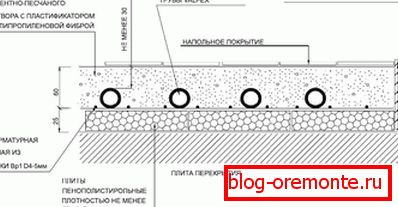
When installing water heated floors, it should be noted that this is a complex and complex task, encompassing many technical factors on which the efficiency of the entire system depends. First of all, it is necessary to make sure that the heated room has high-quality thermal insulation, since otherwise, any heating system will be expensive to operate and will not cope with heating. The next step will be to inspect the premises to determine the possibility of installing underfloor heating and creating a layout for the connection and location of the main nodes. If we are talking about installing floors with water coolant in the apartment, then you need to remember that:
- There is some probability of flooding of the lower floors, so the device of a warm water floor must be completely sealed and designed for the working pressures created by the circulating pump.
- The power grid must be designed for high loads;
- Due to the laying of pipes, some room space will be lost.
Note! Connecting to a central heating system is illegal.
It should also be remembered that heating the rooms in the basement or various technical rooms does not make sense unless absolutely necessary, since significant heat loss will occur. To increase the efficiency of heating, only those with high thermal conductivity should be used as floor coverings, and the lower part of the pipe should be insulated.
Thus, all the heat will flow into the room. In addition, attention must be paid to all connections to prevent leakage. Pipes on the way from the heating boiler must be carefully insulated. The collectors at the entrance and exit can be hidden in a special cabinet or mounted into the wall, if its thickness allows it, but it should be provided with unhindered access to it.
How to choose a pipe
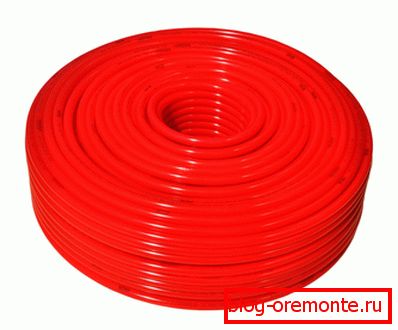
Currently, there is a huge selection of pipes with different properties and conditions of their operation. Therefore, it is quite difficult to make an unambiguous choice in favor of a particular material and a certain size. They must be selected among pipes that are designed for heating, as they are able to withstand high temperatures and not lose their properties, as well as have high heat transfer.
The ideal option would be copper pipes that are not susceptible to corrosion, can withstand high mechanical loads and water pressure without losing tightness. They have a small coefficient of expansion, their service life is from 50 years. However, self-assembly may cause difficulties with their soldering or welding. On the other hand, the cost of such a system is extremely high compared to other analogues.
The following types of pipes - metal and plastic. They are much worse in heat conduction than copper ones, but they are also significantly cheaper in cost. They are also not subject to corrosion and have a long service life. However, they are not recommended to be connected using clamping fittings, since they tend to flow with slight increases in pressure in the system. Such pipes are preferably welded using a special heater. Plastic pipes are less durable and temperature resistant compared to metal-plastic, so they are not recommended for installation in hidden water floor systems. The advantages of reinforced plastic pipes are also less thin walls, a small coefficient of expansion and ease of installation. But when installing them as a warm floor, it is better to make as few connections as possible.
The third type of pipes are steel. They have high strength and low thermal conductivity. Their main disadvantage is the high level of thermal expansion, which is unacceptable for some types of floors and can lead to their deterioration. In addition, they are significantly susceptible to oxidation and their service life is much less than all other types of pipes. Therefore, they are practically not used for warm floors.
Note! The diameter of suitable pipes is selected taking into account the thermal calculations of the system: the required temperature in the room, the uniform heating of the entire floor, energy efficiency. A larger diameter can provide fast heating, but at the same time the costs for the heating boiler and the circulating pump will increase, and the floor level will be raised to the appropriate height. On this basis, select pipes with a diameter of 16 mm to 20 mm.
Styling options
The main types of installation of warm floors are as follows:
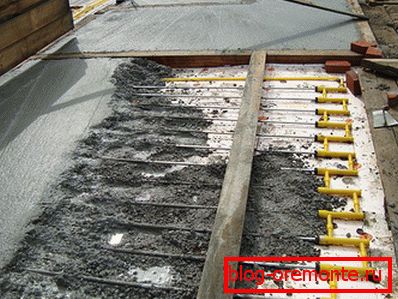
- Under the concrete screed. An option that is quite suitable for self-styling, since all the material used is inexpensive and does not require the use of sophisticated technology for installation. You can use almost any method of laying pipes: snake, spiral, shell, etc. The circulation system is installed on the waterproofing and insulating layers, on top of which a metal grid is installed. After laying the pipes, the floor is poured with concrete or a special mortar, and then the floors are screed. As a result, the surface acquires the necessary strength and uniform heating of the entire surface. However, in the event of a leak, it will not be an easy task to eliminate it.
- On a wooden draft floor. Laying can be carried out modularly and rack. Modular - is a ready-made system of channels with already installed insulating layers on the basis of chipboard. Rack is a separate laying of heat-conducting plates and pipes between sheets of chipboard of a special form. The gaps between them are reinforced with aluminum strips, into which the pipes are laid.
- On a moisture resistant special basis from expanded polystyrene. In this system, finished plates with grooves cut into them are used to install metal heat shields and on top of pipes. It is the most common, as it allows to install underfloor heating in the presence of small irregularities and significant restrictions in the height of the room.
Since water during circulation through the pipe loses some of the thermal energy, with increasing distance from the heat source (boiler) the heating temperature decreases. Therefore, to avoid the appearance of a floor heating gradient, there are two methods for laying pipes:
- Spiral wiring diagram. With this method, the heating and return pipes are arranged parallel to each other and therefore they are able to compensate for the heating and cooling in such a way that the difference will be hardly noticeable. By construction, a double helix is obtained. This type of heating is widely used in rooms with a large area.
- Parallel method. Snake tubes are laid parallel to each other. That is, the heating temperature is higher at the beginning of the pipe than at the end. Therefore, the more heated part is installed near the sources of cold, that is, entrance doors or windows. Such a system is usually installed in small and medium-sized premises.
Assembly work
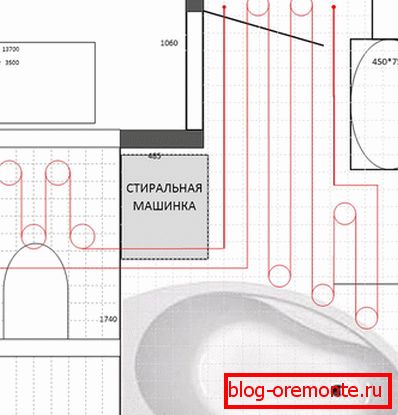
from water heating, it is necessary to draw up a detailed plan for connecting the system, as well as to calculate the amount of building materials required. It is also necessary to level the surface so that there are no distortions, to eliminate various defects and damages. If you plan to install an autonomous boiler, then its location should be as close as possible to the heated room in order to reduce heat loss and ease of maintenance. The cabinet for collectors is installed directly in the room and is immured into the wall or hidden behind various decorative elements. It is convenient to place the collector and the boiler in the basement, which will save not only living space, but also the cost of finishing.
At the first stage, a collector cabinet is installed. For this, approximately in the center of the room, a niche in the wall is hollowed out according to the required dimensions, and then it is embedded there. The first to bring him a pipe with hot water, and then the return pipe. At the entrance and exit put a mandatory valve that allows you to shut off the water supply and to perform repairs or maintenance of the system.
Also, it would not be superfluous to install pressure gauges that could promptly signal clogged pipes and an emergency pressure increase. Behind the valves and gauges put the collector on the required number of inputs and outputs, each supplying control valves. If the taps are more than required, then put them on the stubs. At the outlet manifold, it is necessary to install a tap to drain the water and an automatic air vent that can prevent the system from airing. When planning the use of a central or stand-alone boiler, appropriate branches should be installed at the inlet and outlet.
Laying of heating pipes should be carried out on even and clean floors with installed hydro and thermal insulation. A damper tape with a width of 15 cm is applied along the perimeter of the room along the walls, which will prevent the screed from collapsing during thermal expansion. After that, depending on the material of the floors and the chosen type of installation, pipes are laid. For reliability, the pipes are fixed with wire, special plastic clips or clamps. However, it is necessary not to tighten tightly, but leave a small gap, which is designed to take into account the thermal expansion of pipes. When laying it is necessary to observe the following admissible distances:
- There should be a 7 cm distance from the wall so that the radiated heat is used more efficiently.
- The distance between the pipes is approximately 30 cm, with the exception of places with increased heat absorption (windows and doors).
- The maximum length of the pipes should not exceed 60 m, since otherwise uneven heating of the room will be observed.
Warm water floors achieve maximum efficiency when using not one channel for circulation, but as many as possible to create circulation circuits. Each of the circuits with one end attached to the inlet manifold, and the other - on the output.
After installation of all pipes, tests are carried out at pressures above the operating norm per 1 atm. This will allow to detect poor-quality connections and leaks, as well as determine the degree of heating of the room. If achieved the necessary technical characteristics of the system, then produce an exterior floor. Depending on the applied methods of laying and the base material, they make a tie, laying laminate or other floor covering.

It is quite difficult to make a warm floor on your own, since it is necessary to carry out calculations of the required heating power, to draw up a plan for the placement of utilities, as well as to properly conduct all installation work. The resulting heating system will be able to rationally use thermal energy and distribute it evenly throughout the entire space of the room.
Video
This video demonstrates the installation of a water heated floor: