How to lay laminate 2
In this article we will explain how to lay laminate flooring on a wooden floor with your own hands, as well as show photos and video instructions. After all, if it is wrong to lay, then it can crack or deform. What needs to be done before you begin its installation on the floor?
Room preparation

First of all, indoors, it is required to create an optimum air humidity, which in percentage ratio will equal 40–70%. At the same time, the temperature should not fall below 15 ° C and should not be higher than 30 ° C. These are very important conditions, because their non-observance during installation of the laminate will significantly reduce its service life.
Note! It is very important that before laying the laminate in the package lay in the room for two days. This is necessary so that it can adapt to the humidity and temperature of the room. If this condition is not met, the dimensions of the laminate may change during installation rather unexpectedly.
Also before installation it is necessary to check whether the floor on which the laminate will be laid is flat or not. To understand this, you need to take the two-meter rule and attach it to the floor. Then, with its help, it will be possible to determine how much the difference in sex between floor heights varies in different places. The main thing is that, in general, the floor does not have differences in more than 2 mm.
The stiffness of the base is checked. If the carpet, linoleum or the floor made of wooden lag boards creaks heavily, it will be necessary to either dismantle the old flooring or level the floor in some way (depending on the type of floor).
What to look for when buying a laminate? First of all, the packaging has not been opened in any way, is it intact and intact, and whether the manufacturer is listed. By the way, still need to look at the fact that the manufacturer was not the underground shops of China, as the acquisition of low-quality goods will lead to terrible installation, and as a result, the short service life of the laminate floor. Typically, such a laminate is different from the rest of the low price.
In no case can not lay laminate on the floor, fastening it with screws, nailing or gluing to the base! Its design provides for special locks that snap into place after connection. Also during installation, you must take into account the gaps that must be between the edge of the laminate and all the walls. This gap is 1–1.5 cm.
If the room has a high humidity, it should not be laid until it is restored to normal. In particular, the laminate is better not to lay in the bathroom, even moisture-resistant. However, it is worth knowing that there are products whose composition may be optimal for kitchens, where the humidity is still higher than in other rooms. In order to prevent the penetration of water and moisture through the joints in the locks, these places need to be missed with a special type of sealant.
Substrate selection
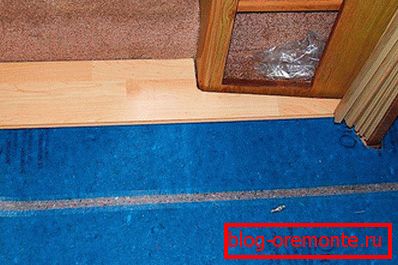
What is a substrate? This is a thin coating that is laid before laying laminate. What types of substrates exist? It is worth noting that the most preferred is a substrate made of cork, as it is known for not shrinking and has excellent properties in terms of sound insulation and heat preservation. Before you lay it, you need to lay a layer of plastic film.
Note! The film must be laid overlap, and it should be about 15 cm, no less.
How to prepare the base

To understand how to properly conduct the preparatory work with the old base and what they include, you need to know what requirements are placed on the installation of the laminate. For a start, it is important to understand exactly what grounds you can lay a laminate board:
- concrete pavement;
- floor on wooden logs;
- old linoleum;
- ceramic tile, hung on the floor.
Each type of floor needs its own approach. Therefore, in turn, we will try to figure out where to start in each individual case. The smoother the concrete layer is, the easier it will be to lay laminate on it.
Laying on concrete floor

On the new concrete screed, the topcoat can be laid only after complete drying, 30 days after it has been poured. The smoother the concrete layer will be poured, the better the laminate will be laid on it.
If the concrete floor is already about 5–10 years old and more, then it is necessary to make sure that the floor is level, has no cracks, and has never moved away from the base below (floor slabs or soil). In the case when certain deformations are found on the concrete floor, it is worth correcting them before the laminate is laid. For example, it is enough to fill small cracks or existing irregularities with a thin layer of self-leveling screed.
When it comes to a huge amount of damage, the entire screed must be replaced. This applies to those cases where individual pieces of concrete break off, the upper layer is almost completely destroyed or the screed “breathes”, that is, it is lagging behind the slab. How to perform a concrete screed can be found in the article "Concrete floor with your own hands."
Before laying the laminate board on concrete, the surface of which is already aligned, you should lay a layer of vapor barrier, which is made of plastic film. The edges are laid on each other with an overlap and sealed with tape so that heat does not pass through them.
Installation on the floor of wood
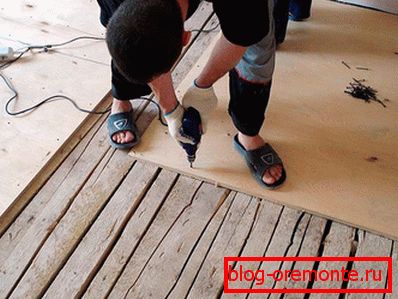
In a situation if the floor is wooden, you need to take care not only of evenness, as is the case with concrete, but also of securely attaching the boards to the logs on which they lie. It is enough to fasten the board with screws in the place where it plays, or to nail it. It may even be necessary to redo the entire floor.
Boards with an uneven surface can be processed with a plane. Everything must be done so that there are no protruding surfaces. The same applies to nails - if somewhere their boards sticking out of the board, they need to be knocked out. The same can be said about the screws - they should not hang around.
Note! If the nail is not hammered, it may have fallen into a knot. In this case, it is better to pull it out and try to score next. You can pull out a nail with a pry bar or a hammer with a nail puller.
You can even the flooring of wood and another method - to cover them with sheets of plywood. However, for such purposes it is impossible to use sheets with a thickness of less than 6 mm, since they can be deformed during operation without sustaining the load. Suitable not only plywood, but also other extruded materials. In fact, the question depends only on how much money the landlord is willing to lay out in order to level the wooden floor.
Selecting the thickness of the plywood for leveling the floor, you need to take into account the total size of the “puff cake” of the new floor, which consists of the following elements:
- plywood (other material);
- a mat under laminate;
- laminate board itself.
This is important to do in advance, otherwise it may become clear after installing the laminate that the door to the room does not open. It is necessary either to provide for the thickness of the plywood or to mount the doors last.
Laying on linoleum and tile
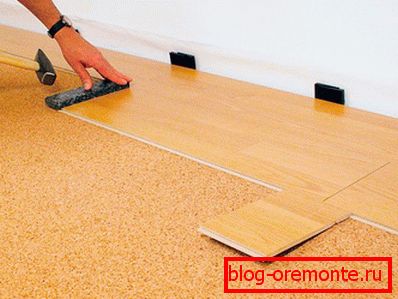
The essence of the preparation of the base of these materials is the same - the surface should be flat. If linoleum is badly torn, covered in cuts, then it must be dismantled and then work according to a scheme that depends on whether concrete or boards are under the linoleum.
When a tile is laid on the floor, it is also necessary to make sure that it is flat, never lagged behind or cracked. If it is found in some place that the tile has lagged behind, it must be removed, the old mortar (glue-cement) must be knocked down under it. Then the place should be cleaned and put a whole tile on the new mortar. If it broke, then you can pour the resulting void in the floor with cement-sand mortar or concrete.
A layer of vapor barrier, if linoleum and tile are not removed, you can not mount, but the substrate should still be.
The choice of tools and materials for installation

First of all, you need tools such as:
- pencil or marker;
- tape measure 5–10 m long (laser instrument is possible);
- square;
- hammer;
- clamps.
The hammer is needed in order to knock down the panels with each other. They need to use not in full force, just tapping on the locks, and then exclusively through the rubber gasket.
Mounting options
Glue fastening implies the butt-joint of the panels, while the locks of the boards are coated with special glue, and the panels are tightly attracted to each other. This option is suitable for rooms where there will be a high load, and there is also a need to protect the floor from moisture.
The disadvantage of this method can be called an extremely time-consuming process, as well as the fact that after gluing the panels it is almost impossible to disassemble, and the glue can also begin to crack after some time.
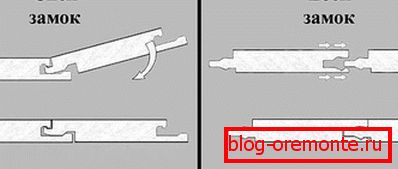
A more acceptable method of attachment is with the help of locks, known as “Click”. They are joined by the spike of one board into the groove of the other, while the angle of joining is 30 °. When the panel is lowered, it will not jump out of the lock anymore due to the fact that it has excellent strength and reliability. By the way, the joints in this case are not at all visible, which makes such mounting of the laminate also aesthetically beneficial.
Another type of lock, “Lock,” requires a smoother surface on which to laminate. If you connect the laminate with such a lock with no specific skills, you can damage it.
The disadvantage of the lock is not only the complex assembly of the panels, but also the impossibility of disassembly, which is practically reduced to zero due to its design. At the same time, this is a plus in the sense that the panels are unlikely to disperse by themselves.
Note! Lock locks are knocked down with a hammer, because they do not dock manually.
Choice of laying patterns

As a rule, laminate need to be laid from the windows in length, although sometimes there are ways of laying diagonally. This option may seem interesting for some people, but someone may not like it. So, this is the choice of everyone.
Among the most frequently used schemes for laying laminate include the following:
- classic;
- diagonal, or chess;
- brick.
Now a little more about each scheme separately.
Classic scheme

Most often, this type of installation is used in office type rooms and living rooms. It is considered the most acceptable in the matter of economy, since it allows the use of trim, cut from the edge of the board when laying a row. Of course, only trim lengths of at least 30 cm are suitable. If there is a bed in the room, you can play trim with it, setting them at the end and beginning of the row. As a result, laying laminate according to this scheme, which involves the beginning of installation from window to door, allows at the end of the work to have less than 5% waste that is unsuitable for use when flooring.
Diagonal scheme
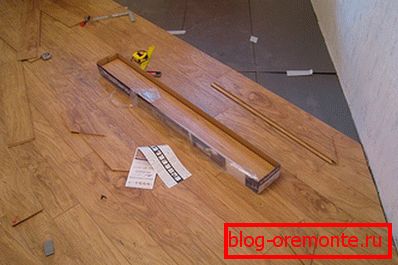
What is so unique diagonal method of laying laminate board? Laminate fit almost the same principle as in the classical scheme, but at an angle of 45 °. The room in which the installation of laminate is made that way, will undoubtedly win in the design, especially if the door is located in the corner. However, the amount of waste in this case increases several times, reaching 15%, and consequently, the cost of purchasing laminate increases. The number of baseboards does not change, as the perimeter of the room remains unchanged.
Brick scheme
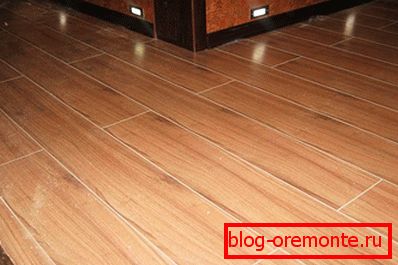
Why such a name? Installation on this principle creates a laminate pattern in the form of brickwork, which is also similar to a chessboard. On each new row, the laminate board is shifted to half the panel or to another predetermined size. The effect can be expressed in simple words - incredibly beautiful. However, the costs are much higher than with diagonal installation, since installation implies laying only the whole strip to the junction with the new board, and you cannot dial a number from the segments. However, there are also advantages: if laminate boards are laid in exactly this sequence, the highest durability of the coating is achieved.
Note! It does not matter what scheme is chosen, however, in any case, it is required to carry out the displacement of the locks by 20 cm in relation to the previous row.
Installation Features
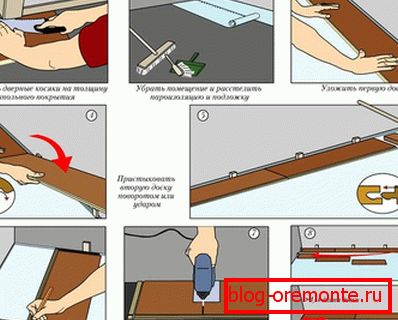
At the beginning of the installation process, it is imperative to remove any debris from the floor, and even better - vacuum it. Next, the first layer is to lay a plastic film as a vapor barrier, and then the substrate under the laminate. The joints are necessarily connected with tape, so as not to diverge. On it boards are stacked in rows in accordance with one of the selected schemes described above.
Note! You do not need to cover the entire floor with the substrate in order not to contaminate it once more, but to lay it a little bit as the rows of the laminate are laid.
Since during installation the laminate should move a little away from the wall, it is necessary to take care to prepare in advance some number of spacer wedges or pieces of plywood instead of them to ensure this gap. It must also be in those places where pipes and other obstacles pass, otherwise panels that tend to increase in size with increasing temperature will rest against such places.
The panels are joined in a raised state, and after they are joined, they are lowered onto the substrate. The first side locks are attached, and then those that dock with the next one. Installation usually begins with a corner, especially from those places where there are pipes and radiators. If the doors in the room open inwards, then it is better to start installation from their side, otherwise then you will have to remove the doors from the hinges. If this is not a problem to do, then we work in the first embodiment - from the corner.
The last panel is customized in size, that is, cut to width. It is worth considering that the wall may not be quite even, so there will have to measure more and more accurately.
Installation of plinths
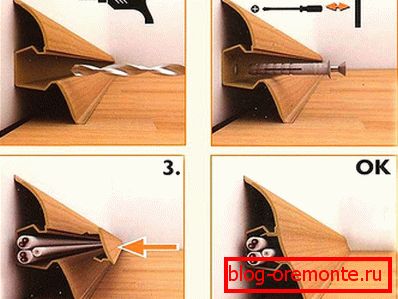
When everything is installed, plastic plinths are attached to the laminate floor. They can be fixed with dowels to the wall or use special hidden fasteners. Especially practical can be called plinths, in which there is a cable channel, where it is very convenient to conduct low-current wiring or an Internet cable. If the floor will crawl in several rooms, you will need to arrange a special expansion joint and close it with a threshold. When the laminate is put on the glue, you need to wait a few days until it dries.
Video
This video shows the installation of Tarkett laminate and the installation of the Cezar plinth: