How to lay a cork floor
More recently, cork flooring has become widespread, and every year cork flooring is becoming more and more popular. The main advantage of the cork floor is that its flooring can be done independently. However, before you get to work, keep in mind that this expensive material is not suitable for every room. This article will help you figure out how to lay the cork floor correctly.
Kinds
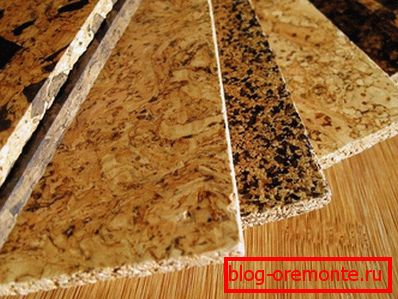
There are several types of cork floors. Each of them has obvious differences.
Solid cork veneer. This is the most expensive type, which is covered with durable varnish. This material is completely environmentally friendly. Available in 6 m seams2thickness up to 6 mm. Also, its production is carried out in rolls and in the form of tiles. To facilitate installation on a concrete floor, the reverse side is covered with vinyl film.

Панели MDF with cork. Can be attributed to the average price category. It is often called corkboard, although this is most likely cork laminate. Its base is made of MDF, followed by a layer of cork crumb, which has passed dry hot pressing. The last layer, the top one, is cork veneer, which is protected by a vinyl film or varnish with a thickness of 2 to 4 mm.

Cork laminate. It has the standard dimensions and thickness of a simple laminate.
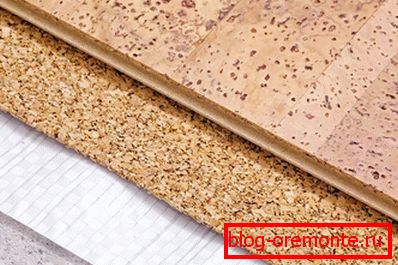
Extruded cork chips. Cork tiles are produced on this basis. It has a fine-grained structure. Color is yellow-brown. In quality, it is not inferior to solid cork veneer. This type of cork is a budget option.
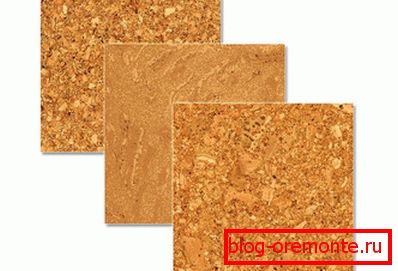
Note! On sale you can find trim, waste and residues of solid veneer. If you connect the imagination, as well as show artistic taste, then you can collect quite an original coating.
Virtues и недостатки
Cork floor обладает рядом положительных сторон: он не скользит, пружинит, с легкостью справляется с нагрузкой. Дополнительно служит в качестве теплоизоляции и звукоизоляции. На протяжении срока его эксплуатации выделения вредных для окружающей среды и человека веществ обнаружено не было.

But despite this, cork floors are quite fragile, which is a clear disadvantage. If there is no experience and understanding of the principle of laying the adhesive plug, then it is better not to experiment. You can also select a high level of thermal expansion. If water gets on the plug, it tends to swell, especially if there is dissolved organic matter in the water. The conclusion is obvious: if there is a stable temperature imbalance in the room, the cork flooring in this case will serve a short time. If you are going to lay cork flooring on the balcony, kitchen or in the hallway, then you should stay on the cork laminate, which has a protective coating. In the bathroom or in the toilet, the use of cork is generally irrelevant.
Note! If these recommendations are ignored and the cork floor is laid even in a slightly damp room, then after a short time micro cracks will form on it.
Cork does not have antiseptic properties, as it is a biologically neutral material.
Where to use

However, not everything is so bad. There are rooms in which the use of cork floors is welcome.
- Children's room and bedroom. Ideally, it is better to use a solid cork veneer coating, although any other type will do. The advantages here are plenty: the legs are always warm; if the baby falls, which often happens with children, it will not harm itself. According to some observations, walking in a traffic jam has a beneficial effect on the development of mental abilities and psyche.
- Study. Although cork muffles the sound, it does not create deadly silence. It is rather a comfortable environment to do the job.
- Living room. In this room would be ideal to use cork laminate. It is characterized by durability and ease of care.
Styling methods and rules

The installation of cork floors is carried out by three methods:
- The flooring is carried out by the same principle, as well as a usual laminate. The only difference is the use of certain tools and a certain technology. More on this will be discussed below.
- Flooring is carried out in a floating way.
- Installation can be done with glue.

The second and third method of laying clearly differ. However, as for the preparation of the premises, here all the work is the same. The same can be said about the use of the tool. It is not allowed to install cork in the cold season. The humidity of the air in the room should not exceed 60%. Under circumstances contrary to the data, stopping is not allowed.
Accessories, tools and extra material
To work with cork flooring you need the following equipment:
- Joiner's rubber mallet (mallet).
- Jigsaw. The cutting element must be finely toothed.
- Metal roller. It is necessary for the adhesive floor. Roller width up to 30 cm.
- For floating floor plank cork laminate.
- Spacer wedges. The wedges should not be made of wood, as they crumble the cork. They can be made from scraps of this material.
- Rule As it can be used a piece of corkboard.
- Clamp-hook for tightening the laminate.
Note! Cannot use a regular hand saw. Along the edges of the billet cork all crumble.
As additional material, you will need:
- plinth
- powders,
- glue,
- fine tine spatula and wide,
- jar with a tight-fitting lid. It is necessary for the rags moistened in a solvent. The rags are necessary for elimination of glue drips.
Preparatory work
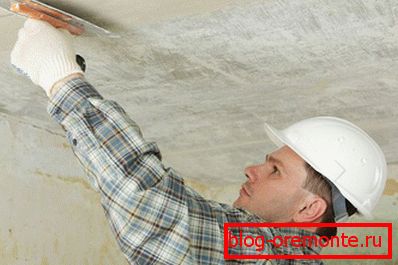
The surface for laying the cork should be flat, dry, smooth. If you have a concrete screed, this is not enough, since its surface has a roughness. As a result, the cork will play. Concrete is then an abrasive, so the cork, being a soft material, will gradually wear off. Even the slightest presence of moisture is also unacceptable, since cork tends to swell. The surface of the subfloor should be well dried.
Note! To check for moisture in the concrete screed, lay the film for several hours. If moisture is formed on it in a day, it means that the concrete has not yet dried out.
In rare cases, moisture can come from the neighbors living below. Therefore, all existing gaps should be eliminated, especially in the area of the riser pipes.
Floor leveling
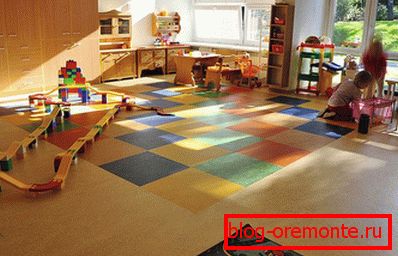
It is recommended to level the subfloor with liquid equalizers. Considering that cork flooring is not a cheap pleasure, it is extremely important to prepare a quality base. After all, its durability depends on this factor. Experts recommend the use of such material as marmoleum.
- Marmoleum имеет такие же механические свойства, как и пробка, поэтому большой нагрузки на покрытие оказываться не будет.
- Marmoleum хорошо заполнит все неровности, при этом поверхность будет идеально гладкой.
- Marmoleum has a bactericidal property. It will not allow harmful microflora to develop under the cork.
Note! If you have laminate, plywood or linoleum on the floor, do not remove them. Cork can be laid on top of these coatings.
Floating cork floor
Floating cork floor может быть сделан по разным технологиям, например, из пробкового ламината, из цельного куска шпона или быть наборным инкрустированным.
If you decide to perform a floating laminate flooring, the sequence of works is as follows:
- First of all, the room is measured out. After, the material is purchased. When the cork is already delivered, it should be unpacked and allowed to rest, or rather acclimatize.
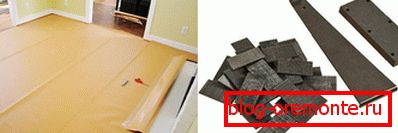
- Draft floor covered with film. The overlap of the film should be 25 cm. Wrap 15 cm over the walls. You connect each joint of the film with tape.
- Laminate is laid with offset. Work begins from the far corner of the transverse rows. The crest of the next board is inserted into the groove of the previous one.
- The bar must be held at an angle, then press and gently lower. The lock should close the connection. If you need to tighten individual seats, then you can use a rubber mallet.
- From the wall you need to maintain a distance of 30 mm. For this you can use spacer wedges.
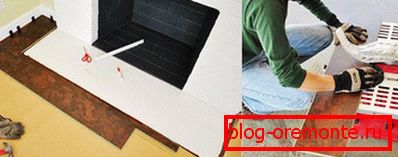
- When the entire cork laminate is assembled, all remnants of the protruding film around the perimeter of the wall are cut off.
- При помощи клея к стене прикрепляете plinth изготовленный из пробки. Важно, чтобы после установки он нависал над полом на 2 мм, а не плотно прилегал к полу. Для этой цели можно использовать зубочистки.
- After installing the baseboard floor is ready, and you can walk on it.
A photo


Video
Adhesive method
The quality of the floor will depend entirely on the quality of the adhesive. Although each manufacturer advertises its own, the best option would be the one that does not contain volatile aggressive solvents, for example, Kaskoflex. This glue is not toxic, and it takes only 10 minutes to dry. This time is enough to adjust the tile.

Note! Such adhesives are very expensive. Therefore, you can search for an alternative!
Alternatively, PVA glue can be used. But it is important to be extremely attentive. It is impossible to glue the cork on liquid PVA, as it is water based. The only thing that can be done is to give the glue time to dry on average for 15-20 minutes. During this time all water comes out of it. But under this condition, it will not be possible to adjust the tile, it must immediately be laid in its place, since the scrum will be dead. Moreover, the air humidity in this situation will increase, which is a risk and danger for expensive flooring.
Note! If you decide to buy an expensive cork floor, then calculate the funds for a special glue, then you will not have any problems.

The process of gluing the cork will be carried out according to the following system:
- Work must start from the center of the room in a spiral. The spiral can be directed both to the left and to the right. If you are right handed, then it will be easier to work in a clockwise direction.
- Using a spatula, apply the adhesive evenly. Lay the tile and adjust it by rule or by hand.
- After roll with a roller.
- You should also check the horizontal. To do this, use the building level. If there is an unevenness, then you can eliminate it by tapping the floor surface with a rubber mallet.
- At this stage, glue may come out. With the help of rags should be immediately removed. The rags are used only once, so take care of enough of them in advance. When the glue dries, it will not be possible to remove it from the surface.
- Along the perimeter of the room, leave a gap of up to 5 mm.
- По прошествии суток приклейте plinth и пол готов.
So, we have reviewed with you the different ways of laying the cork floor. Remember that laying is a responsible occupation. If you are not confident in your abilities, then entrust this work to qualified specialists. Be sure to watch the video, which will clearly show the whole process of work.