Heat-insulated floor from polypropylene pipes most
The warm floor system makes life more comfortable. It is therefore not surprising that many craftsmen are studying the technology of its installation. Today there are several options for the implementation of a warm floor. For example, it can be made using polypropylene pipes. This article will discuss how to make a warm floor of polypropylene pipes with your own hands.
Features of use of polypropylene pipes

To organize underfloor heating, all the material used must meet certain criteria. This is due to the fact that the piping system is subjected to high loads. The pipes will be under constant mechanical stress: poured concrete, installed furniture, people walking and so on.
Note! If you buy low-quality material, it may result in a pipe breakthrough, which would entail dismantling the flooring and concrete screed. And this is a big financial cost.

As for pipes made of polypropylene, they fully comply with the requirements that apply to such products for floor heating. The following are the advantages of polypropylene pipes:
- Reliability and long operational life is about 50 years.
- Ability to bend. In places of bending do not lose their integrity and strength.
- When joining, hermetic joints are formed.
- Affordable price.
- Oxygen molecules do not penetrate inside the product.
- Pipes withstand considerable mechanical stress.
As for the disadvantages of a warm floor made of polypropylene, this is the mandatory use of specialized welding equipment. At the same time, it is important to have at least some experience in welding polypropylene pipes. Otherwise, there is a risk of a leak at one of the joints.
Preparatory work
Before laying the pipes it is important to make a number of obligatory preparatory works. Otherwise, you will not heat the air in the room, but the underlying foundation. Therefore, for the effective distribution of thermal energy is heat insulation. All the preparatory work is carried out in several steps:
- A waterproofing layer is placed on the draft screed. To do this, you can use a thick plastic film. If you live in your home, then the moisture in the soil will not rise to the top. The film should be wrapped on the wall 100 mm.
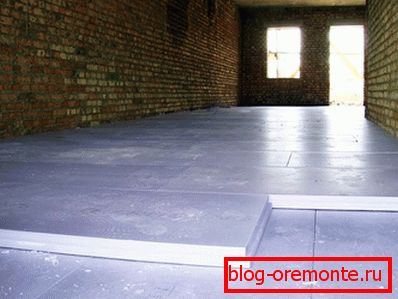
- In the next step, the heat insulation material is laid. In most cases, extruded polystyrene foam is used for this purpose. This material is highly resistant to mechanical stress. It is resistant to moisture, so extruded polystyrene foam is best suited for thermal insulation of a concrete floor. Installation of the material is made in a staggered manner. If the roughing screed is uneven, then gaps may form at the joints of the slabs, which can be filled with foam. But here prudence should be exercised. If the floor is too uneven, then this can adversely affect the heating system. Additional hydraulic resistance will be generated in the pipes. The gaps between the wall and the sheets of polystyrene foam are also recommended to fill with foam.
- To increase the quality of insulation, penofol can be laid on top, which is a material of polyethylene foam. On the one hand, it has a layer of aluminum foil. Due to the reflection of the thermal energy will rise up and, accordingly, warm the air in the room. Penofol joints are glued together with construction tape.

Note! Each preparatory phase should be carried out accurately and in accordance with the existing technology. In this case, you will be able to create underfloor heating.
Material calculation

Pipe consumption will largely depend on the layout of the heating circuit, for example, zigzag or snail. When using polypropylene pipes, the recommended laying pattern is “snail”. Although it is a bit more difficult to install, it is more efficient when using a heated floor. In any case, the scheme will have an irregular geometric shape with a large number of twists and turns with different radii. Given this, calculating the exact footage of the required pipe can be problematic. In this case, you can use two methods:
- making a draft on a piece of paper on a millimeter scale;
- using a long thread.
Creating a project on paper will take more time. To do this, transfer the form of a heated room to paper. Draw a pipe layout. The resulting snake or zigzag is measured with a ruler and the pipe length is obtained. Another method requires the use of strong rope. For this, it is laid in the way in which the pipe will lie. At the end of the rope you just need to measure.
Note! No matter what method you use to measure the length of the pipe, you need to add 10% of the overrun to the figure above.
Installation of heated floor

If you lay polypropylene pipes according to the “snail” scheme, then two pipes (feed and return) will run in parallel. The use of such a scheme will simplify the procedure of bending polypropylene. The pipes are fastened using special metal clamps or plastic clips. The fastener is fixed to the tie with dowels through the thermal insulation layer.
Note! Fastening polypropylene pipe can be done by another method. To do this, fit the metal mesh with large cells. To it will be fixed pipe. This mesh will serve as an additional reinforcement screed.
When the piping system is ready it remains to connect the heating circuits to the collector. At this stage it is important to check the entire system for tightness. Therefore, under pressure, run water into the system of a warm water floor and check each welding joint.
Note! The system must be equipped with a valve for air release.

It is important to pay attention to some design features of the system. So, the step of turns should be determined on the basis of the task. If the warm water floor will serve as the main heating, the pitch should be no more than 150 mm. In the case of using the floor as an additional source of heat, the step is allowed up to 400 mm. In places where it is planned to install furniture or other large objects, laying a warm floor does not make sense.
If after checking the system there were no faults, then you can pour the coupler. Then you need to give time to pour completely dry. At the same time it is impossible to turn on the heating. Concrete has to dry independently and as much as possible under natural conditions.
So, we discussed the basic rules of how to make underfloor heating using polypropylene pipes. We hope the outlined material will help you create a comfortable environment in a room with a warm floor. If you have your own experience in creating a similar floor using polypropylene pipes, we will be interested in your opinion and personal experience. Leave feedback at the end of this article.
Video
From the provided video you can learn more about the use of polypropylene pipes in the arrangement of floor heating systems: