Floor in the garage itself
What is most important in the design of the garage? Almost everything. It is required to make a high-quality roof through which water will not flow, strong and warm walls, perhaps someone will want to make an inspection pit. Also important and what will be the floor.
Which floor to choose? There are several technologies that allow the use of various materials and structures. For example, a car owner may decide that in the place where his transport is located, you can make a concrete floor in the garage with your own hands - the most common option.
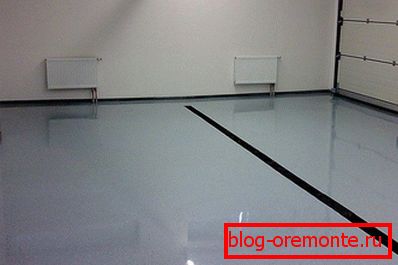
In addition to concrete, make and self-leveling floor, which is known for being able to level the base itself. The floor level is almost perfect as a result.
Wooden flooring

It is possible to make a wooden floor in the garage, but it is worth considering the exact foundation it is in the room now. For example, the wooden flooring of warm birch planks can be put on the finished floor, just before it lay thick logs, treated with linseed oil and painted with enamel, which protects from moisture.
Note! Lags are long bars or thick boards. They should be laid along the entire length of the garage. It is better if they are solid, but their length may not be enough, in this case, the logs are interconnected by side plates of boards nailed or fastened with screws.
And what to do if the garage has just begun to be built, there is no question of concrete, and instead of it there is usual ground? It is necessary to carry out some preparatory work, since the boards, if put on the ground, will quickly rot. In addition, it is unlikely that the ground under the future floor is flat, so the base must be leveled.
When the ground is level, you need to make a cushion on it with a mixture of gravel and sand. It is done like this:
- a layer of sand pours in - a little, 3 is enough, 4 cm at most;
- gravel or warm expanded clay - the layer thickness is the same or slightly more;
- both layers need to be spilled with some water;
- ram all that is bombarded.
Note! So that the earth and the layers laid on it are perfectly compacted, you can use a roller or a manual tamper, you can even do it with your feet. It should be noted that tamping with feet gives a good effect.
Then lags are stacked on the finished base. Under them need to lay a flat thick boards, laid on the wide side. So it is easier to lay the logs, because the base consists of expanded clay.
Boards need to be treated with fire-fighting equipment. There are two reasons for this:
- Reducing the likelihood of fire.
- Requirements of fire authorities.
In addition, all wooden parts of the floor should be treated with antifungal agents, as well as mixtures that prevent the tree from rotting.
Note! If desired, instead of thick boards, you can use a brick or columns, filled with concrete. They are installed in increments of about 30 cm, and the distance between the rows is kept at about 80 cm.
As a rule, the logs are laid across the garage, and the boards - along the direction of the car. Such floor will be more reliable, and the term of its service - long.
Boards of the floor, called blocks, must be chosen equal in thickness, which will be about 6 cm. At the same time, this size should not be less than 5 cm, otherwise the floor will not be able to withstand the load created by the car, and will bend. Before you lay these boards, you need to dry them well. Before mounting the chopping block, it is important to treat with antifungal antiseptic. The bottom of the boards must be treated with a waterproofing mixture.
After that, the entire floor is covered with a layer of linseed oil, it is possible for several times. This is to protect the floor from problems such as unexpectedly spilled engine oil. If you preolith the floor in the garage beforehand, then during operation there will be fewer traces left on it, which will then need to be cleaned.
Device for self-leveling floor in the garage

Immediately I must say that the self-leveling floor is one of the most expensive, as when buying it as a building material in pre-packaged packages, and during installation, so before you start working with it, you need to weigh the pros and cons.
Work on the device of a bulk floor begins with cleaning of the room. The old base must be carefully removed so that no dust, debris or anything else remains. Then begins the kneading of the solution. Nothing complicated - the container is taken into which about 6–7 l of water will fit, and a dry mix of 25 kg is poured into it. All ingredients are mixed mechanically (using a drill with a nozzle) or manual for about 3 minutes. After 5 minutes, the solution can be stirred again, for a couple of minutes already.
Next, the solution is poured onto the floor and stretched by the rule, then taking an even shape. It is best not to do it in large quantities at a time, as the mixture can dry out. Laying the coating on the self-leveling floor is best after 7 days.
How to pour concrete floor

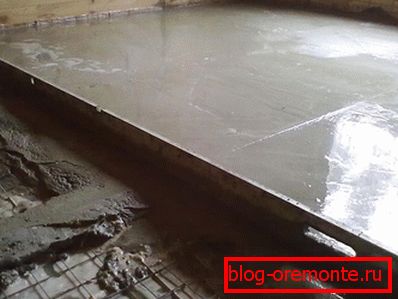
To understand how to fill the floor in the garage, you need to know what is included in the concrete. Typically, there are three components (not including plasticizers): cement, sand and gravel, as well as water, through which concrete is given the desired consistency.
If the floor in the garage is still represented by the ground, it is worthwhile to carry out the work described above, that is, level it and lay out a layer of insulation from expanded clay and sand. True, unlike the wooden floor, the boards will be needed not as lining for the lags, but as beacons. Also, in the role of beacons, metal corners and similar products can be successfully applied to the screed.
Exposing the beacons, you need to adhere to the level of the floor, which was previously marked on the walls with a laser or water level. The lighthouses themselves should be fixed, otherwise during the pouring of concrete they can budge, thereby violating the evenness of the floor.
Concrete is kneaded as follows. Crushed stone is poured into the concrete mixer, water is poured, and then cement is added. This sequence is necessary so that the cement is well stirred and does not stick to the walls of the concrete mixer, and also did not take lumps. Water must be added to the solution as needed, but it is worth considering that the concrete should not be dry, as it will not set well, but it should not be made so liquid that the water in it flows. In this case, the mixture will be inferior.
The finished concrete is poured out between the lighthouses and leveled by the rule of 2–2.5 m. After this, the floor is primed and ceramic tiles can be laid on it.
To fill the floor, there are many options. The main thing - to dwell on the fact that the most practical and inexpensive for each of those who do the floor in his garage.
Video
This video will cover the pouring of a concrete cushion for the garage floor:
This video shows the process of applying a poly polymer epoxy coating "Make FLOOR":