Concrete floor technology
Installation of the floor is one of the most important stages of any construction. During operation, the floor is experiencing fairly large loads, so the choice of material from which it will be made must be approached as responsibly as possible. As one of the most durable options, you can note the pouring of the concrete floor. With proper work, such a floor will have excellent strength and evenness, which will have a positive effect if the floor is meant as a base for a further coating, whether it is a laminate or some roll material. And one of the main disadvantages of this type of floor is coldness, which is successfully corrected by applying the technology of a heated floor.
Speaking about the production of works of this type, it should be said that the technology of pouring concrete floor is a process that, for ease of understanding, should be divided into several stages.
Training

At this stage, you first need to prepare the surface for pouring, but before that, you need to draw a zero line of the floor. As a rule, it is located at the lowest point of the doorway. For these purposes it is convenient to use a laser level, but if it is not there, then you can use a chopping cord, constantly controlling the horizontal line with the help of a building level.
After that you need to prepare the base. If the floor is planned to be poured over concrete floors, then they should be thoroughly cleaned of possible contamination and coated with a primer for better adhesion of the mixture to the surface.
If you intend to fill the floor on the ground, then several additional measures will be required.
- First you need to level the surface with a shovel.
- Then, the surface should be tamped. For these purposes, you can use both a special vibrating plate and a conventional log with attached handles.
- Next, you need to pour and tamp the gravel layer, 10 cm thick.
- Next comes a layer of sand of approximately equal thickness, which also needs to be tamped.
- After there is a layer of rubble. Its thickness should be the same as the previous ones and it also needs to be tamped.
- Next, follow the waterproofing layer. Ruberoid can be used as the most simple and accessible material. It must be evenly spread over the entire area of the room, and the edges should be on the same level as the previously drawn zero line.
- The next layer can be laid a layer of insulation material (foam), but you can do without it.
Reinforcement

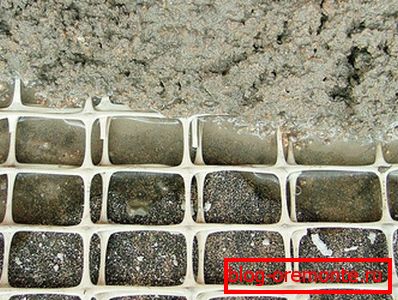
The next step in pouring the concrete floor is the installation of a reinforcing grid. For these purposes, it can be used as a finished metal mesh with cells of 10? 10 cm, and an in-place sheathing of metal reinforcement. It should be noted that the reinforcement grid should be mounted at a height equal to 1/3 of the total thickness of the fill layer. To do this, it is mounted, located on special supports, given height.
Installation of beacons

Next, you can begin to install the beacons - metal guides, indicating the upper limit of the fill. Their installation should be done by laying them on small mounds that need to be made of concrete mix. It is necessary to follow with special care both the horizontal installation of the guides and their location in the same plane with the zero line.
Note! Instead of factory-made beacons, you can use round metal pipes and shaped pipes.
Fill

When all the above works are completed, you can proceed to the pouring of the concrete floor. For this you need to prepare a quality mixture. You can use the finished or make it yourself. In the case of the use of the finished version of the mixture, it is simply diluted with water and stirred until a homogeneous consistency is obtained in accordance with the attached instructions. When the mixture is prepared independently, you need to mix one part of the cement with two parts of sand.
Note! The most common proportion of concrete, in which 1: 3: 6 parts, respectively, of cement, sand and aggregate. Water is added depending on the required plasticity of the solution, and is 0.5 - 1 part of the total volume.
All components are mixed in a concrete mixer with the addition of water, to obtain a uniform consistency. The resulting mixture is poured into the space between the lighthouses and hold the tie. Then the guide beacons are removed, and their place is filled with a solution. Once all work is completed, the floor is left to dry completely for about 30 days.
Concluding the above, we can distinguish a number of general rules for pouring concrete floor.
- If the room is large enough, then at the stage of installation of the beacons it is necessary to equip and additional formwork that divides the room into smaller parts. As a rule, their sizes are limited to the volume of the concrete mixer.
- If the cement mix will be prepared on its own, cement of a grade not lower than M-500 should be used.
- Depending on the size of the room and the presence / absence of a heated floor system, the thickness of the pouring can be from 30 to 75 mm.
- It is best to fill the concrete floor at one time, thus achieving maximum quality coverage.
Compliance with the above rules increases the likelihood of obtaining an excellent result on floor filling.
Video
This video shows how the concrete floor is leveling and leveling: