3d self-leveling floor
Today there are many floor coverings. A special place in this list is self-leveling self-leveling floor, which has recently become increasingly popular. And this is not surprising, because it is distinguished by aesthetics, smoothness, integrity and durability. In addition, the self-leveling floor has a number of advantages that other floor coverings do not have. To make such a floor personally, you need to have certain information. In this article we will explain how to make a 3D self-leveling floor with your own hands, as well as give a video instruction.
Preparatory work

Bulk 3D floors are arranged on a screed of concrete or cement mortar, or on the floor of wooden planks. When screed, the floor must be well swept and cleaned of debris, and if necessary, trim the surface. If there is a wooden surface, the boards are checked for strength, strengthen them, close up the gaps and, if necessary, grind. To ensure that the polymer composition does not leak into the gaps when pouring, but gradually spreads across the surface, it is better to apply a sealant or a mixture of cement and sand on it. Sometimes it is more practical to treat the floor with a primer.
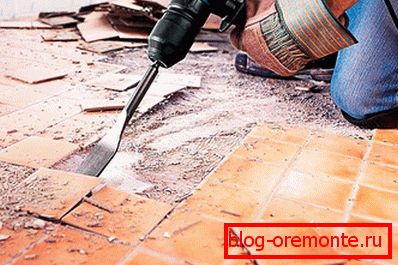
- If linoleum is laid on the floor, it is removed. At the same time, if the top layer is a tile, after having checked it for durability and making sure that it is not loose, it is left in the same place. Otherwise, the tile is removed. Further, after repairing the projections and depressions, the surface is leveled. The goal of the work is to achieve a clean, level floor without flaws.
- During the preparatory work on the production of self-leveling floor special attention should be paid to the arrangement of the joints of the walls with the floor under construction. Deformation loads in the room contribute to the formation of cracks in the floor over time. To ensure that the linear expansion does not affect the quality of the surface, a damping tape is laid along the contour of the room, which also has sound-proofing properties. Its width should approximately coincide with the level of the future self-leveling floor.
- Another method of preparation that requires more work is to make a filet. In the joints of the floor and walls at a distance of the size of the plinth do drank with the same pitch. This place is cleared of blockages, it is separated by building tape on the joining of the walls with the floor and leveled with epoxy. After the mixture dries, the scotch tape is dismantled and the following work comes.
- Then, parallel to the fillet, one more floor pit is created, which is sealed with a primer to grip the rest of the surface. Also, the baseboard with the baseboard is worked through with scotch tape, which is removed after the floors are cured.
Primer and leveling the floor

To make self-leveling floors better adhere to the existing surface, you need to walk along the base with a primer. It is necessary to choose it carefully, as the quality of the floor under construction depends on this material. In addition, the primer well tightens cracks, if any, and prevents swelling of the floor surface. Low viscosity, polymer based materials such as Knauf and Ceresit are best suited. These are well-known quality brands. In addition to these, the market offers many more primers, which can also be used with strict adherence to the recommendations.
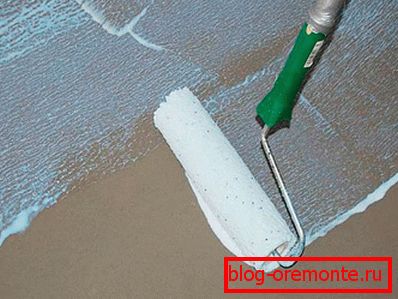
- If the base under the floor has an acceptable appearance, then its primer can be carried out in one go. This is enough for the subsequent high-quality clutch. The composition is applied with a spray or roller. The floor is covered after diluting the mixture with water. With a strong absorption of the primer floor, the latter is processed again. You need to repeat the process 4 hours after the first call. As a result, the surface should have a brilliant appearance.
- For better adhesion, the treated floor is covered with a thin layer of sand. This material need 150 g per 1 m? surface. Sand contributes to the roughness of the base, which in turn adds adhesion to the surface. A day after applying the primer, you can carry out work on the self-leveling floor.
Note! Polymer formulations require special treatment when working with them in terms of humidity and temperature. With a high humidity in the room, it is necessary to dry the air. After the screed is poured, you need to wait about a month to complete its drying.
Making and pouring mortar

To prepare the solution, it is necessary to purchase a container with a capacity of up to 25 liters, an electric drill with a nozzle in the form of a mixer, a brush with needles on a long handle, called a roller, a squeegee, or a spatula with a wide blade.
First, to prepare the solution, water is poured into the container, after which a certain amount of the mixture is poured there in a dry form. The ingredients added according to the proportions are thoroughly mixed with a mixer. The consistency of the solution should resemble kefir without the formation of bubbles and lumps. To check the correct proportions, you can do some manipulations. A plastic cup with a cut flat bottom is placed on a flat glass surface and pressed against the base. After that, the solution is poured into this bottomless vessel, the glass rises and the process of spreading the solution over the surface is monitored. If the mixture is prepared correctly, 100 g of the solution should form a 20-cm spot around the circumference. If the fitting was unsuccessful, the required amount of dry mix or water is added to the tank, and the solution is mixed again. The technology of filling of a bulk floor is rather simple.
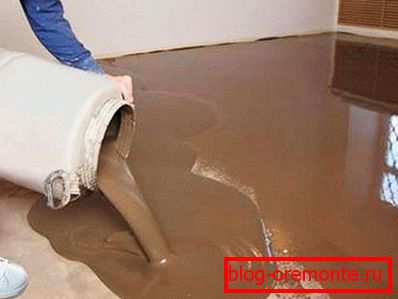
- Moisten the surface with a primer diluted with water. The prepared solution is poured in portions, which over time are interconnected. When performing this work, it is necessary to take into account the location of the deformation seams on the concrete surface.
- It is desirable that at one time one person was engaged in preparing the solution, and the second filled the floor with them and distributed evenly with a wide spatula. Particular attention should be paid to filling the corners and wall sections with the solution. When the floor is filled with the right amount of the mixture, it spreads evenly over the entire surface, after which the beacons are removed.
- When the device is self-leveling floor on it go in the shoes on the spikes, called flat shoes. After the beacons are removed, the turn comes to aeration of the solution, which is carried out with a roller with needles. This event is held for the accelerated release of air bubbles from the solution to the outside, which will make the surface even. The workflow lasts only 2/3 hours. After this time, the mixture will begin to grasp little by little, after which it remains only to expect complete hardening. Approximately the level of the self-leveling floor should be 5 mm thick and more.
Note! In order for the floor surface to harden evenly and little by little, rather than dry out, it is necessary to ensure optimal conditions in the room - temperature from + 5 ° C to + 25 ° C and low air humidity. To avoid sunlight on the floor, the windows must be curtained.
- Two days after the initial layer completely hardens, a polyurethane transparent or other decorative coating with various fillers is applied on the 3D self-leveling floor.
In the self-leveling floors after the mixture hardens, the seams are cut. The polymer coating is cut to one third of its thickness to create a depression that is filled with a cord, after which it is sealed from above with a sealant. This method does not allow the formation of cracks. Seams in self-leveling floors should duplicate the same in the concrete base. This principle is most relevant for rooms with a large area.
Due to the nature of the polymer compositions, it is important to adhere to safety precautions when working. Indoors must have constant ventilation. Personal protective equipment such as a respirator and gloves should be used.
Video
This video describes how to make a bulk 3d floor: