Wooden wickets: material features and manufacturing
How to make a wood gate with their own hands? We will analyze the main stages of this work, and at the same time we will talk about how justified it is to choose wood as a material and how to extend its service life.
To build such a structure is quite a feasible job, even for a beginner.
Advantages and disadvantages of the material
In general, all the features of wood are well known; let us, however, reiterate its advantages and disadvantages.
pros
- Low price. A fence, a bar, a board and a lath - materials unsurpassed on low cost.
Please note: of course, we are not talking about noble woods. The gates and gates of wood often go pine or larch; the second is preferable because it is extremely resistant to rotting.
- The absolute minimum required for the manufacture of tools. In addition, not everyone has the skills of a welder necessary for working with metal.
- Production speed. The only relatively long stage is the concreting of the pillars and the waiting period associated with concrete strength. All other work can be performed by one person during daylight hours.
- Wooden wickets are quite beautiful.
Minuses
- Short life. Alas, the wood in the open air usually preserves the presentation of not more than three to five years. However, in the appropriate section of the article, we will mention ways to protect the material from rotting.
Especially without a protective coating.
- Low mechanical strength. Connections with nails and screws with a moderate thickness of the material is easy to break.
- Fire hazard The tree is combustible and may well serve the spread of fire.
- Finally, it is well understood: wood gates and wickets. will not be a barrier for intruders. They can only symbolically mark the boundary of your possessions. To overcome it is easy for anyone in good shape.
Manufacturing
Tools and materials
So, the gate is made of wood with their own hands easily. Perfectly. What tools do you need?
- Square, tape measure, ruler and pencil.
- Hacksaw for wood. Yes, it is more convenient to cut curly elements with an electric jigsaw with a narrow canvas; However, in most cases, the gate from the board and the picket fence represents the simplest kind of utilitarian design.
- Screwdriver or screwdriver.
- Rasp for processing ends from potential splinters.
- When working with unplaned material - manual or electric plane.
- If you have to dig holes for the pillars - useful garden drill with a diameter of 20-30 centimeters, plumb and scrap.
For the manufacture of the gate itself is usually those lumber that are at hand. If you have the opportunity to choose - fine, then the recommendations will be as follows:
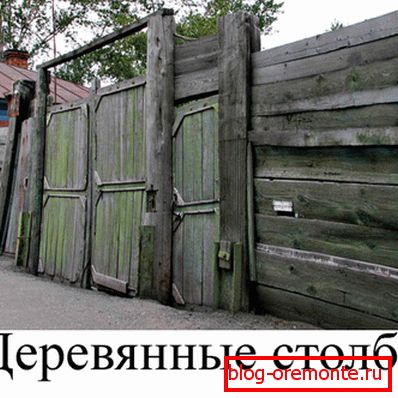
- The pillars can be made of timber with a section of 100x100 millimeters. Under the ground, each pillar will go about a meter; height above ground is determined by the height of the fence and the gate itself. It rarely exceeds 1.2 meters.
- As a framework for the gate, a bar with a cross section of 40x40 millimeters is used.
- The frame can be sheathed with a picket fence or rail with a section of 20x40 mm.
In addition, in order to make the gate, you will need a valve on the inside of the gate; hinges for a padlock outside (unless, of course, there is a need for it) and two sheds. Light commercial hinges for garden wickets are usually used: much more massive structures for welding require much more massive structures (for example, sectional garage doors with a wicket).
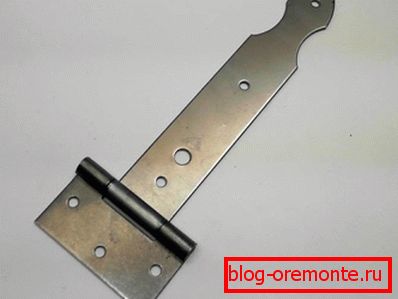
In the photo - a decorative loop, the strength of which is quite sufficient for a garden wicket.
For the installation of pillars for the fence will require cement, sand and gravel.
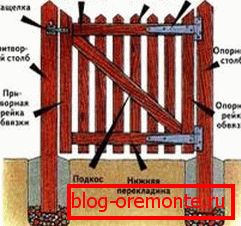
Pillars
Their installation is standard:
- Drill pits are selected depth of about a meter. The distance between the planes of the columns facing each other is slightly more than the width of the future wicket (usually from 100 to 120 centimeters).
- The bottom of the pits is filled with five centimeters of sand and poured for shrinking with plenty of water. Then, a five centimeter bedding is made with rubble.
- The underground part of the pillars is burned with a blowtorch or a gas torch. Does not place and the treatment of the entire surface antiseptic solution. The goal is to slow down the decay.
- The pole is installed on a plumb line; then the pit is filled with rubble and rammed.
Tip: this work will have to do at least two. At the same time, you cannot hold the pillar, control its position along the plumb line and fill the pit with rubble.
- The base is poured with a liquid cement mortar with a ratio of cement and sand of 1: 3 or even 1: 2. The stronger solution you use - the faster you can hang the gate.
Frame assembly
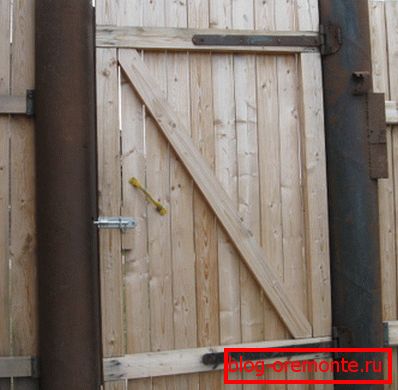
The basis will be a frame in the shape of the Latin letter Z. After sheathing with slats, we will get two hard triangles that will make deformation and sagging impossible.
Bars are laid out on a flat surface and laid out so that the whole frame lies in the same plane. Then we cut them off to size and once again check the relative position. We will not connect the frame elements together; they will be retained by the sheathing slats.
If necessary, the frame (and at the same time the future trimming) are planed with a plane.
After plating, this form of frame will provide rigidity to the structure.
Sheathing
Further depends on whether our gate will be solid or lattice.
For solid slats or boards, it is easier to spread directly on the frame and mark the cutting line along the ruler. If the top is semicircular - you can use an improvised compass from a nail and a pencil on a short cord hammered into the center.
Reiki for lattice design can be simply cut one by one, guided by the roulette. The inevitable errors of a cut of 1-2 millimeters will not be evident.
For assembly, galvanized self-tapping screws are usually used for a tree with a length slightly less than the total thickness of the frame and plating strips.
Sheds, Latch and Hinges
Our wooden gate with your own hands in the rough is ready. It remains only to hang it. Sheds are attached to the wicket frame; to the post you fasten them, guided by a plumb line. In calm weather, the gate ideally should not independently, under its own weight, either swing open or close.
The distance from the ground should be at least 5 centimeters. After our design is fixed, fasten the bolts and the hinges under the lock with self-tapping screws. Usually they are located at a height of about 90 centimeters.
Painting
Wooden gates and wickets with a beautiful texture are usually treated with an antiseptic solution, then varnished with any varnish for external use. The most durable and durable yacht varnish based on polyurethane, but cheaper PF-170 will do. Coverage - at least two layers.

Beautiful wood texture is better to keep in mind.
If you just need reliable protection from weathering - suitable alkyd enamel PF-115.
Conclusion
As you can see, the construction of a wooden gate will not be a daunting task for you. As usual, in the presented video in this article you will find additional information on this topic. Successes in construction!