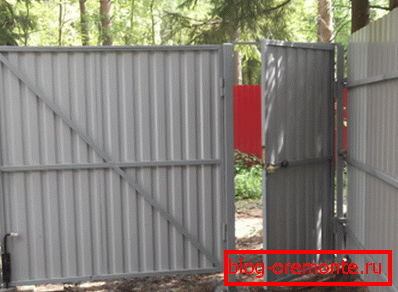
Wicket door made of corrugated flooring: with the purchase
How to make a gate from a professional flooring with your own hands? If you have a welding machine, a grinder and a screwdriver at your disposal, this work will not seem too complicated. Instructions on the order of its implementation - at your service.
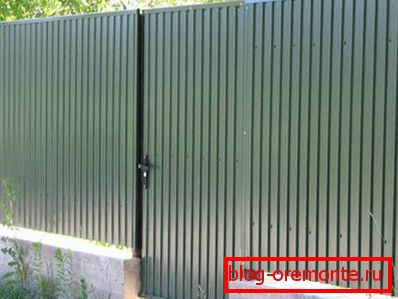
If you have the skills of a welder and a welding machine, you can make such a design yourself.
Dimensions
Let's start by listing the main parameters that you will need in the manufacture of the gate and in general the fence (fence) of corrugated board:
- The optimal width of the gate itself is one meter. With smaller dimensions of the opening you may have problems with carrying, for example, dimensional furniture.
- The maximum height is limited except by the fence itself: according to the current SNiP from the side of the street or passage, it should not be higher than 220 centimeters.
- Pillars забора обычно заглубляются в грунт примерно на метр.
Useful: it all depends on the type of soil. In heavy soils, 70 centimeters is enough; meter pits usually dig in weak and heaving soils. In any case, it is desirable to deepen the pillar below the freezing point.
- Typical Fence Section Length - 2.5 - 3 meters.
- On the slope it is desirable to do height difference between adjacent sections no more than 10 percent of their height. In addition, it is worth terracing the strip under the fence: the design will look much neater. At the same time, there will be no gaps under it, through which neighbors' cats and dogs can visit your yard.
- The handle and lock are usually mounted at a height of about 90 centimeters. However, a small shift up or down will not make the use of both and other inconvenient.
- Canopies are welded in 25 centimeters from the lower and upper edges of the canvas.
- It is convenient to make poles of proftruby section from 60x60 to 80x80 millimeters. Production of gates from corrugated sheeting with a frame of 40x20 mm pipe is practiced; However, the size of 40x40 will make the structure more rigid, and at the same time it will allow to cut a narrow profile lock into the frame without unnecessary movements.
Drawing gates of corrugated. Here the thin tube is compensated by the presence of two crossbars.
Instruments
The gate for a fence from a professional flooring will require in the manufacture of a certain minimum of tools:
- Welding machine. Optimal invertor welder (current 160-200 amps).
- Bulgarian with a cutting wheel for metal.
- Scriber. To get the exact dimensions and frame of the ideal shape, the cutting lines must be very thin. In addition, pencil lines are hardly visible on the surface of the steel pipe and are easily rubbed.
- Screwdriver. We will fix the profiled sheet to the trout pipe with metal screws.
- If the pillars have not yet been installed, a garden drill with a diameter of 20-30 centimeters is most convenient for digging holes. With a shovel for such a narrow pit, simply do not dig it up, and a larger size is a much larger amount of rubble, concrete and, as a result, a large final price of the project.
- For tamping rubble when installing pillars will not interfere with scrap. It is more convenient to mix concrete in a concrete mixer; but with small volumes it will be perfectly replaced by a drill or perforator with a mixer nozzle. A bucket of mortar is kneaded with this simple device in a couple of minutes.
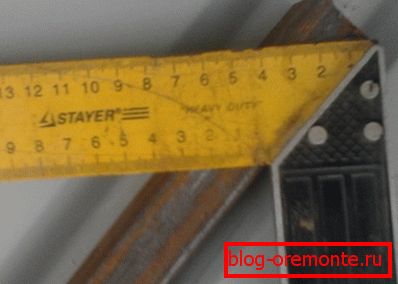
- Square, roulette and ruler.
This tool will greatly simplify the digging of holes under the pillars.
Getting Started
It is necessary to stipulate: we will consider the simplest construction of a wicket for a fence made of corrugated flooring without any architectural excesses. Gates of corrugated with elements of forging look great, but much more difficult to manufacture and require certain skills.
Pillars
If they are not installed - the procedure is exactly the same as for the fence:
- Pulling the cord along the fence line, mark the location of the pits.
- We select them with the help of a garden drill. If it is not - you can get on foot and steel scoop with sharp edges.
- We set up pillars strictly on a plumb line and fill the base with rubble. Making sure once again that the pillar is standing upright, tamp the gravel with a crowbar.
- Fill the pit with a liquid solution with a ratio of cement and sand of 1: 3.
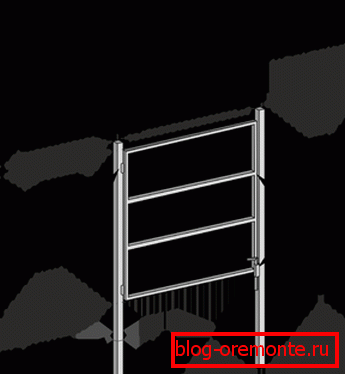
Frame
We mark the horizontal and vertical pipes and cut them at a 45-degree angle by plotting the lines on the square.
This is the pipe marking process.
Attention: if you use a 20x40 pipe, the wide side should be oriented perpendicular to the plane of the fence. Otherwise, our gate from corrugated board will be too flimsy, and it will be much more difficult to install the lock.
Then, laying out the pipes on a flat surface, grab the frame in all corners. We measure diagonals: they must be strictly the same. If necessary, straighten the frame and boil the corners finally.
The horizontal jumper is welded by cutting it in place. Notice that it can be positioned not strictly in the center, but slightly lower or higher: it will be more convenient if the handle for the wicket of corrugated board screwed to the crossbar is at a height of about 90 cm from the ground.
Last, strictly along the future vertical axis, awnings are welded.
Frame installation
It is possible only when the concrete in the pits partially gain strength - no less than 3 days.
Frame калитки выставляется по высоте на твердое основание нужной высоты; затем навесы прихватываются к столбу. Убедитесь, что калитка открывается и закрывается без усилий, говорящих о перекосе навесов, и варите навесы к столбу окончательно.
Lock installation
In principle, any lock designed for external doors can be installed on the gate - so long as its insides are not afraid of corrosion. Too massive constructions come to nothing: nevertheless, we produce non-sectional garage doors with a wicket.
The most convenient to install (and well protected from the ingress of water and dust into the mechanism) are special narrow-profile locks for a proftrub.

On the photo - electromechanical narrow-profile lock.
Installation is simple:
- The slot for the lock case and the holes for the core, mounting screws and handles are marked.
- Round holes are drilled and made up with a roller cone.
- Under the case of the lock, the grinder makes two vertical slots, then one diagonal. The triangles of steel are bent outward and cut off. The edges are then filed.
- It is easy to mark the location of the castle mate by smearing the lock bolt with toothpaste or lipstick. Close and open the lock and an imprint of the place where the groove should be located will appear on the pole.
- Cover plates are installed after the gate is sheathed with a professional sheet.
Sheathing with a profile sheet
And there are no surprises:
- Cut the sheet width.
- Fasten the 35-mm self-tapping edge, orienting the sheet edge along the frame.
- Stretch cords along frame pipes or draw pencil lines.
- We pull the sheet through the wave.
It remains to install the lining of the lock - and you can use the metal profile gate.
The work is completed. Can I celebrate ??
Conclusion
As you can see, making the gate from a corrugated flooring with your own hands is quite realistic and feasible. The video in this article will show you the main stages of work. Successes in construction!