Welded fences - the characteristic, stages of installation
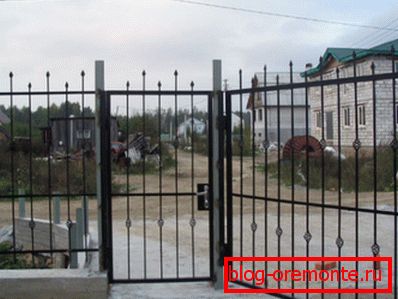
The iron fence is a modern type of fencing that effectively marks the boundaries of your site, while at the same time separating the site from the outside world. A welded metal fence is an example of how protective functions harmonize with aesthetic solutions. Of course, in terms of design, it is inferior to forged structures, but it also has its own audience, which appreciates and uses welded fences: with its own hands building them.
Installing such a construction for the site, you get a solid fence for many years.
Beauty and aesthetics for many years
Metal fence characteristics
Today we will tell you how to make a fence with your own hands. Sectional welding of fences begins with the manufacture of the frame by welding shaped metal pipes (20 mm x 20 mm; 40 mm x 20 mm; 60 mm x 30 mm). The material can be applied metal strip (25 mmx4 mm). It all depends on your taste, how the fence will look in strict or openwork version.
The main advantages of metal fences:
- The best combination of price and quality. They are relatively inexpensive, and at the same time have all the necessary consumer properties that match the modern fence.
- Reliability and durability.
- Easy installation, spans are fastened among themselves at the place of installation, mounted on already pre-installed racks
- Variety of shapes, of all heights, as well as made of black or galvanized metal. Galvanized metal fences will last longer without requiring additional care.
Disadvantages of iron fences:
- do not protect from wind;
- do not close from the outside world;
- require corrosion treatment;
- making welded fences requires the ability to use a welding machine.
Installation and installation
Immediately I want to warn you if you do not know how to work with a welding machine, then it is better to ask friends or relatives who know how to do it. Or there is a second option to make a fence of corrugated without welding. Believe it is the best option in this case. How to make a fence of corrugated board with your hands without welding, in fact, the principle is the same, but everything is fastened with screws, and not cooked.
Tip! It is better to work together, applying eye, hand and respiratory protection. This will protect you from injury and from the harmful effects of smoke when working with the welding machine.
Installation of a welded fence begins with a full measurement of the site. In this case, measurements should be made from the corner posts in each direction with the markings of the future posts, after two or two and a half meters.
For work we need:
- Good welding machine. Best semi-automatic or inverter.
- Two angular grinders, one with a power of 2 kW, the second with a speed regulator and power not more than a thousand watts.
- It is possible to use a level. For issuing mortgages in one level.
- In addition, you need a small concrete mixer, wheelbarrow and shovels shovel.
The erection process begins with the installation of 60 x 60 pillars, with the construction of the extreme structural elements. This method is needed to create beacons, which will then serve as guidelines for the installation of the following racks. Under these pillars they drill or dig holes not less than a meter deep, it all depends on the height of the fences.
Then set them up, pour concrete, controlling the vertical level, and give the concrete to stand. Then, on the top of the vertical posts and the height of the outermost pillars, we stretch the cord to indicate the line of the future welded metal fence.
During the installation of the racks, it is imperative to control the verticality with the help of the construction level, as well as their fixation until the foundation for the fence (concrete fill) is fully set. As shown in the photo:
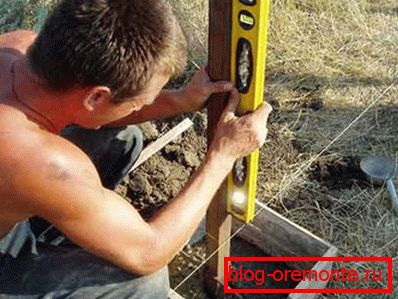
We expose columns strictly vertically
On top of the fence posts are brewed with plugs to prevent moisture from getting inside or putting plastic that can be purchased at the store. While our racks will be grappling, we begin to prepare sections for the fence.
Section manufacturing
Before making sections, it is necessary to draw sketches of welded fences. The photo shows several options:
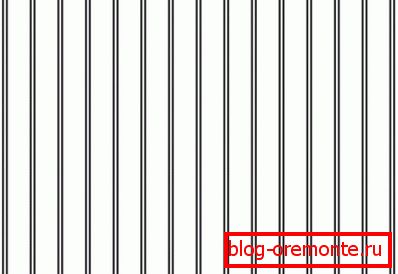
Simple section option
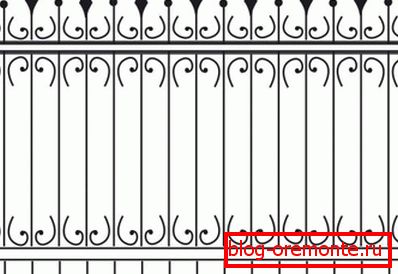
Sketch with elements of decor
Welding a fence with your own hands begins with the manufacture of a section using a welding machine. They are made in different sizes, usually in width from 70 to 290 cm and in height from 150 to 200 cm. The frame of each section is made of a shaped tube, and the inside of the frame is filled with various inserts.
The distance between the pillars is selected by the size of the sections. They are welded to the plates available for this on each pillar.
Make the gate
Before you weld the gate to the fence, you need to prepare the material for work. Now the next stage - we weld the gate frames. For the manufacture of the frame we use a pipe with a section of 60 x 30 mm, 60 x 40 mm or 50 x 50 mm.
There are no clear rules - everyone can use what is available. From these pipes we make the outer frame for the gate. Then it is necessary to weld the inner frame from the inside (to stiffen the structure and to fix sheeting, metal or wood, etc.).
The inner frame is made of pipe 20 x 20 mm, 20 x 40 mm or any other. Welded pipes to 2 cm every 20 - 30 cm. We weld all pipes in a staggered manner so that the door cannot be pulled (unscrewed) from heating.
Now it is necessary to grind welding seams with a grinder and paint these areas with primer. After drying, the primer can be painted with enamel. We recommend to apply at least two layers with drying of each layer.
At the end
Hopefully, you have learned a lot from our article, and now you will have no difficulty in how to make a fence with your own hands. If you still have questions, you can watch a video on this topic.