We make plastic fences ourselves
Although some citizens believe the influence of the West is pernicious, nevertheless, they have a lot to learn and plastic fences brought to us from the USA are an example of this. In our country, this is quite a new material, but due to its merits, it is quickly gaining popularity.
Let's try to understand the advantages of such fences, which will also help us in the video in this article.
Plastic shtaketnik
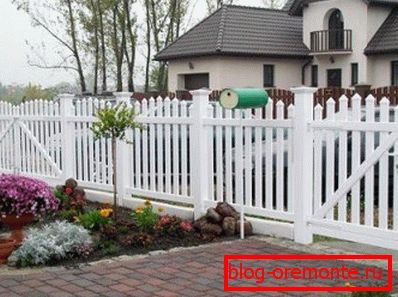
Plastic fence options

The fence made of plastic caps is made in the form of a mosaic panel.
The fact that plastic is popular in Russia is said even by such an example that you see in the photo above - this is a resident of the city of Bratsk, Nikolai Petryakov designed a part of his fence this way and this is not his only cork piece. But this refers to artistic invention, but polyvinyl chloride fences are put on stream and are produced in mass production.
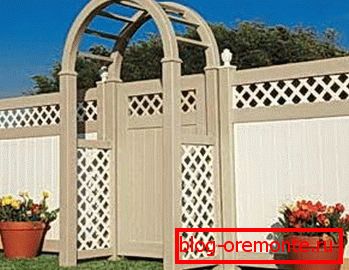
Plastic fence with arched entrance
The main advantage of PVC, perhaps, is its resistance to the most different climatic conditions and sharp temperature jumps. In addition, the plastic fence does not burn, it is impact resistant and resistant to ultraviolet radiation. All these advantages can still add a light weight and the actual absence of the need for constant care.
Production of PVC fences is akin to the production of plastic windows - the technology is almost the same. Such structures are very easy to install in the right place (low weight affects) and their useful life is calculated for a period of up to 50 years. The fence itself consists of sections that easily fit together.
Council When choosing a plastic fence, one should take into account its transparency and height, this applies not to the front part of the estate, but to the boundary lines, where an excessively high fence can shade the neighboring windows or any trees. This is not only illegal, but can also lead to conflicts that will not brighten up your life.
Preparing the assembly site
Perimeter marking for fence installation
- First of all, you should have in your hands a document of ownership of a plot where its boundaries are clearly marked. Focusing on such a plan, drive in the pegs in all the corner points of the perimeter, as well as in those places where you get the gate and wicket. Now stretch a kapron thread between them - this will be a guideline for installing the fence posts.
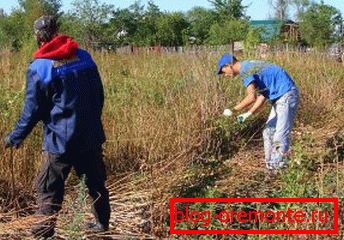
- If no work has been done on the site for a long time or no one has lived there, then you will certainly have to clear the perimeter from all large weeds, and possibly trees. You should also remove all trash and all building materials that can be stored on this line.
Mounting pillars
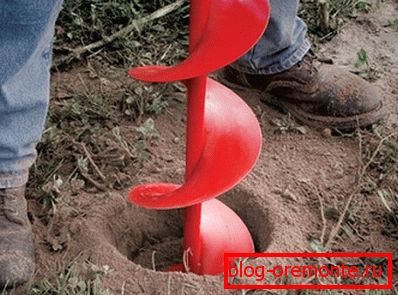
Hole drilling
- The wells should be drilled to a depth of 60 to 80 cm, but the instruction involves immersing the pole in the ground on? the entire length of the support, so in the right places you can make a groove, and in others - a bedding so that the line of the fence is strictly horizontal. For example, if the estate is located on a slope, then the entire fence cannot be made at the same height, but differences must occur in sections (one section below (or above) another), without any bias.

Principles of installation of fence posts
- The first method of mounting the columns with your own hands provides for filling it in the hole with cement mortar filled with crushed stone or gravel. The option is quite reliable and in this case is needed for fences that have a greater height.
- The second method involves the filling of the column in the hole with rubble, gravel or construction debris (broken brick, knocked-down plaster, pieces of concrete slabs) and the subsequent tamping of the soil. This is called bunting and is suitable for any fence height.
- The third method consists in pouring the upper half of the well with cement mortar, and the lower one is simply filled with soil. Concrete pouring gives the whole structure stability and is also suitable for fences of any height.
- The fourth method is the easiest, it does not provide for any additional materials for imparting stability, but only ground bedding and tamping. The method used is good only for low light fences.
Council Note that the appearance and strength of the whole structure depends on the installation of the pillars, therefore the supports must be exposed with maximum accuracy. To align, use the building level, plumb and nylon thread, pulling it between two extreme leveling supports on one line.
Final fence assembly

On the lag (crossbar) there are latches (latches)
- You already know how to install poles for the fence, but do not rush to ram them, or pour them with cement mortar (except the very first one, on which the entire structure will be leveled) - first assemble the sections. In the crossbar there are special latches or latches that hold it in a pole groove. Insert the lower lag.
Installation of PVC section in the span
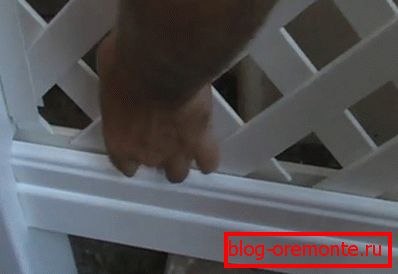
- Now you need to install the sectional panel in the groove, which is on the bottom bar - you can do it without much effort. Installation will occur after a characteristic click - a section of the village in the groove.

Installing the top lag
- Now install the upper crossbar in accordance with the slots. But now you can align the collected span and fix the extreme column. If you need a drop in the height of the fence, then install another column next to it - this will, of course, increase the price of the structure, but the appearance will benefit.
Conclusion
Sometimes plastic fences (especially large sizes) can be mounted using brackets, screws and rivets, but the essence of the assembly does not change. You need to withstand strict vertical and horizontal parameters, then the whole fence will have the proper appearance.