We make and install poles for the fence with their own hands
For any fence, with the exception of an independent, you need strong support, dug into the ground. We will talk now about how to make them and how best to install them, and also turn to the demonstration of the video in this article as an auxiliary material.
You will be offered columns of different materials and several structural solutions for the fence frame.

Brickные столбы для забора
Materials of columns and their installation
Tree
Wooden fence posts
- If we talk about country houses or the countryside in general, the most commonly used will be wooden poles, which are used for mounting fences. They are very easy to make and for this you will need either a regular round timber or a bar, which only need to sharpen the butt. The height of such a support will depend on the size of the fence itself, but the length of the butt will take from 60 to 80 cm - at this depth you will have to make blockage of the pillars for the fence.
- But such supports are not always installed by blocking, so the butt may remain blunt, but one procedure for the tree must be done. Given the fact that the wood is prone to rotting, the part that will be in the ground must be ground. Instead of resin to protect against moisture, you can also use solid lubricants or, at worst, the usual primer type GF.
Council Before hammering in or digging in the tarred support, let it dry out, because the liquid resin is wiped off with soil and the protection from moisture is canceled. The same applies to the primer, but the grease must be applied in abundance, so that it does not wear out.
Metallic profile
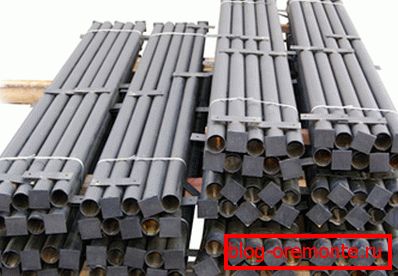
Metal fence posts
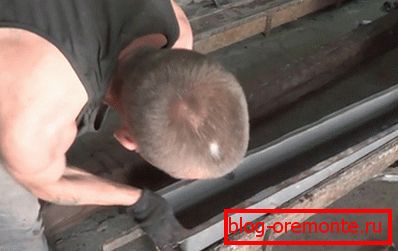
- You can also make metal fence posts with your own hands, and for this you will need a round, square or rectangular profile. In addition to the pipe, you will need a metal strip, 50-60 mm wide for the brackets, as well as a welding machine for the structural assembly of the supports.

Bracket for the column under the logs
- If you make the supports yourself, then it is important for you to correctly calculate the height and length (in width) of the consoles. Here you will not need a manual - you just need to calculate the estimated height of the fence and weld a metal strip relative to these dimensions as a bracket. You also need to decide on the length of the strip, since for an ordinary post it will be enough 10-15 cm in each direction, but if you are going to lay a brick over the profile, then these centimeters should act because of the brickwork.
- In the strip you will need to drill holes for fixing the log (jumpers), two pieces on each side. The diameter must be selected for future mounting bolts, but more often, it is 10-15 mm.
Concrete
Form for casting concrete columns
- With the casting of concrete pillars for the fence, the situation is somewhat more complicated - for this you need to do it yourself (from boards or tin) or buy a mold that is most often made of fiberglass or metal. For the manufacture of durable products you need a vibrating table and if you have one or you can borrow it somewhere, then you can not only provide yourself with supports for the fence, but also open a small business of manufacturing and selling them.
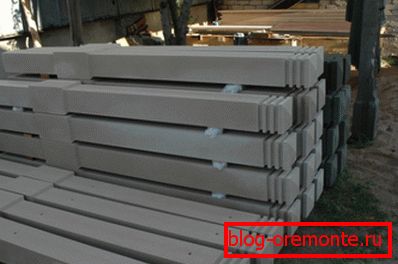
Beautiful concrete pillars for fences
- If you still decide to do the supports yourself, then do not forget to insert the mortgages for the reinforcement of the brackets when reinforcing. But for a one-time installation of the fence you, of course, better to buy such supports in finished form.
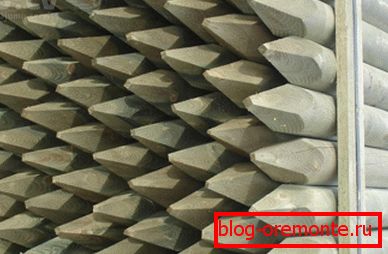
Brick
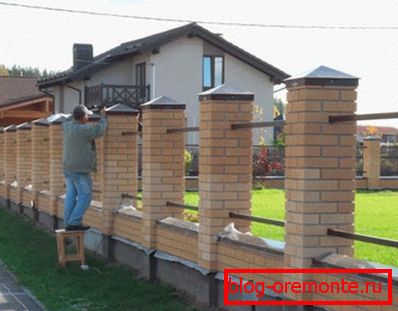
Brick supports for manor fencing
- The most beautiful, most powerful and reliable, of course, can be called pillars for fences made of brick (private, silicate or decorative). Such vertical racks are suitable for the picket fence, and for the fence of corrugated board, and for the Rabitz grid, and for cast and forged grilles, and for plastic. Also, the barrier can be installed in the form of brickwork, but such supports, of course, will have the highest price among all analogues.
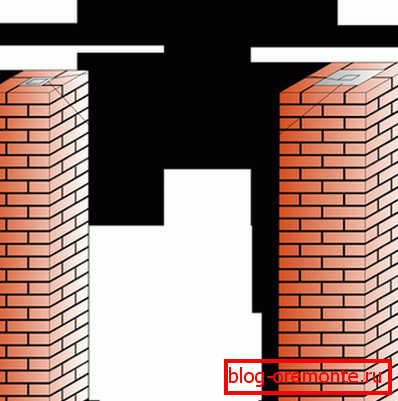
Brick masonry parameters
- The installation of brick fence posts is made after the installation of vertical metal or concrete poles, that is, the stone itself more likely performs the function of decorative camouflage rather than fasteners. Do not forget that between the metal profile and the brick, it is necessary to pour the mortar to make a monolith.

Brackets need to be prepared in advance.
- During the laying of bricks do not forget to attach a metal strip to the profile for the bracket, as shown in the photo above. The fixing of the console is carried out either with the help of bolts, or with the help of electric or gas welding.

Caps from tin
- To complete the composition with vertical brick racks, use caps. They can be of very different shapes and make them from metal, plastic or concrete. In addition, such a coating will protect the structure from direct rain and snow, which will certainly increase the service life.
Council When installing brick supports, it is better to connect them to each other at the bottom with a low partition in the form of a brick or concrete curb. The improvement of at least two parameters will depend on this - the bundle will be strengthened in the frame and the appearance of the whole structure will be improved.
Installation of columns
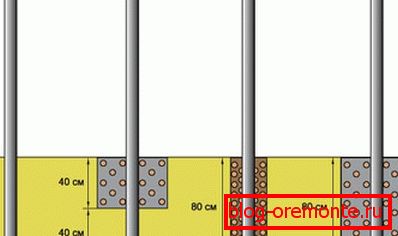
Schematic diagram of the installation of intake columns
Now let's see how to put up posts for the fence, but for this there are at least four options and each of them is more or less suitable for a particular material. You can use any method you like considering the technical capabilities of the racks installed.
The first proposed option shows how to dig poles for the fence directly into the ground. This is the easiest, but, alas, far from the best way to install vertical pillars, because precipitation and soil subsidence will contribute to the roll of support, and, accordingly, the entire fence. The method is good for installing temporary fences that will last no more than two or three years.
The second option is half-hearted, but pouring concrete over the upper part of the pit creates stability for the whole structure, although the lower part of the butt remains open to moisture. For concrete poles, this poses absolutely no danger, which cannot be said about wood and metal.
The third option shows how to dig poles for the fence in the ground, followed by bunting rubble, gravel or debris. That is, this method involves actions similar to the first method, only you will have to fall asleep no longer the ground, but any solid fraction that needs to be tamped well. This is very convenient for concrete pillars, but wood and metal will be exposed to moisture here.
And, finally, the fourth, the most reliable option of all, since in this case you will have to install columns for the fence in a concrete solution. The cement envelops the butt and protects it from moisture and oxygen, while pouring gives stability to the entire structure as a whole.
Council When installing metal and wooden posts, close the butt of the butt with a waterproofing film or cement mortar. Thus, you will block access of moisture from subsoil waters.
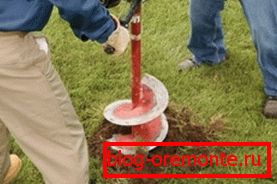
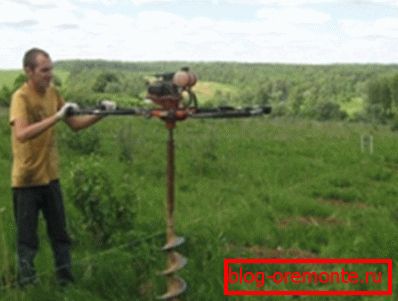
Drilling under the fence posts manually
- The pits for the racks are best not to dig, but to use a drill for this, moreover, you can order special equipment, and you can, in the old manner, use a hand drill, as in the photo above. Here, perhaps, the more important is the question of the depth to which the fence posts are buried, because the pits themselves are easy to make.
- The depth of planting butt usually ranges from 60 to 80 cm, but first of all, it will depend on the possible mechanical load (height, fencing material, possible windage, etc.) and the condition of the soil in this area. So the soil can be sandy, which means that it is friable or with subsoil waters, then the depth should be increased.
Line the pillars align with threads
- It remains only to learn how to align the fence posts and for this we need a level and nylon threads. The two outer posts in one line are aligned with the level and fixed, then the threads are stretched between them at the top and bottom. They will be a reference point for pits and for supports.
Conclusion
We have just learned how to dig in the fence posts, and what they are like. If you have learned lessons from this material, then you can safely get to work - you will succeed!