We build a fence to give their own hands
Refining a country site does not begin with planting flowers and installing decorative elements, but with the construction of a fence. That’s just a question - do you know how to build a fence correctly, so that it serves not just one year, but several decades? If not, our article will help you build a fence without any problems and consequences.
What is most important in the fence is the right vertical level and reliable base.
What to do fence
Let us first deal with the following point, which country fences with their own hands the easiest to build:
- Wooden fence. Agree, this material is easily processed, the cost of it is acceptable, and to make such a fence is easy (see also the article Fences made of wood is a traditional solution in a modern design). The disadvantage is its short operational life.
- Metal (professional flooring) fencing - Another option that has become popular recently. The price of corrugated sheets is not too different from the cost of wooden wall paneling and planed boards, which are used for the fence.
- Brick fence - expensive pleasure that is not affordable for everyone. Another significant drawback is the lengthy brick laying process.
Note! The fence can also be built of concrete, but this option is considered time consuming. Also, the aesthetic side of the concrete fence is very doubtful, if only in combination with natural stone or other decorative elements.
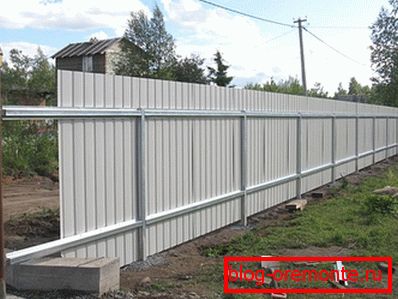
In our article we will look at the process of building a fence of corrugated board and metal pillars.
Preparatory work
To build a dacha fence with your own hands, the first step is to prepare all the tools:
- Screwdriver for installation of sheets of professional flooring to the horizontal jumpers.
- Sledge hammer for driving vertical pillars into the ground.
- Capacity for mixing solution.
- Hammer will need to install the formwork.
- A hacksaw (metal shears are also suitable).
- It is also advisable to purchase a welding machine, you can rent it in a hardware store.
As for materials, then for installation you will need:
- Cement.
- Sand.
- Crushed stone
- Metal poles.
- Decking.
- Boards (plywood, fiberboard).
- Wooden bars.
- Iron fittings.
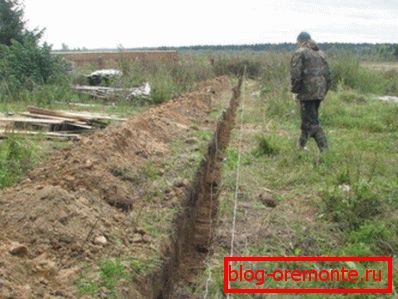
- The fence to the country with their own hands begin to build with the marking of the territory. It is very important to measure the distance between the vertical pillars correctly so that the corrugated board does not sag and is not loose in strong gusts of wind. Best of all, when between the posts no more than two and a half meters.
Formwork for the fence
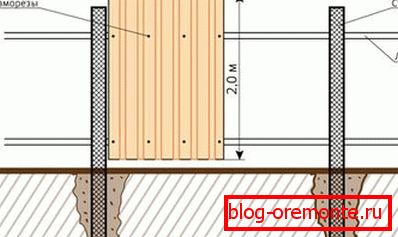
The figure shows an example of how best to build a fence of corrugated board, while not losing strength
- After all the calculations are done, you should start digging a hole. Remember - its depth depends on the height of the fence, but the minimum size is 80 cm.
For low fences enough depth and 60 -70 cm
- If you want to strengthen the fence, then from each post dig a trench to the next hole. The depth is enough 40 cm. This is to create a strip footing that will strengthen the base of the fence (see also the article The Ribbon Foundation for the Fence - how to build correctly).
- Now it is necessary to pour sand to the bottom of the dimple, you can add rubble. The thickness of the pillow is not more than 15 cm.
- Sand should be carefully tamped to get a smooth and dense surface.
We have finished with the pit for the foundation, now we proceed to the construction of the formwork:
- The first step is to install wooden bars along the fence line, on both sides. They will serve as an emphasis for the bars holding the formwork.
- The next step is to mount sheets of plywood / fiberboard or boards 20-30 cm above ground level.
Note! It is not necessary to build formwork in the trenches between the pillars, there the foundation will be poured flush with the ground. Although, if you want a concrete base to be seen, it is better, of course, to make a formwork.
- Use the bars and fix the formwork so that the boards do not deform after the cement has been poured.
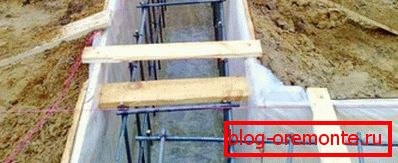
On the walls of the formwork you need to fix the polyethylene, this will allow, after hardening the mortar, to disassemble the formwork without deforming the foundation
- Using a welding machine and fittings, make a metal frame in the recesses. It should be something like this, as in the photo below.

In this process, the aesthetic side of the issue is not important, the main thing is the presence of metal rods.
Installation of metal pillars
- Take the pillar and set it in the center of the pit, where, according to your calculations, there should be a vertical support.
- Hammer it into the ground with a sledge hammer of 20-30 cm. Check with a level or by stretched string, whether you are working properly or proofreading is required.
- If all is well, then it is necessary to drive a pillar into the ground for another 20-30 cm.
Tip! At the bottom of the pit, you can lay out broken bricks, it will give strength to the future foundation.
Pay attention, everyone can make fences in the country with their own hands, the main thing is to follow the sequence of each process.
Fill the foundation
- Now it is necessary to prepare a solution: mix cement, water, sand and crushed stone in the tank, mix thoroughly.
- Fill better to start with the pillars.
- After the foundation is flush with the top edge of the formwork, take a metal rod and pierce the mortar in several places. This will get rid of the air that has accumulated inside.
- Now it remains to wait 5-6 days until the foundation dries. No work with the installation of corrugated can not be made.
Professional flooring
And again it is necessary to use the welding machine:
- Horizontal bars should be welded to fixed vertical posts: a channel or a corner. The main thing - fasten them so that they can withstand a direct load of 60-70 kg.
- Attach them better in a straight line, without any diagonal intersections.
- First weld one edge, then weld the second. Wire may be used to support horizontal jumpers at the required height for the duration of the workflow.
- When the entire fence takes the form of a single metal frame, you can begin to install corrugated.

The finished metal frame looks something like this
- To do this, lean the material against the horizontal jumpers.
Important! To reduce the load from the wind, it is necessary to leave a gap between the corrugated sheet and the ground about 7 cm
- Take in the hands of the screwdriver and screw galvanized screws for metal at the corners of the sheet.
- Check the sheet level, if that adjust the height by twisting the screws.
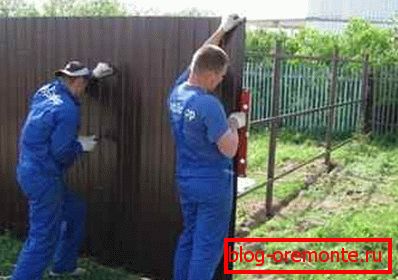
It is better to work together: one holds, the other fastens
- When you achieve the desired result, fix a sheet of solid, twisting screws every 30-40 cm.
In this manual, how to build a reliable fence to give of corrugated ends. The final touch is upgrading the area near the fence.
Tip! It is better to build fences for giving with your own hands in the warm season, in winter there are two problems: snow and low temperature, which prevents cement from hardening.
Conclusion
If you do not know how to decorate the fence in the country with your own hands, find on our website an article that answers this question, and you can immediately solve your problem. In any case, be sure to watch the video that we attached to the article, it has a lot of useful visual tips.