We build a fence at your summer cottage
For each owner of a small suburban area outside the city, first of all there is an acute problem to protect him from the rest. This may be due to a number of completely natural causes. First of all, this designation of the territory, having built a fence, you will designate the borders of your site and stop the access of unauthorized persons. So the decision is made, and it is worth getting down to business.
We build the fence ourselves, on our own, this is the task that will be in front of you. Our article will help you with this, your recommendations.

But the photo is the original design of the fence, made of wood
What material to choose for construction
Indeed, first of all, you need to decide what your fence will be like, as there are enough materials for fence construction today, you should weigh everything and choose the best option.
That's what it's worth to choose from.

Decking, действительно универсальный материал для конструкций ограждения
- Brick.As a rule, choosing a brick, we focus on the construction of a capital and sturdy construction. Accordingly, in the end, we get a beautiful and strong structure that will stand for a long time and protect your home.
- DeckingThis material produces very aesthetic and sturdy structures. A distinctive feature of brick construction is the simplicity and speed of installation.
- Tree. A fairly common material, which today make the original fences. It used to be the main material for the construction of fencing structures.
- Rabitz it can be installed both from the front side and inside the plot. When capital fencing and proper design has a pretty decent appearance. But if you do not want everything to be visible through your fence, then the chain-link is not for you.
Most modern fences include these materials in their design. Very often they are combined, usually with stone or brickwork. If you read the prices of specialized companies that are engaged in construction, you will probably come across an ad, we will build fences combined. We advise you to pay attention to such original facilities.
Material selected, start construction
Regardless of what type of construction you have chosen, you must begin construction as a rule from the foundation. But before you start digging a hole for the future basis of the structure, you need to mark everything up.
In particular, your legal territory, and the corners at which the fence of your site will end. It is from these angles that you will begin marking all along the perimeter.

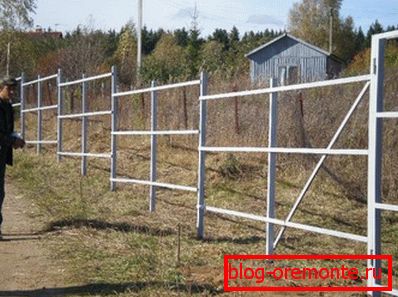
In the photo, the scheme of the future fence
Information! If you plan to install a temporary fence, and then update and build the capital structure, you should not install a strip foundation. In this case, when installing the pillars, it is possible to do by concreting each column individually.
Let us and our instructions will be directed to the installation of the fence without the construction of a complex foundation, but if your plans include a fence made of brick or stone, you will still need a good foundation.
Well, let's continue to establish the basis of your fence. Since we will not fill the foundation, and we will confine ourselves to installing the pillars directly filling concrete individually, dig holes in the corners, this will be the beginning of the supporting frame of the entire fence.
A little about the fence rack
It is worth noting that the pillars for the fence can also be different, they also need to be taken somewhere, or made with your own hands. The most ideal material is metal, such pillars are durable and durable.
Of course, wooden poles can also be used, but as practice shows, they are not durable, and require special treatment of the part that will be in the ground. Such structures are usually used for temporary buildings, with their subsequent removal and construction of a stronger fence.
Finished base pipe
As for the metal pillars for the fence, it is usually ordinary pipes of various diameters. You can also apply a square metal profile, the appropriate size. You may also need a welding machine if you make your own poles.
With the help of welding, you can assemble the entire supporting structure, or weld attachments for spans of the fence. The video in this article will help you understand all the subtleties of installing pillars on this principle, do not forget to watch it.
Mounting frame for mounting spans
Having completed the installation of the supporting structure, you can proceed to the installation of fastening strips for spans of the fence structure.
Here, too, there are several versions of the mounting rails.
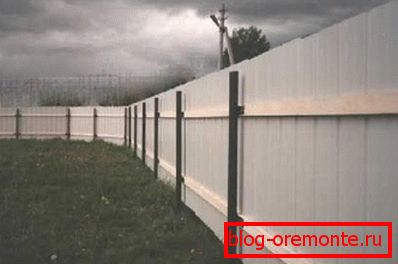
The established sheets of a professional flooring on wooden guides
- Wooden beam fastens to metal "ears" welded on columns. If you have a welding machine, you can weld them yourself.
- Metal corner also need to be welded to the post. After it laid wooden beam and fixed on the corner.
- Profile tube. By welding such a guide, you will achieve maximum rigidity of the entire structure as a whole. It is also very easy to twist the screw on the metal in the installation of spans.
Information! Remember that by collecting a frame entirely of metal, the price of such a finished fence increases significantly. Do not be lazy and make preliminary calculations, this will allow you to avoid unnecessary costs.
Installing fences spans
When the frame, as the basis of the entire fence is ready, it remains quite a bit to install the spans to its rightful place. Depending on the material from which you will have spans, we will begin installation.
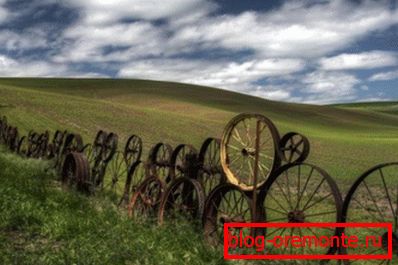
There are also such spans, a unique solution
We will focus on decking, although this method is also applicable to other intake structures, to the installation of slate span, wood and even from the netting of the chain-link.
In order to have the upper edge of the fence you had a straight string, stretch a pre-thread, which will serve as a guide. In order to mark the horizontal direction, you can mark the water level or laser level.
Now you can put the first sheet, pre-setting it in height, which defines a stretched thread. Do not forget to use the lining, if you need to slightly raise the span, be sure to observe the horizon line, because this is how your face looks.
When installing the next sheet, be sure to overlap the already mounted one. So you will hide the joints and achieve a one-color connection. As a rule, difficulties in fixing the span sheets of a novice master should arise, this is the simplest task.
Conclusion
After going through all the stages, you really built a great fence, we hope that our advice has benefited you.