Swing iron doors for the garage do it yourself - a
If you have a garage or you are going to build it, then you will surely need a reliable iron gate. They may have a different design, but I will tell you about the swing option as the simplest and most reliable among all. And the main advantage of this decision is that the product can be made from scratch on its own, for this you need to have the necessary materials and tools at hand, and also to spend some time on the work.

In the photo: iron doors provide maximum protection against penetration.
Workflow Description
Before considering the work stage by stage, I want to tell you about some important nuances that are unknown to those who first make the gate with their own hands.
The design requirements are as follows:
- The width of the opening must be of such a size as to ensure unhindered entry and exit from the garage.. The generally accepted norm is the distance from the mirror to the door frame at 30 cm, if you need to enter not at a straight line, but at an angle, then the width is desirable to do more for the convenience of movement. Again, for a small car, it is better to make more openings in case you later buy a bigger car;
- The height of the gate in the standard is 200-210 cm, this is quite enough for most cars. But if you do not exclude the purchase of a minibus in the future, then I strongly advise you to make a height of at least 240 mm, I reworked the gate myself to a person who initially regretted the extra money for a large structure, and then he had to spend on replacing the structure;
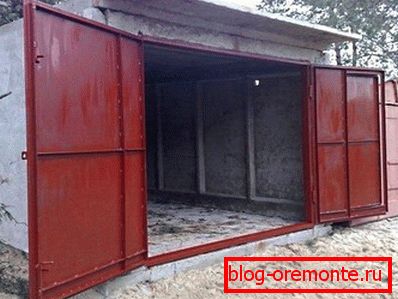
Large gates provide easy access to the garage.
- It is important to consider the width of the garage, according to generally accepted standards, the distance from the framework of the gate to the walls should be at least 80 cm, this is necessary for the reliability of the building;
- The design should provide maximum strength and reliability.therefore it is necessary to use a massive corner, a profile pipe or a channel, and the sheet metal should have a thickness of at least 3 mm. In addition, take care of quality garage loops and locks, which can eliminate the likelihood of hacking from the outside;
- Finally, to prevent deformation, vertical clamps should be provided.which will reliably fix the sash and prevent the fabric from tilting with time.
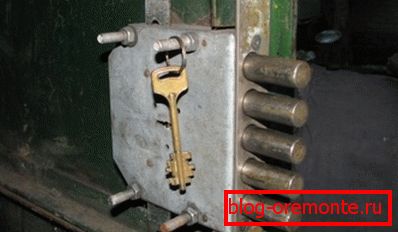
Reliable lock - a mandatory attribute of the garage door
Project development
The biggest mistake in preparation is to assume that the work can be done almost on the knee, determining the necessary dimensions and parameters during the process. In fact, this is far from the case; without a clear drawing, you cannot make a gate; moreover, without a sketch, you will not normally calculate the amount of materials needed.
Making the project is not so difficult, you need to perform some simple steps:
- If you are only building a structure, then you need to calculate the optimal size of the gate and on the basis of these data to carry out construction. This is the most preferred option, since you do not need to adapt to the existing conditions, you are doing everything as it should, and as a result you get the optimal result;
- If the old gate is replaced or the structure is put into an existing opening, then careful measurements should be made and all parameters should be written on paper. It is important not to make a mistake here, since after the frame is assembled, it will be problematic to alter the structure;
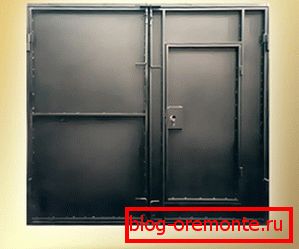
- When all the parameters are there, you need to decide on the type of construction, there are two options - the usual hinged shutters and the system with a wicket, when there is a small person in the large door. The second solution is more difficult to implement, but it is much more convenient for those who are often in the garage and engaged in car repairs. If you do not repair the car yourself and just put it overnight, then there is no need for a wicket;
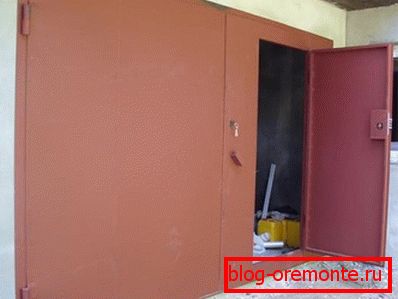
In the presence of a wicket, you can not open the sash, which allows you to keep warm in winter
- When all the data is at hand, and you have decided on the design, you can make a drawing. It reflects all the main dimensions of the elements, as well as the location of the curtains, handles, latches, etc. The more detailed the sketch, the easier it will be to navigate in the future and the less the likelihood of errors and miscalculations.

Here is one example that can be used as a basis.
Preparatory stage
At this stage you need to collect everything you need to work. I will start with the materials and list the main options that you can use. You can calculate the exact amount yourself if you have a project.

Metal corner - the basis of the whole structure
So, for the construction of works will require the following:
| Corner or profiled tube for the frame | I advise you to use a 65x65 corner or larger, as it costs a little and has excellent reliability. Here it is important to remember that the design consists not only of the outer, but also of the inner frame, which is mounted on the inside of the opening and makes the structure much more reliable, that is, the material will need twice as much |
| Corner for the gate frame | It can be the same size, and maybe a little smaller. The main thing is that the design should be rigid and not warped a year or two after installation. Personally, I advise you to use the same 65x65 mm version, it is reliable and weighs less than the more massive types |
| Surface Sheet | It is best to use a material with a thickness of 3-4 mm, since it is highly durable and at the same time its weight is not as large as in the thicker versions. It is also possible to use galvanization, but it is much more expensive, and it is more difficult to paint this type of metal. |
| Embedded elements | They are laid or hammered into the wall and welded to the frame at the hinge locations and serve to reinforce the structure. For these purposes, it is best to use valves with a thickness of 16 mm or more. As for the length, the principle “the more the better” is true, it all depends on your walls. |
| Garage loops | These elements are very different from standard curtains, and this is not surprising, because they need to withstand enormous loads. Below, I will tell you which options are better to use, here I just note that they need 2 pieces per sash and 2 pieces per wicket door if present (there may be smaller elements) |
| Gate valves | They are placed above and below and not only strengthen the design, but also prevent the flaps of the valves. They are easier to buy in finished form or order in the workshop |
| Lock or locks | Without a reliable locking system, all the reliability of the gate is useless. Therefore, get a reliable lock or several locks and install them correctly. |
| Primer and paint | Primer and paint for iron gates - a mandatory attribute of the final stage of work. It is important to protect the metal from corrosion immediately after installation, otherwise you will have to completely clean the surface |
Important! I have seen tips from some professionals on using a professional sheet as the outer cover. But this is not the best option, if only because the thickness of this material is 0.5 mm and it can be easily opened even with a can opener. Do not save and choose a solid exterior finish.
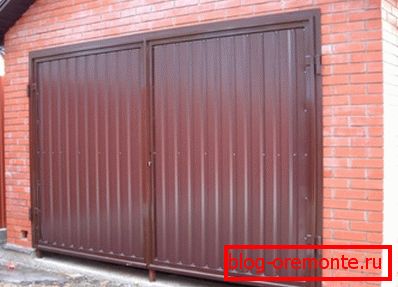
Decking can be used for the garage in the yard, in the garage arrays it is better to use more stringent options
Now you need to tell what tool will be needed during the work:
- Welding machine - you cannot do without it. You can rent equipment, and if you do not know how to work, you can attract a specialist for welding, if you prepare everything yourself, then the work will not be too expensive;
- Bulgarian and at least 5 cutting wheels for metal. I advise you not to save on disks, as cheap components not only wear out quickly, but can also burst when cutting, which is unsafe;

Choose only high-quality equipment
- For measuring and marking, a tape measure, level and angle, as well as a construction pencil are used. You can take a marker, it is more convenient for the reason that the labels are visible much better;
- The brush will be needed to paint the surface after assembling the structure.
Assembling the gate frame
The process consists of several stages, below is a diagram, and each stage is described in detail below:

Every part of the process is important.
- The frame of the garage door consists of the outer and inner parts, that is, you need 4 horizontal and 4 vertical elements. When cutting, I advise you to pay special attention to the correct position of the grinder, often inexperienced carvers allow distortions. To avoid this, draw a straight line on both sides and go strictly along it;
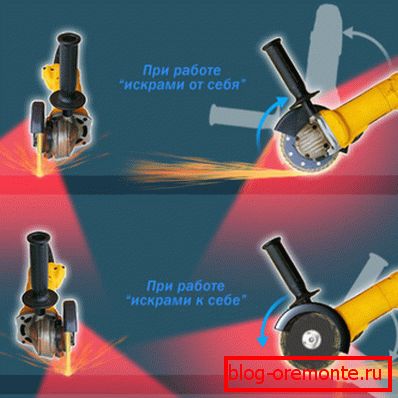
Hold the tool properly to minimize the chance of injury even when a disk is destroyed.
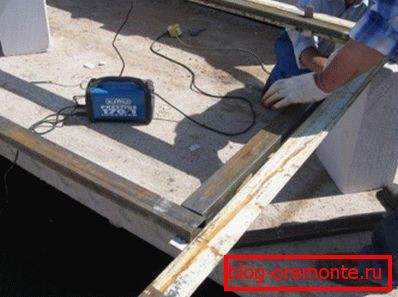
- Next you need to set the frame exactly, the corner is adjacent to the walls, that is, the outside turns out to be a flat surface. When setting, check the plane level, and to control the geometry, measure the diagonals - they must be exactly the same. Since the lower parts of the frame will be welded, it is better to put it on an elevation - blocks or a stack of bricks;

The smoother the frame, the more reliable the design will be.
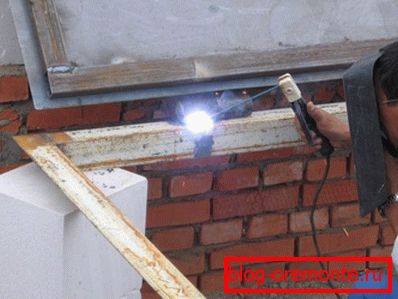
- Welding is done neatly and firmly, the seam must go along the entire joint, the point variant will not provide the necessary reliability;
- The second element is welded in the same way, the outer welding places are smoothed with a grinder in order to ensure the most even plane and the best fit of the flaps to the surface.

The outer parts of the welding are perfectly flat.
Sash assembly
I advise you to start this stage after finishing the assembly of the frame, since it will serve as the main guideline. Iron garage doors are designed in which it is important to fit all the parts to each other, so try to do the work as best as possible.
The process itself looks like this:
- The size of the internal opening of the frame is measured, after which the elements for the flaps are cut off. For vertical parts, the length should be 10 mm less than the distance in the frame, so that the structure can easily go inside, and for horizontal size it will be even smaller; you also need to take away the thickness of the two vertical frame elements. That is, between the doors and the frame there should be a gap of about 5 mm around the perimeter;
The folds are best to try on inside the box, so you are guaranteed to avoid mistakes
- After alignment, the frames can be welded, make sure that they do not move during operation, and the design is obtained as evenly as possible. Often there are situations when due to careless attitude to work, the iron gates are initially skewed and difficult to open and close;
- Now let us see how to make the structure even stronger: for this, the frame is additionally reinforced with horizontal or vertical struts, their position does not matter, the main thing is to strengthen the canvas;
Spacers help make the gate much stronger
- If you have a gate with a wicket, then you need to make an opening for it in one of the wings, reinforcing it with additional stiffening ribs.
Stiffeners reinforce the opening under the small door in the casement
The construction of the valves
Making the garage door continues by attaching a metal sheet to the surface, the work is simple, but has some features:
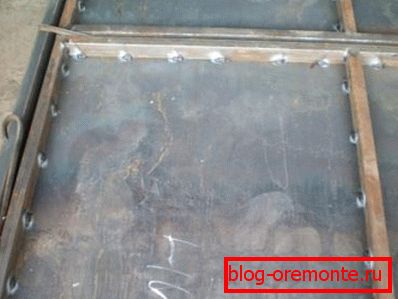
- A sheet 3 mm thick is cut so that it covers the joints above and below, as for the joint between the doors, then there may be two options. The first is that on one sheet the sheet does not reach the edge by 2-3 cm, while on the other it is made longer, thus closing the connection. The second one assumes an even fastening of the sheet on the shutters in the middle, and then a metal strip is welded on top of one of them, which will close the gap;

If you weld stripes on top of all the joints on the iron gates, this will increase their burglar resistance.
- The sheet is welded by the point method, while very carefully monitoring that it does not move, otherwise it will be very difficult to redo the work;
- Next, you need to try on the hinges, for this purpose, reinforced versions with a diameter of at least 50 mm on the ball or the end bearing are taken. It is important to choose a reliable option and set the elements as precisely as possible; you need to fix the frame and the door in a fixed position;

Reliable hinges provide easy closing and opening of the gate
- The elements are welded very reliably, after which it is imperative to check how the system works, and whether there are any problems with closing-opening;
Reliable welding is a prerequisite for quality gates
- Lastly, latches and locks are attached, different options can be used here.
Important! I advise you to use two options, for example, an internal and a padlock, and further strengthen the design of the deadbolt, which simultaneously closes the keyhole.
Installation and painting
The finished structure is installed in the opening as follows:
- First, the embedded elements are hammered into the wall, which will strengthen the structure;
- Next, put the inside of the frame, it is welded to the mortgage. Strips or corners can be welded to it, which will be connected to the outer part;
- The external structure is set to the level, after which it must be grasped to the internal using previously welded-on connections;

The two parts of the box are necessarily fastened together.
- After that, the construction is checked, if everything is normal, then everything is welded to the end.
Let's figure out how to properly paint the gate, everything is simple:
- Before painting the structure, the surface is cleaned and degreased, this will allow the paint to stick better;
- Painting begins with the application of primer, it will protect the surface from corrosion and improve the adhesion of the finishing layer;
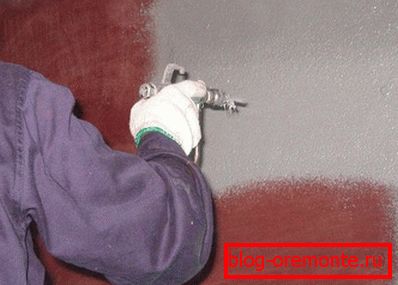
Before painting the metal, it is necessary to apply the primer.
- It is better to paint in 2 layers, weather-resistant paint is used for work, it is better on acrylic or alkyd basis, the price of these compounds is higher, but the quality is much better.
Of course, if you wish, you can decorate the gate with forging elements - metal patterns look spectacular and make ordinary gates much more interesting. But this is a topic for a separate review, which should be considered in great detail.

Such gates immediately transform the garage.
Conclusion
It’s not so difficult to make an iron gate with your own hands, you see for yourself - it is enough to assemble one structure, and if you have to do the work again, it will pass quickly and easily. The videos in this article will explain some of the important nuances even better, and if you have questions, ask them in the comments.