Metal profile gates for your own home
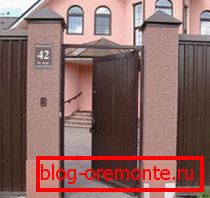
The gate from a professional leaf is not only reliable, but also has excellent appearance
One of the prominent advantages of a country house is the presence of its own plot. And in order to protect it from prying eyes, unexpected guests and the wind, a strong and reliable fence is needed. But it will not be enough just to limit your possessions to a solid fence, it is necessary to foresee in it a wicket and a gate. Installation of these elements and is the most difficult stages in the installation work.
And, nevertheless, a gate and a gate from a professional sheet with your own hands is more than possible, and we will discuss this in this article.
Advantages of the professional sheet
In our case, wickets and gates made of metal profile provide for the sheet in the quality of the canvas. And the best material for such purposes you will not find.
Consider why:
- Such material is light enough that allows you to do without laying the strip footing. In the process of work, the pillars are simply concreted in the pits.
- The professional flooring differs in rather low cost, being the competitor to a tree and a grid the chain-link.
- You can not ignore the decorative qualities of such metal fences. Until recently, fences made of corrugated flooring were not particularly attractive, but in recent years a number of manufacturers have been offering various imitations of brick, stone or wood.
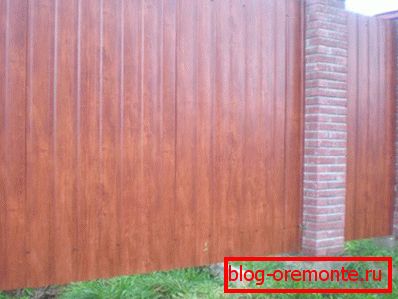
Professional leaf under wood is almost indistinguishable from natural material.
- Простота установки. Installation своими руками может быть осуществлен вами без особо труда.
- Durability and strength - more than 20 years of service.
Installation
Let's consider how to make a wicket from a profile using the example of installing a corrugated fence. For this you need the following materials:
- Profile pipe for log and wicket frame with gate.
- Pipe for supports.
- Sheets profiled.
- Roofing screws.
- Hinges for gates and wickets.
- Primer on metal.
- Concrete solution.
- Paint
To assemble the entire structure, as well as to create fasteners, you will need a welding machine.
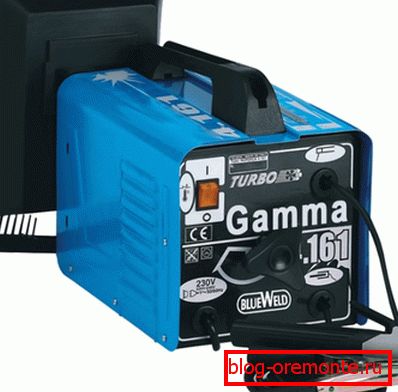
Household Welding Machine
Preparatory stage
At this stage, you should make a markup of the territory, that is, determine the places for the holes for the supports. The standard distance between the fence posts made of corrugated flooring is two and a half meters. Under the gate, it is enough to take 1 meter, and for the gate, a distance of 2-3 meters is usually provided.
Tip! Do not make the distance between the supports of the fence more than 2.5 meters, as the professional sheets have the effect of windage and can warp in strong winds.
Assembly work
- Installation of supports. Despite the fact that such a fence does not provide for laying the foundation, however, the pillars must be firmly concreted. The instruction includes the following steps:
- Dig pits according to the markings.
Tip! To speed up the process is best to use the ice drill.
The depth of the pits is directly proportional to the height of the fence. Experts recommend dropping support exactly one-third the length. Thus, it turns out that for a standard height fence, a depth of 70 cm is sufficient.
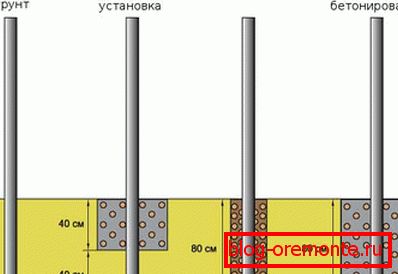
Installation options supports. In our case full concreting is used.
- Place a pillar in the pit and level it.
- Secure the future support with wooden supports.
- Fill the pit with cement solution.
- Do the same with the other pillars of the fence.
- Concrete will set for three days. At this time, our main occupation will be a wicket from the profile with your own hands.
- Making the gate. The gate from a metalprofile the hands becomes very simply.
- For the frame, you should prepare two shaped tubes, the length of which is equal to the height of the fence and three cross, one of which will be located in the middle. Cross pipes should be 4 cm shorter than the door opening + thickness of two longitudinal pipes.
- If you do not know how to weld a gate from a profile pipe, then this is easy to learn, since there is nothing complicated here. We assemble the construction of the gate and connect the pipes by means of spot welding. This procedure will take you quite a bit of time.
- In the middle of the gate we weld the prepared cross pipe for rigidity and ease of installation of professional sheets.
- Weld the loop. As a result, you should have a frame as in the photo below.
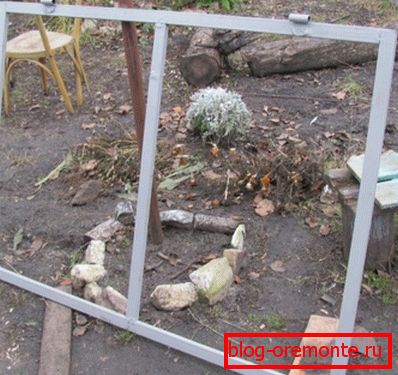
Gate from a profile pipe the hands (framework). This photo shows an already painted product.
- Paint the frame.
In a similar way make the gate.
Tip! If the width of one leaf of the gate is more than 1 meter, then it is desirable to provide here, in addition to the transverse pipe, also diagonal ones, which will give the structure additional rigidity.
- We sheathe frame with professional sheets. This stage is the easiest.
- Cut out sheets of the required width.
- Using roofing screws, fix the sheets of corrugated sheet on the frame.
- Fasten the gate and wicket to the supports.
- Welded loop to the posts.
- Further, the wicket from the profile must be hinged.
In order to sheathe the rest of the fence with sheets, you need to install transverse lags between the supports. We mount them with the help of spot welding and strengthen the professional sheets with self-tapping screws.
The fence is ready.
Conclusion
As you can see, a gate from a professional sheet with your own hands is not so difficult. The key to this is accurate marking. Therefore, at the preparation stage, you should calculate all the nuances so that you do not have to redo everything.
The installation process itself is very simple, and let the need for welding does not scare you - once you have to do everything for the first time.
The main thing is that with due diligence you get a reliable, durable, and most importantly - a beautiful fence made by you personally. Better to understand this issue will help you photos and video on our site.