Metal mesh for the fence: how to choose and fix it
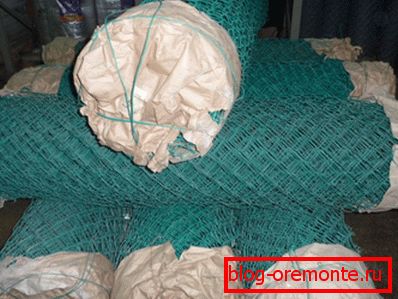
Slab with polymer coating
Many gardeners use to build fencing their site grid for fences. It is very economical, and at the same time durable material, which completely transmits the sun's rays, so you can plant any plants along the fence, without fear that they will die. Some people even plant their loins around the hedge on purpose, so that a beautiful green mesh for the fence will come out.
Tips for choosing materials
Most often, metal netting of the chain-link is used for the fencing of the territory, but there are also PVC nets for fences.
The chain-link is made of low-carbon steel wire, as well as galvanized or polymer-coated wire. If you bought an uncoated material, then you definitely need to paint it after installation, otherwise after the first rain the metal is covered with rust. High-quality galvanized fence mesh can have a durability of up to 20-25 years, but cheap domestic wire with low zinc content will be susceptible to corrosion in 1-2 years.
If you live in a coastal solar region, then it is better to use a fence with a polymer coating. Leading manufacturers use high-quality materials for its manufacture, and it does not fade in the sun and withstands temperatures down to -35 degrees, but cheap analogues can deteriorate.
Tip! To determine the quality of the polymer coating, you need to look at the inner side of the spiral. If you find scratches and cuts on the coating, then you should not take such a product.
The edges of high-quality chain-link should not diverge when pressed
The strength of the fence depends on the size of the cells and the diameter of the wire. Technical specifications for the quality of products are specified in GOST 5336-80 "Steel woven grids". In order to lower the manufacturing price, some manufacturers increase the cells and reduce the wire thickness. Using data on the mass of chain-link from GOST, it is possible to determine the quality of the grid by weighing it. If the mass differs by more than 5%, then there is not a high-quality roll of material in front of you.
Counting materials
Rabits are sold in stores usually in the form of rolls. Typically, the height of the roll is 1.5 m, and the length - 10 m. If necessary, you can order larger sizes that can reach 4 * 18 m.
To calculate the number of pillars, you need to measure the perimeter of the site and divide by the size of the span. For fences from the chain-link, it is optimal to dig in columns every 2.5 meters.
To determine the height of the corner and intermediate pillars, you need to add 10 cm and 1-1.5 meters to the grid width for dropping the pillars. The looser the soil on your site, the more you need to dig in the pillars. Pay special attention to the corner posts, since the maximum load will fall on them, so they need to be driven in 20 cm deeper.
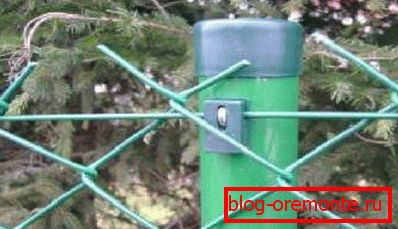
Pillar installation
How to make a fence from the netting chain-link on their own? Read on and everything will become clear to you.
So, the base of the pillars will need to pour cement for greater strength. At the same time, it is necessary to use bunting of pillars with rubble. Unlike concreting, it will fix the supporting pillars in clay soil more well. Of course, you can just dig up half the pit, and then drive a pillar with a sledgehammer, but it will be less durable.
To do this, you need to drill a hole and fill up the initial layer of 10 cm of sand. Next, a pole is installed on the level and rubble and brick fragments are poured around it. Then everything is tightly compacted, covered with sand and poured with water from above to increase the density. The remaining layer is poured with cement (4 parts of sand, water and rubble are added to 1 part of cement).
The scheme of bucking pillars with rubble is shown in the photo.
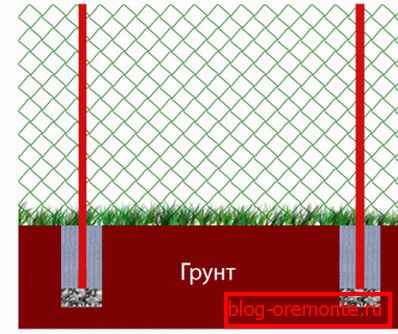
Rubble rubble
Tip! First, install the corner posts. To then install the intermediate posts exactly in a row, stretch a rope between them along the top and bottom.
You can see in detail how the fence is being built in this video:
Mounting methods
The steel mesh will not sag in spans of 2-3 meters, but with such an attachment it will be easy to bend back and crawl through, so you need to additionally secure the lower edge.
- The grid for fencing fences, attached to a wire with a section of 5-6 mm, which is drawn between the pillars, looks beautiful.
- Also a good option would be to make a row of planks with a thickness of 30-40 mm along the bottom edge, to which then pull a chain-knife on nails. Boards can be fastened to the posts for long bolts.
- The most reliable, but time consuming method of attachment is to mount on the frame of the steel corners. The wire is attached to the frame by welding.
- To save time, you can buy ready-made sections of the chain-link, which usually have a size of 1.5 * 2.5 m. Spans are fastened to metal plates welded to the posts.
Making a fence
Fence trimming begins with the docking of individual pieces among themselves. This can be done as follows: pull the outer wire out of the canvas, attach 2 pieces with the ends and twist them with the same wire. You can also take a straight wire and tie the next canvas.

Types of mesh fencing
Now you need to hang a chain-post on the pillars. The easiest way to do this is on the wooden stitches we mentioned earlier.
If you stretch the mesh on a wire, then you may have difficulty with this. To do this, pass a thick metal rod through the outermost cells and wind a part of the net on it, and then fix it with wire. Tie the cable to the rod, which will tighten the grid, and to make it easier, make a lever of a strong pole.
After installation, do not forget to paint the fence with enamel if you bought cheap uncoated material.
How to make the fence opaque
After installation, you may want to close the review of your site from outsiders, or beautifully arrange it.
This can be done in the following ways:
- Hedge. The grid on the fence for the garden will look much more beautiful if you plant climbing plants along it. For a beautiful effect, you will need to wait several years, but you can plant an annual plant that will grow in just a month.
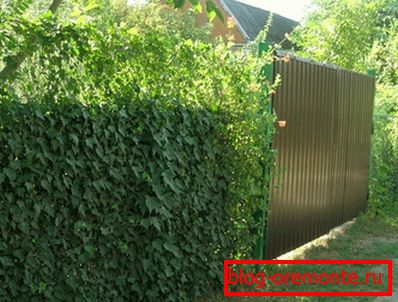
The dream of every summer resident is a hedge of climbing plants
- Camouflage camouflage netting on the fence is a good option for gardeners who want to close the fence not tightly, but with clearances for good plant growth. However, this design is not suitable for everyone.

Military Fence
- Dimming nets can be used not only to create a shadow on the site, but also to design the fence. It has a green color and can be of different shading density (30-90%).
- Artificial needles - a decorative mesh on the fence, which is sold in rolls. This material is short-lived, next year it will lose its bright color.
- Threading reed - a spectacular option, but time consuming, and not durable. You can also find mats of reed and reed related rods.
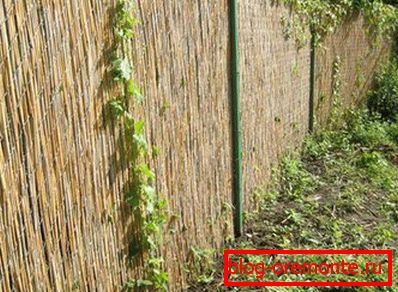
How to close the fence with reeds
- Polycarbonate sheets - allow you to make the fence opaque with your own hands. To do this, use matte sheets, which can be colored.
Conclusion
If you want to make a fence on the site on your own, then the grid is the best option. Our instructions will help you to avoid common mistakes in the construction of the fence, and the observed technology will extend the service life.