Mesh for the fence with a polymer coating: what kind of
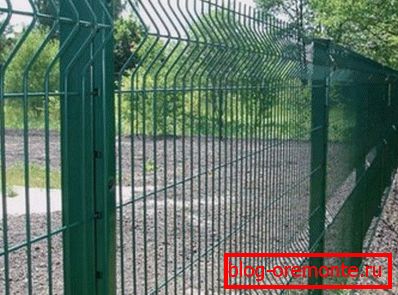
Polymer mesh fence example
If you need to put a beautiful and durable fence around the perimeter of the territory of the house, then there can, of course, be many solutions.
But, as a rule, if such fences are done correctly and truly durable, their price will be quite high. But there is such a material on the market as a polymer mesh for the fence - the fences from it are beautiful, durable and, in fact, such a project is not too expensive. You could even say that this technology is the "golden mean" between price and quality.
Let's understand what kind of material it is and how a fence with a polymer coating is generally made.
Material Features

Photo grid
In fact, this mesh is made of strong low-carbon cold-drawn wire, which at the intersection is connected by welding. The polymer coating itself, most often is green and is applied to the wire after welding the mesh. More precisely, the finished mesh, as well as, for example, decking for the fence with a polymer coating, or immersed in a polymer paint, or the paint is applied to the metal by powder method.

Decking with polymer coating
A welded mesh with a polymer coating for a fence can vary in color, in wire thickness and in cell width (see also the article Welded mesh fence - today we are not talking about a chain-link).
Consider where you can use such fences:
- for fencing the territory of schools and preschool institutions. It is especially convenient that the project does not require large budgets;
- to protect stadiums and sports fields;
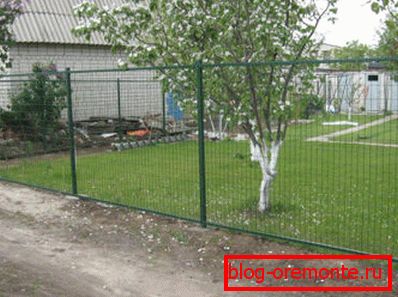
- for fencing private houses, gardens and cottages;
- на автостоянках;
- for fencing many industrial areas.
That is, it turns out that fences from a welded mesh with a polymer coating can be put almost anywhere where there is no need to install more powerful and opaque fences.
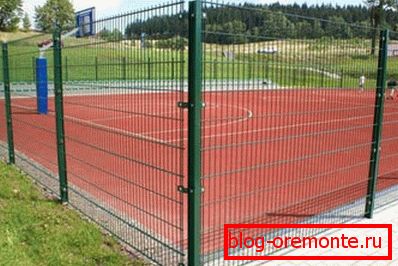
Example of mesh fencing
Now let's talk about the undoubted advantages of technology.
The advantages of material and technology
First of all, it is worth noting such moments:
- Polymeric fences are lightweight, which means that they do not require a strong foundation. In addition, loading and unloading material is cheaper;
- Fences from such a grid look very neat and do not interfere with the passage of sunlight, which allows them to be used for fencing gardens and parks;
- In principle, it’s not a problem to install a polymer fence with your own hands — at a certain stage it is optimal to resort to the services of a welder, but in general, you can do without welding;
- The grid does not need to be painted;
- The grid with a polymer coating is not afraid of the effects of corrosion and due to this can serve for a very long time.
Now touch the negative aspects of technology.
The disadvantages of polymer mesh fence
In general, disadvantages include such things as full visibility of the territory inside the perimeter of the fence, as well as the fact that this type of fence does not protect the yard from the winds.
Polymer Wire Fence
In addition, the fence of the welded mesh with a polymer coating does not have very high strength in the sense that if the attackers want to penetrate the fenced territory, then such a fence will not delay them. Because the steel wire can be quickly cut or simply cut through with a special tool.
These are the characteristics.
It turns out that this type of fence is generally good, but like all other structures it has its drawbacks and is not suitable for use in all situations.
And let's now consider how this fence is made.
Necessary tools and consumables
To work we need this:
- shaped tubes that will serve as racks;
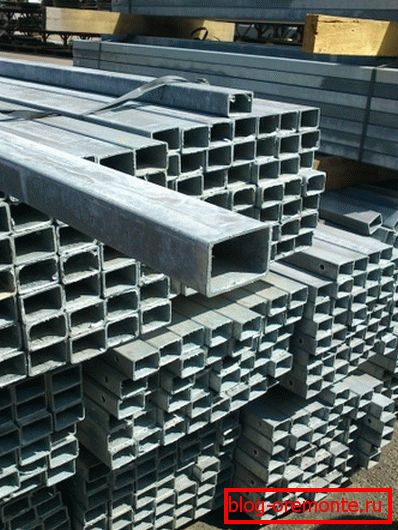
Profile pipes
- the net itself;
- various bolts and screws;
- rule with level, construction thread and tape measure with a pencil;
- Bulgarian, screwdriver and drill;
- buckets, trough and shovels for making concrete;
- sand, cement, crushed stone and water.
Tip: to save budget, you can not buy a power tool, but rent it. In principle, this should cost a penny, because, as a rule, it is fastened, a welded intake mesh with a polymer coating, on ready-made supports rather quickly - a maximum of several days. And the supports themselves will also have to be cut before installation, but this is just a matter of hours.
And we remind you that if you do not fasten the mesh to the supports, but weld, then a good welder will do it maximum in a day.
Let's get to work.
Mounting the fence
Installation of polymer fence
The instruction and sequence of works, in general, is simple. The main thing to remember is that individual steps may depend on the particularities and nuances of your particular situation and, accordingly, may not be performed as described below (see also the Fence with Your Hands article - two simplest options).
An elementary example is, for example, in one case, thick metal stands can be used, which are hard to drill and into which it will naturally be hard to screw in screws or bolts. In this case, it is obviously more expedient to use welding to connect the mesh with the supports.
But if in your situation, the supports are made of thin metal, which is not a problem to drill with a drill or a good screw, then the welding machine and services of the master may not be needed at all.
Therefore, be sure to consider all the nuances of the project and carry out the work, focusing on them.
Let's start.
First you need to mark the line of the future fence and those points where the supports will be attached.
This is done like this:
- we determine all the angles of the fence;
- we drive in pegs in these places;
- we connect pegs by means of a construction thread;
- mark along the thread point for the supports. As a rule, supports are mounted at a distance of about 2-2.5 meters from each other, but of course this is not a required parameter - make the distance as you need it;
Mesh fence supports
Tip: only in this case keep in mind that we are talking about the fact that the size of the spans of 2.5 meters can be reduced, but it is undesirable to increase, because the grid can sag because of the long distance.
- we put pegs at all points, the thread can be temporarily removed.
Now you need to dig holes for all supports.
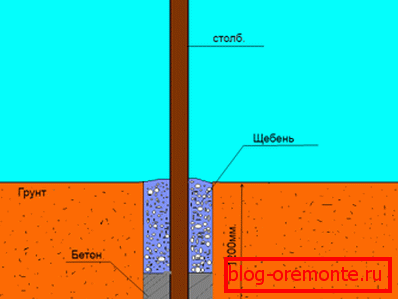
Of course, the most common way to do it with a shovel, but there is a more optimal solution. After all, for a profile pipe size of 50 to 50 mm. You do not need to dig a hole with a large diameter, which means that an ordinary garden auger is quite suitable for such work. With this tool, you can do everything not only quickly, but also carefully, due to the fact that you don’t have to dig out extra earth.

Work with a garden drill
By the way, using a garden drill is also a direct savings. After all, due to the fact that the fossa is small, there will not be needed a lot of concrete to fill the support. So think, perhaps it makes sense to purchase this tool.
Let's go back to work.
The depth of the pits, with a height of supports up to 2.5 meters, should be approximately 70 centimeters.
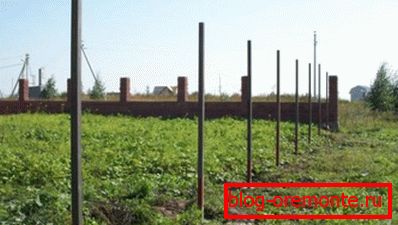
After the pits are dug, you must first install all the corner posts, level them, and then pour concrete. It turns out that after the foundation of the corner supports has dried, they will serve as beacons for all the other, intermediate pillars.
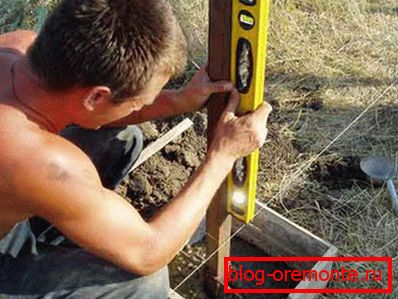
Adjustment of angular support
Further the fence from a polymeric grid becomes so:
- Between all corner posts, a string is pulled. And not one, but on several horizontal levels - at the bottom of the racks, in the middle and at the top. This is necessary in order not to align each intermediate pillar separately, that is, to simplify the work and save time;
- When the threads are stretched, you can install all the other pillars, align their vertical position, focusing on the thread, and pour concrete.
The installation of the fence posts
After the foundation dries everywhere, you can proceed directly to the installation of the grid (Learn also how to make a foundation for the fence: the most popular decisions and important nuances).
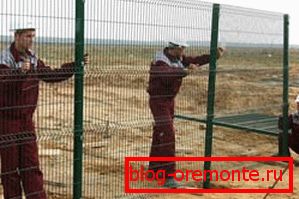
To do this, prepare the sections of the desired size, put them to the supports and fasten or weld.
In general, everything is - the fence with a polymer coating is ready for operation. After all, as you remember, the grid does not need to be cleaned, primed and painted, which means you can use the fence after fixing the grid to the posts.
Let's sum up.
Conclusion
We got acquainted with what constitutes such a material for the fence device as a polymer mesh, and also figured out the approximate sequence of installation and some nuances.
We hope that the information will be useful to you in practice, and if you want to know even more, we recommend watching the video for this article.
Happy installation!