Making a net fence: tips and tricks
Mesh fence: inexpensive and practical
Is it possible to make a fence from the net with your own hands? The question is quite natural, because the mesh-chain-link is one of the most popular, and at the same time inexpensive materials for the manufacture of fences. So the desire to save on installation, making everything yourself, is understandable.
How to make a fence from the netting chain-link? The technology of manufacturing such a fence is quite simple, and in our article we will describe in detail all the steps of the process, starting with the selection of the grid itself and ending with its fixing on the supports.
Materials for the manufacture of mesh fence
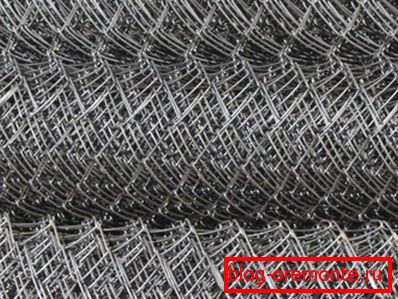
Rabitz
Perhaps, not enough what material for the construction of fences can compete in popularity and prevalence of metal mesh. It can be easily found in any hardware store, and installing fences from the grid does not require any special skills from you.
At the same time, the fence from the netting of the chain-link turns out to be quite functional, since it does not obscure the territory and reliably protects it from accidental penetration of animals. For a garden plot or a summer house - more than enough!

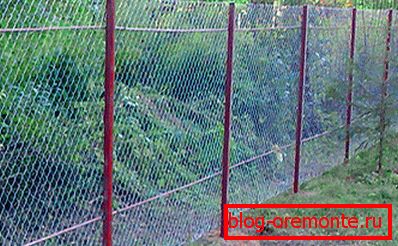
Tension fence scheme
From the chain-link do two types of fencing - sectional fences of the grid and tension mesh fences. In our article we will consider the tension fence from the grid, because its design is more simple.
For the fence we will need:
- Metal fence mesh;
- Pillars;
- Fastening materials (metal wire or bolts with special metal plates).
Starting the design of the fence should be with the choice of the grid itself:
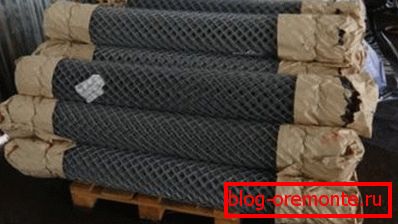
Chain-link rolls
- On the modern market there is a very extensive range of this material. The first parameter by which to make a choice is the height of the fence. The most common size (most commonly referred to as a roll width) is 1.5 m, but there are also two-meter rolls, and more compact ones, 1 - 1.2 m wide.
- Next, you need to determine the size of the cell. Running models are considered to be grids with cells 50 and 100 mm.
Tip! The fine mesh mesh (25-30 mm) is great for making fences for small poultry. In larger cells, chickens or ducklings can crawl through, or get stuck in them and die from suffocation.
Rolls without galvanizing
- For the manufacture of fences used black or galvanized fence mesh. The diameter of the wire is directly proportional to the size of the cell, but billets with a diameter of 1.5-2.5 mm are most often used.
- The price of galvanized mesh is somewhat higher, but it is better to use e for a permanent fence, since it is less susceptible to corrosion.
- The aluminum chain-link has excellent anticorrosive characteristics, but it can be used only for internal fences. If you put the outer fence of the mesh, bound from aluminum wire, the probability of its being stolen by "non-ferrous metal hunters" is high.
Fence posts
When the basis for our future hedge is selected, it is necessary to decide on the bearing structures. Here the choice is quite simple, because most often the pillars are made of wood or metal.
- Wooden poles are most often used in those regions where there are own woodworking enterprises. This is due, of course, with a more affordable cost of wood.
- For the supports of the mesh fence, either well-groomed, rather thin trunks of coniferous trees, or even bars with a section of not less than 50x50 mm are used.
- Wooden supports are treated with antiseptic and painted. To extend the life of the fence, the lower parts of the bars impregnate with water-repellent composition. Waterproofing mastic is quite suitable for this.

Metal supports with mounts
- Metal supports are much more durable, however, they are more expensive. However, recycled pipes are quite suitable for hedge supports - as long as they are not rusty.
- Purchased pipes are cut to size using grinders. After that, clean the metal surface with a brush and degrease.
- Like wooden beams, pipes must be treated against corrosion. The easiest way to do this is with exterior paint.
- At the ends of the pipes it is necessary to insert plugs protecting the support from the ingress of water inside. Wooden wedges are most often used, but special plastic corks can be purchased.
Fence installation
Measurement and frame
This section contains instructions for the independent production of fences from chain-link mesh. Work begins with the measurement area:
- First, using a tape measure or measuring cord, we measure the perimeter of the fenced territory.
- In the corners we drive in wooden pegs, between which we stretch the cord - we will be guided by it, installing the supports.
- Every 2.5 - 3 m we make marks for the installation of pillars. We distribute the supports in such a way that the distances between them are approximately the same.
- In the marked places we make pits for the installation of pillars, on which the fence nets will be fixed. It is easiest to make a hole with a special drill, but if it is not there, then you can dig out narrow nests with a shovel.
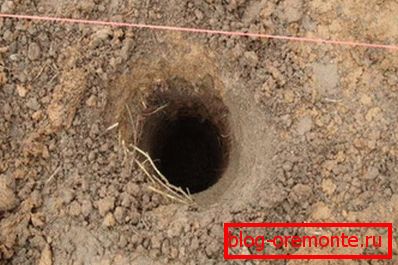
Support socket
- At the bottom of the pits pour sand or gravel. On the "cushion" of this material we set the pillar, align it with the level and fill it with soil or pour concrete.
Tip! To keep the pillar stronger, we add a rubble stone and fragments of bricks to the concrete.
The process of making holes and installing pillars for the fence is shown on the video posted here. We recommend that you take this step very responsibly, since in case of careless installation of supports, the fence will need to be repaired regularly.

Mounted poles with guides
Grid mounting on supports
In order to have a beautiful and smooth fence, the grid must be well stretched. This can be achieved only through strict adherence to the sequence of operations for its installation:
- We place a roll near one of the corner pillars, after which we attach the edge of the mesh to the support. The black wire netting is raised at least 50 mm above the ground, but galvanization can be fixed close to the ground.
- For fixing the chain-link to wooden supports use special brackets. The mesh is attached to the metal pipe even more simply - either with the help of a sanitary clamp, or with a sufficiently soft (so called “knitting”) wire.
Tip! To ensure greater reliability, metal hooks can be welded to each metal support.
- The roll fixed on the corner support is unwound and fixed on the next post. You can manually tighten the net, but it is better to use special devices for this - lanyards (in the photo).

Lanyard for mesh
- Another way to stretch - use spacers. As it can be used a thin metal rod or a thick wire that is drawn in the upper and lower parts of the canvas.
- After the end of one roll, we connect it with the next, weaving it with the help of the removed wire link. We continue to tighten the grid until we complete the entire perimeter.
- At the end of the work, you can additionally fix the grid on the ground. To do this, we drive into the soil wire clips with a step of about 50 cm.
Mounting schemes
Conclusion
As you can see, the fence from the grid is mounted quite simply. Of course, if the fence has a great length, then the whole process is quite laborious, but with a sensible assistant, even with a large section you can manage in one or two days.