Installation of reinforced concrete fence: from purchase to
Is it possible to install the fence from the typesetting reinforced concrete with your own hands?
We will try to disassemble all the stages of this not requiring much experience, but rather time-consuming work.

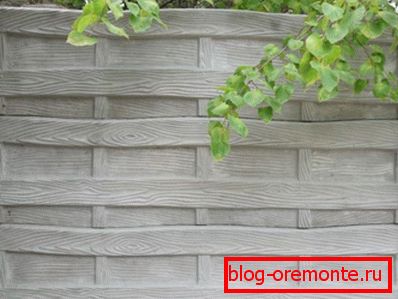
As you can see, the concrete does not have to be dull and monotonously gray.
Tools and materials
Let's start with the preparation. What do we need to build a fence?
Materials
- Pillars. For a fence without gates and wickets, their number is calculated simply: the number of sections +1.
- Decorative panels. Most often, railroad fences are erected with three panels in each span; however, their number can be both less and more.
Important: the current building codes limit the height of the fence from the side of a 2.2 meter high street. In addition, the installation of fences and fences of great height between areas may cause objections from neighbors, if it shade their windows or beds with plantings.
- Sand. He will need to knead the cement mortar when concreting the fence pillars. In addition, a sand bedding is strongly recommended for pillars.
- Rubble, broken brick or gravel. In addition to making this material the top layer of bedding, this filler will make concrete stronger; In addition, with the help of rubble or fragments of bricks, we will have to fix the pillars before pouring mortar.
- Cement.
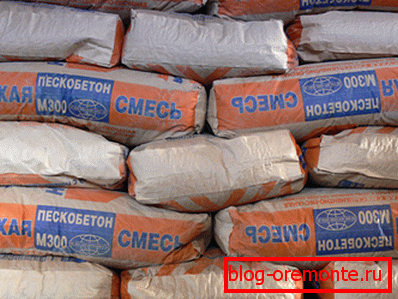
Of course, you can take the finished mixture.
- Concrete soil. You will need it if you want to paint the fence. The primer will reduce the consumption of much more expensive paint and improve its adhesion to the surface.
- Finally, the actual paint - front water emulsion. Acrylic, acrylic-latex and silicone paints are the most resistant to abrasion and deposits; however, the price of the latter is unlikely to please you.
- Cordwhich we mark the line of the fence. It will serve as a guide when digging holes and installing pillars.
- Plummet. On it we have to level the posts.
- Level will help align the top pillars and panels.
- Shovel for digging holes. However, in practice, it is often more convenient to collect scrap or ice pick and a hard steel scoop to remove loosened earth from the pit.
Instruments

If you have a drill at your disposal - even better. Large diameter is not needed: for a pole there is enough a pit about 30 centimeters wide.
- Scrap will be needed for tamping stone when installing pillars for the fence.
- Finally, it will greatly facilitate the work of the rails with a length of just over 2 meters, which are laid on the pillars when they are installed.
Preparation area
The installation of fences and fences begins with the preparation of the work front.
What is it?
- Если у вас стоит старое деревянное ограждение, началом работы станет демонтаж забора. Pillars нетрудно вытащить из земли, используя любой рычаг и проволочную петлю.
- The future fence line is cleared of bushes and tall grass.
- On the slope one has to perform terracing: the inclined surface turns into horizontal sections of equal length with constant height differences.
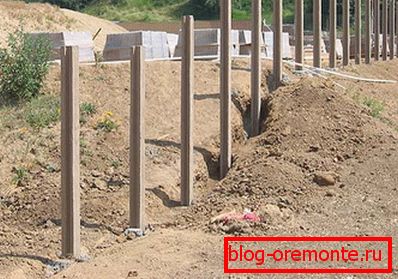
- With a step corresponding to the length of the span, dig holes under the pillars. On dense soils, a depth of 70 centimeters is sufficient; on a weak base it is better to dig a meter. In addition, it is highly desirable to deepen below the freezing point.
- The bottom of the pits is covered with a layer of sand of 5-7 cm. Then the sand is poured abundantly with water for shrinkage and five centimeters of rubble are poured on top.
Installation
Pillars
Installation ж-б забора начинается с установки столбов. При их весе в 80-90 килограммов удобнее всего работать втроем: после установки столба в яму один человек держит его, второй контролирует вертикальность по отвесу, третий уплотняет основание в яме с помощью щебня или обломков кирпичей.
Important: do not forget that on the slope of adjacent sections the common pillar is aligned on a higher section.
If you stocked rails - lay them on top of the adjacent pillars after installing each of them. This will greatly facilitate visual control and reduce the amount of work that will have to be done again.
Do not rush to concrete grounds: we will leave this work for last.
The posts are fixed, but if necessary, they can be slightly shifted or rejected.
Panels
To install them, ideally you will need low forests. It is best to install the panel four.
What is the reason for this instruction? Simply with the weight of concrete fence plates.
With a mass of 60-70 kilograms, the following sequence of actions is optimal:
- Two people serve the panel to the second pair, standing on the scaffolding.
- Those put its edge in the grooves of the pillars.
- The lower pair intercepts the concrete slab and smoothly, without distortions, lowers.
HB fence rarely has a length that is exactly a multiple of the section length. At least two - three panels usually have to be customized in length. To do this, use the usual grinder with a cutting disc for concrete.
Do not forget to check the horizon level - both the actual position of the panels in one section, and the height of the sections relative to each other.
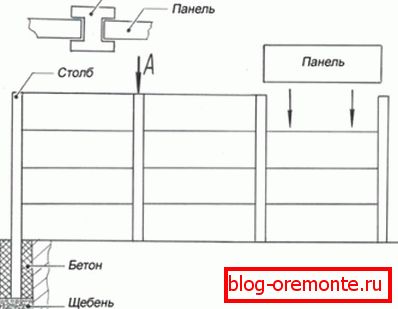
The scheme allows you to understand how the eurofence is going.
Finally, when all the elements of the fence are exposed, the bases of the pillars are poured with a liquid solution with a sand: cement ratio of 1: 3 to 1: 4.
Painting
Here we are not waiting for anything unusual: the fence is painted the same way as any facade.
- The entire surface of the pillars and panels is primed.
- After the primer is completely dry, the first coat of paint is applied. Smooth surfaces are more convenient to paint with a roller; Relief willy-nilly will have to pass with a brush.
- The second layer is applied only after complete drying of the first. Do not try to tint those places where the color seems uneven to you: let the layer dry completely and then apply another one.
- If different parts of the fence are painted in different colors, do not rely on the hardness of your hand - use masking tape.

Two-color fence in the photo is also made of reinforced concrete. As you can see, you can’t call it rude or massive.
Problems and solutions
Reinforced concrete is a very durable material, and repair of fences from it is extremely rarely required.
However, a couple of typical problems still worth mentioning.
- On weak ground, a pillar may squint. You can straighten it with the help of a cable and a polyspast attached to a tree, or a pair of friends Then the column is dug in from all sides, re-filled with rubble and concreted again.
- A careless driver can damage the trim panel with a bumper. Thanks to reinforcement, it will not collapse, but will look pretty untidy. As you might guess, repair of the fence in this case will be reduced to replacing the panel with a similar one.
If there is no complete analogue, it is easy to rearrange the panel from any area hidden from the viewers' eyes, and install another one that is suitable in size.
The modular design of the eurofence and the lack of rigid mounting of the panels will make the replacement of any of them simple.
Conclusion
The video in this article will show you the basic steps of installing a reinforced concrete fence more clearly. Do not be intimidated by unfamiliar work: after all, old Noah was an amateur. Professionals built the Titanic.
Successes in construction!