Installation of corrugated fence - an easy and inexpensive
Many residents of country houses want to embellish the fence without the involvement of specialists, whose services are not cheap. Most often people prefer to make installation of a fence from a professional leaf.
How to do it better and will be discussed in this article.

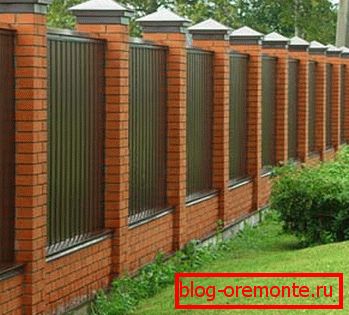
Decking goes well with other materials
Preparatory manipulations
Do not immediately proceed to the procedure for creating a fence. First, you need to understand the rules for choosing the material and marking.
Material selection
If you decided to make installation of a professional flooring on a fence, then you should understand its versions.
Today, there are several classifications of this material, which are distinguished by their unique properties:
- By type of coverage. So, today the professional flooring for the fence is divided into galvanized painted. The first option is much cheaper, but the second has a more attractive appearance due to the wide range of colors. So a sheet of this material can theoretically have any color from the RAL palette. However, it should be borne in mind that in practice it is quite difficult to find a coating with a rare color. However, if you wish, you can order the material on an individual order, but in this case, its price will be much higher.
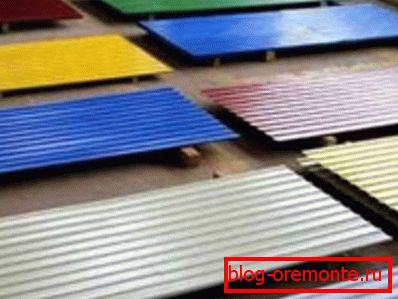
The color palette of modern corrugated can satisfy even the most sophisticated consumer.
- Sheet thickness. This criterion should also be taken into account, because the strength of the fence will directly depend on it. As a rule, the repair of fences of corrugated board is made of samples with a thickness of about 0.45-0.6 mm. Of course, the thicker the material, the more expensive it is.
- By profile heightSo it is divided into C8, C10 and C20. The figure corresponds to the height of the profile in millimeters. Naturally, the strength of the coating depends on this indicator, however, a variety of C8 is enough to create a fence.
Tip: when calculating the number of sheets required be sure to take into account that they will be overlapped. This fact increases consumption by 5-8%.
Markup
In order to install the fences of corrugated sheeting as successfully as possible, a thorough marking is carried out before performing this procedure. The success of the whole operation will largely depend on this stage.
We recommend the following:
- Decide in which places the corner and wicket pillars will be installed. You can use the finished project, and you can show your imagination.
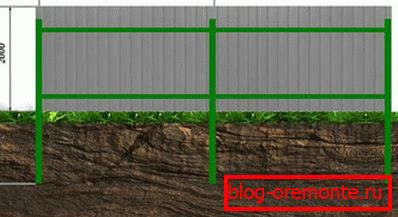
This photo shows the general installation of this type of fence.
- Along the entire perimeter it is necessary to mow the grass, as it can interfere with further manipulations.. If the site has old trees in the immediate vicinity of the fence, it is better to root them out. You can do it yourself, or by contacting experts.
- In order to calculate the amount of required materials, you need to measure the perimeter of the entire area.. This value is required to be divided by the width of the sheet, in the end we get the required amount of material. Do not forget to add 10-15% in case of damage to the sheets.
Tip: even with the BTI scheme, do not trust her. The fact is that there are cases of erroneous data in these schemes.
- You also need to calculate the required number of pillars for the fence. It should be borne in mind that the most optimal distance between them is 2.5-3 meters. As for the crossbars, their number is determined based on the height of the fence (if it exceeds 2 meters, then three lags should be made for a span, otherwise two).
Installing pillars
In order to install the fence from metal profiles, the first step is to drill holes for the installation of pillars. This can be done manually (using scrap and shovels) or with a special gasoline drill. Of course, the second option is much simpler, but it will require impressive cash costs.
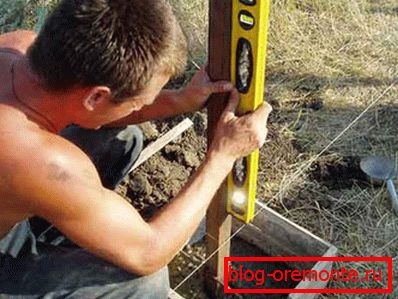
Without a thorough level check, there is a high risk that there will be an oversight that will lead to misalignment.
So, we present to your attention a few recommendations that will be useful to inexperienced masters:
- Holes for pillars should have a diameter of the order of 20 cm, which allows you to expose the columns perfectly vertically. Of course, experienced professionals prefer to reduce this figure to the diameter of the post. However, as stated in the instructions, holes of small diameter are much more difficult to make perfectly vertical.
- The optimal depth is 120 cm. It allows you to avoid various harmful effects of the environment, and at the same time does not force platonic efforts.
- First you need to put the corner pillars (their main purpose - the definition of the planes of all sides). In order to repair the fence from corrugated board could please you, use the long laser level to check the evenness of the installation elements.
- When the corner posts are installed, it is required to tighten the rope along them at a distance of 25 cm from the ground. On this line you will need to create holes for the remaining posts. With this method, holes are drilled on all sides of the future fence from a profiled sheet.
Installation of a log and fixation of a professional leaf
Now it is required to weld lags made of 40x20 mm pipe to the installed posts. You can use any method of welding, as this material is very malleable. It should be noted that installation of fences from a professional sheet is characterized by labor-intensive sealing of seams.
In order for your fence to look aesthetically pleasing, you should paint the welds and the welded joints with enamel or primer. This measure will not only embellish these elements, but also protect them from the harmful effects of the environment.
The last step is to install a professional sheet on the fence. It is best to perform this procedure together, as you will need to hold one side of the sheet during its fixation.
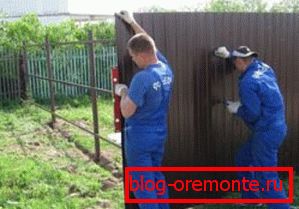
Only by working together can you achieve perfect flatness of fixation.
It is recommended not to install the sheets at once, but first attach a few and evaluate by what method it is better to organize their fixation. Consider the golden rule: there should be at least four screws on one running lag meter.
It is best to use roofing screws with a hexagonal head and a drill length of 19-20 mm. If you purchased a colored corrugated flooring, then you have to work hard to pick up screws, painted in the same color. For fixing fasteners, it is recommended to use a powerful screwdriver (torque not less than 80 N * m).
If desired, you can arrange the pillars at a distance corresponding to the width of the sheet. Such a measure will not only increase the strength of the fence, but also facilitate the lining
It is recommended to start fixing sheets from the far corner of the perimeter, connecting them with an overlap. Do not forget to regularly check the verticality of the attachment using a level.
Conclusion
Of course, to understand the procedure described by us is not easy, so we took care of the aids. In the presented video in this article you will find additional information on this topic, which will help you reveal all the nuances.