How to make a reliable and durable site fencing: the correct
In this article we will look at how to make a wooden fence of the site, as well as the sequence in which such fences are most often installed. In addition, let us consider what is generally needed for such work and touch on several important nuances.
Of course, you can consider how to fence the area with metal supports and elements, but it is important to understand that the metal fence will be much more expensive, and it will be more difficult to make an independent installation. Because you need and welding, and more power tools. Therefore, we study the simplest technology - the assembly of fences made of wood.
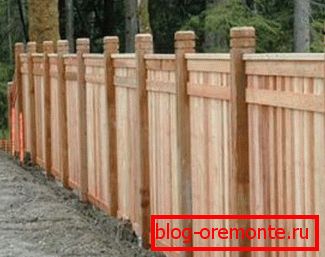
Photo of wood fencing
And, probably, first of all, it is worth finding out what features such a construction as a wooden fence has in general.
Advantages and disadvantages of wood fences
The positive aspects of the material and technology in general are in the following points:
- The price of a standard design will be relatively low. And if you perform the installation yourself, you can save even more money;
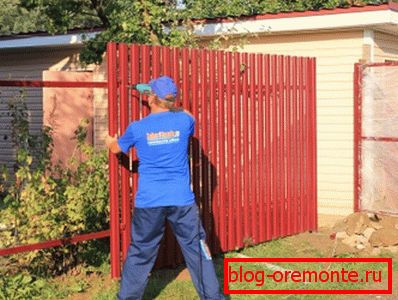
Independent installation of the fence
- High speed and ease of installation. This is due to the fact that no welding is needed, no metal cutting, etc. Wood is fairly easy to process, and all elements of the fence can be interconnected very quickly;
- Ability to paint the fence in any color;
- Low weight of the structure as a whole, which allows making light and inexpensive foundations;
- High level of maintainability. In principle, any damaged piece of wooden fencing can be quickly repaired, and inexpensive;
- Pretty good strength of the fence. It will be difficult to lay down well-made pillars, but, of course, in the case when they are installed correctly.
And of course, it should be noted that a neatly made wooden fence looks very nice and can be made in absolutely any style and with an original design. And you can build a structure - with your own hands, without resorting to the help of designers and specialized brigades. It would, as they say, desire.
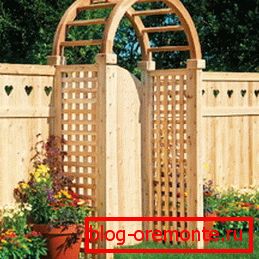
Photo of a wooden fence with a beautiful design
Well, from the shortcomings, we can distinguish the following points:
- Wooden fences are afraid of fire;
Tip: in order to increase the level of fire resistance of a wooden fence, periodically process all its elements with special protective solutions.
- Like the surface of almost any non-stone fence, wood is quite easy to scratch;
- If the supports, frame and trim of the fence are not treated with antiseptics, and do not protect from moisture, the design will not last very long.
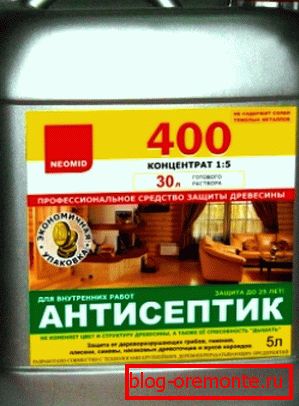
An example of an antiseptic for wood
So, the conclusion is simple. It turns out that, in general, wooden fencing is a pretty good way to protect the site, but it only turns out that the construction will last a long time and will be reliable only if the poles, the frame and the casing itself are properly installed and protected.
Therefore, let's consider what kind of inventory is needed for the work and get acquainted with the correct sequence and important nuances of installation. And even if you do not plan to do the fencing on the site with your own hands, such information will still be useful - because you can better control the actions of the hired brigade.
Let's start.
Necessary inventory
We will install the fence and supports the most standard - everything will be from a tree.
From the tool you need this:
- tape measure, rule with level and pencil;
- upholstery cord with paint and construction thread;
- garden drill and shovel;

Standard Garden Drill
- bath for solution and bucket;
- hacksaw;
- hammer, wire cutters and pliers.
Such is the minimum set of tools.
Please note that the speed of assembly, installation design can be significantly increased. To do this, instead of a hacksaw, you need to use a miter electric saw. And note that it is not necessary to buy it - because you can save money and take the tool for rent.
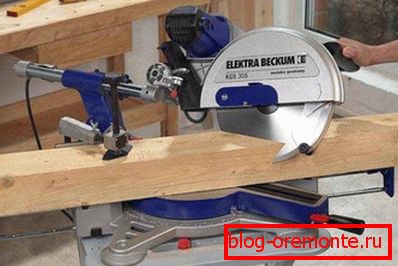
Miter saw
As for consumables, then prepare these materials:
- various screws and nails;
- roofing material (needed for waterproofing pillars);
- sand, cement and crushed stone for making concrete;
- antiseptic;
- paint.
If all of the above is, then you can safely begin work.
Mounting construction
It should be noted that before starting to build the fence, it is very important to take into account that there are certain rules and regulations on the protection of the land plot. For example, in order to avoid territorial disputes with neighbors, you need to call a specialist who clearly defines the boundaries of your particular site and will give a green light to the project. In addition, you need to find out if there are any communications under the line of the future fencing - maybe you can't even dig at this place.
Take into account such moments before fencing the site and then everything goes really well and without problems.
Well, let's start the first stage of work, before you a brief instruction.
Layout and installation of pillars
- Determine the line, the perimeter contour of the future fencing.
- Beat in all the corners pegs and pull the thread between them. And make sure that the thread is sure to be durable, because during work you will often touch it, and if the thread turns out to be bad, you will have to constantly re-tension it, and this is a waste of time.

Pegs at the corners of the future fencing
- Determine the points along the thread where the intermediate supports will stand. As a rule, the normal distance is 2-2.5 meters. However, it all depends on what thickness of timber for horizontal lintels you use. If it is too thin, then naturally it will bend in a horizontal position, therefore in such a situation the distance of the spans can be made less than 2.5 meters.

An example of the distance between the supports of a wooden fence
Now you need to dig holes (centimeters 60-70 in depth) for the corner posts of the fence - the fastest thing to do is not with a shovel, but with a garden drill. And in this case, the solution for the foundation will need less.
Now is a very important, even the key point!
Important! Before you insert wooden pillars into the pits and fill them with concrete, you need to take care of the moisture barrier. To do this, you need to wrap the lower parts of the supports (pre-treat absolutely all the wood with antiseptic) with roofing paper and fix it on the wood with a stapler or studs.

Pillar with moisture protection of roofing material
It will not be superfluous to take care of the protection of the concrete itself - wrap the roofing material as well as the bottom and walls of each pit. With this approach, not only timber, but also the future foundation will be protected from water.
So, we finish operations with roofing material, we insert columns, we align them vertically and we fill in holes with solution.
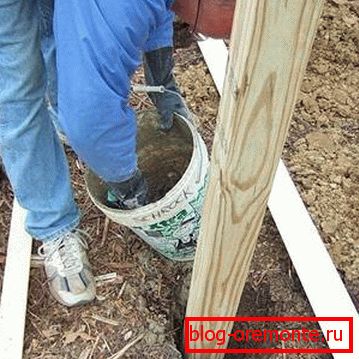
Filling of the base for support
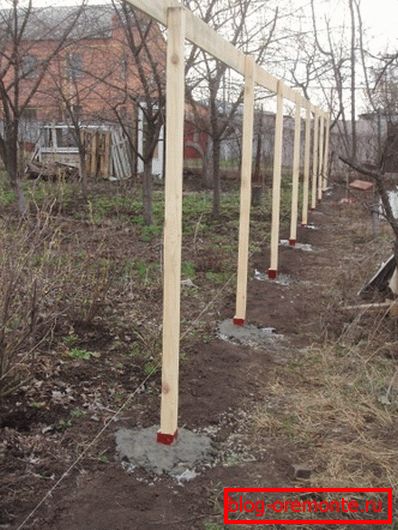
And while the foundation corner supports solidifies and gaining strength, you can drill holes for all intermediate pillars.
When the concrete hardens, it will be possible to tighten the threads between the pillars (along their lower part, in the middle and at the top), which will serve as a kind of beacon for adjusting the correct vertical position of all intermediate supports.
If everything is ready, we insert all the pillars, align them and fill the pits with solution.
When all the concrete hardens, you can proceed to the final assembly of the frame.
Installation of lintels and trim paneling
In fact, these are the easiest stages.
It is necessary to tighten the thread between all corner supports at the level where the jumpers will be located. Well, respectively, after this action, the timber can be attached horizontally to the supports. This can be done both with nails and screws.
Installation of horizontal jumpers
In general, the installation of the frame is completed on this, and you can cut the boards of the required size and nail them to the jumpers.
The fence is ready, we have reliably protected all wooden elements from moisture and rotting, which means that the fence will last as long as possible.
Let's sum up.
Conclusion
We have figured out not only the easiest way to make a wooden fence, but also got acquainted with the nuances that make the fence possibly last more than a dozen years.
If you want to learn more, then watch the video in this article - perhaps there will be something useful and interesting for you.
Happy installation!