How to make a gate at the gate: tips to the cottager
When building a fence around your summer cottage, you must have built a gate for the entrance of a car. Thus, you wanted to kill two birds with one stone: make the entrance for the car and of course the entrance to your territory.
But as practice has shown, it is not very convenient to open a large half of the gate in order to enter or exit. Now is the time for a constructive decision. It is necessary to modify the finished design.
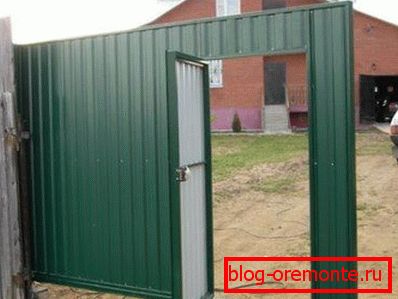
In the photo is an example of the gate in the gate.
Today we will tell you how to make a gate in the garage door, which is already installed and functioning.
Preparatory stage
Well, the first thing to do is keep in mind what material your doors are made of, because we will modify the finished structure, so we will need to dismantle the casing of the structure and make a cutout in it.

As a result, we must get the same gate with a wicket.
Let's assume that the doors of your garage are sheathed with profiled sheeting.
Immediately prepare the tool that you need in the process:
- BulgarianWe will have to make cuts for metal, and this, as we know, is the most universal tool.
- Welding machine. Welding will be needed for the manufacture of structural stiffness of the gate, and for the manufacture of the gate itself.
- Screwdriver or reversible drill. Fasteners, in this case, metal screws are best mechanically tightened.
- Roulette, building level, pencil or chalkThe whole set will help you to measure and give marks.
Tip: In terms of convenience and ease the task, we would recommend using a metal shaped pipe for the manufacture of the wicket. The price of this material is not high, and it also has a small weight, which is not unimportant in the device of the whole structure as a whole.
Let's start with the dismantling of the skin
You probably already know exactly which of the two halves of the gate will have an opening. If so, then you need to dismantle the existing skin so as not to spoil it. This is done simply by unscrewing the screws and removing the sheet of metal.
Now that you have a half-gate frame in front of you, you need to mark our future hinged door. Be sure to measure from the lower frame of the portal structure. As for the width of the passage, we advise you to focus on the existing standards, ninety, eighty millimeters, that’s what you want.
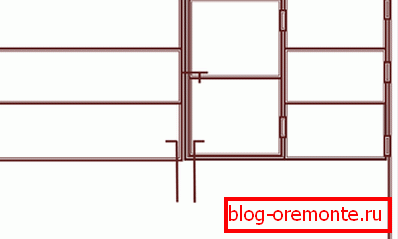
The design drawing we need to assemble
Do not forget that your gate in the garage door with your own hands, should be one of the recommended sizes. The opening in half of the removed section needs to be measured a little more taking into account the width of the material used.
Now that you have accurately measured everything, you can cut an opening for the gate in the half of the gate.
Important! Before you start to cut the opening, it is recommended to remove from the hinges half of the door construction with which the work will be carried out. In the recumbent state, it is much easier to carry out both the markup and the subsequent assembly, welding.
Installation of the wicket frame and gate section
Cutting the opening in the section it is now necessary to fasten and betray him stiffness. To do this, cut pieces of a shaped pipe cut to the desired size by welding to the frame of the gate by welding. At the same time, we strictly observe the dimensions of the future opening.
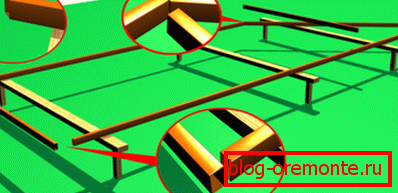
Scheme of the frame assembly with the use of a welding joint
When the doorway is ready, proceed to the manufacture of the door structure itself. We cut the pipe exactly in size and with the help of welding fasten to each other along the perimeter. Do not forget about stiffeners and guides for fixing plating.
Be sure to use when building assembly corner ninety degrees. Exact exposure of angles is an important point in the installation. So you will avoid the warp of the frame, and get the exact rectangular shape.
Informative video - in this article, will help you to understand all the subtleties of the metal structure assembly. Be sure to look at it, and perhaps some questions will disappear by themselves.
Install the frame and weld the hinges
Both designs are already assembled and now it is time to weld the hinges on the frame and, accordingly, on the half of the gate. We will use special door hinges that you can buy today at almost any hardware store.
Here is our instruction on how to do it simply:

Photo gate with welded hinges
- First of all, you must decide for yourself where the gate will open, inside your section or outside. From this will depend on the process of mounting loops.
- Mount the hinges, presumably the door will open inward. We have a section of the gate back to us, the front side, where sheeting is attached, lies on the ground.
- In the finished opening set frame wicket. We expose exactly on the plane the whole structure. So that both frameworks are in the same plane, so we avoid skewing the whole structure as a whole.
- We install loops on their rightful place, usually it is twenty millimeters from the top and bottom of the wicket frame.
- Half loop, choke, mounted on the fence itself. The second half is internal, mounted on the door frame.
- We catch welding in several places and check how the door comes off. If everything is in order and there are no distortions and mismatches in the plane, weld the hinges thorough.
Theoretically, your sectional garage doors with a wicket door are already ready, it remains to sheathe them with a steel sheet, and the job is done.
We sheathe the skeleton of the gate and gate with a professional sheet
It is necessary to immediately say about the main thing, since we have a whole profile sheet, it is necessary to mark the place of the cutout of the doorway. But to use this cut-out element for covering the doorway is up to you.
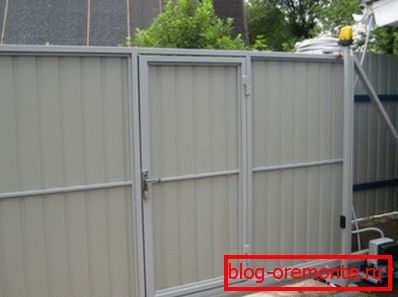
Gates with a wicket trimmed with a wicket, view inside the plot
Usually such a cut-out element will be smaller in size than the gate itself, and if you want to get a one-color design, letting metal in on the sash of the fence, then you should take a new sheet and cut out the part of the desired size.
The easiest way to cut a gate in the gate door in the sheet of corrugated board, it will be a temporary installation in its old place. After the inside, the frame can be marked. After remove the sheet and remove unnecessary item grinder.
Now it is possible to overhaul the profiled sheeting on the fence section, after cutting the required size onto the gate itself and also fastening it with self-tapping screws.
Finally
On this, perhaps, and all, we hope that you have made an excellent gate in the garage door with your own hands, now you can easily go out and go to your dacha.