How to make a fence made of wooden fence

Fence from the fence
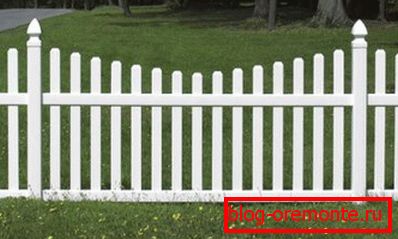
Wooden fence made of picket fence still remains one of the most common types of fencing. This is especially true for villas and private houses.
The reason for this is primarily the ease of installation of this design. And also in its ability to be combined with any landscape design. Due to this, such a fence is found not only near inexpensive cottages, but also near luxury houses.
We will look at the benefits of stacked fences. And, of course, tell you how to install them with your own hands.
Benefits
The fence can be not only wooden. There are also samples of metal and plastic. But we will talk about the benefits of classic woodwork.
Their main advantages are as follows:
- A wide variety of versions - picket fence can be of different sizes and with different intervals. In addition, it can be painted in any color;
- The possibility of making unusual fences - this feature is closely related to the previous feature. The fence can be made according to the original design project. Thanks to this, anyone, even the most demanding taste of the owner of the house, will be satisfied;
The original fence of the fence
- Ability to fit into any landscape design. Decorative wooden fence will adorn even the most refined area.
- Good compatibility with any basis - wooden fence for the fence is installed in combination with wooden pillars, and with brick, metal or concrete. This allows you to make the fence stylish, eye-catching;
- Reliability and durability - this quality is realized only with regular maintenance of the structure. It consists in periodic painting and elimination of defects arising from mechanical or weather effects.
Thus, besides advantages, such a fence has only one drawback - the need for care. But since painting is required only every few years, this minus is not critical.
Mounting the fence
So the advantages and disadvantages are clear to us. But how to make a wooden fence-fence with your own hands? Installation instructions are outlined below.
It should be noted that the work carried out is simple. Everything can be done independently, without the help of experts. After all, no professional skills are required.
This is also a plus wooden picket fence. By doing the work yourself, you can save money the family budget.
Choice of picket
Having decided to build a wooden fence, the fence needs to be chosen rather carefully. After all, now there are a huge number of types of shtaket. You will need to decide which one you will use.
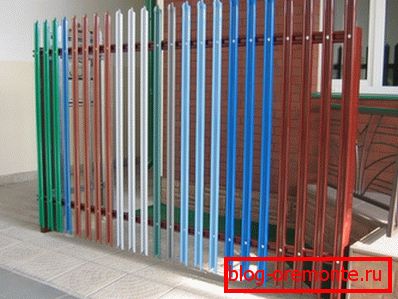
Modern shtaketnik can be very diverse
At the same time, calculate how your chosen option will fit into the landscape of your site. And whether it will look harmoniously next to your cottage or house.
Tip! To keep within the budget allocated for these purposes, calculate in advance how many picket lines you need. And do not forget about the purchase of pillars, prozhilin and nails.
Preparatory work
It is necessary to determine where exactly and in what direction the fence will be installed. The site of the planned installation must be cleaned from the branches of trees, shrubs, weeds and debris.
Having finished with cleaning, we pass to a marking. Draw lines on the ground where our fence will pass. Further, in several places we drive pegs into the ground and stretch a rope between them.
Assembly design
First of all, we determine where the pillars will be installed. They are wooden, metal or concrete. They can also be laid out of brick (see photo).

The pillars can be brick
You can apply any of these types at your discretion. But we recommend using wood. They are more convenient to install.
In the selected places digging holes depth 60-80 cm. We install our supports there. Using the building level, align them.
With the help of stops fix the pillars in the pits in a strictly upright position. Next pour concrete. After three days, you can begin to mount the beams.
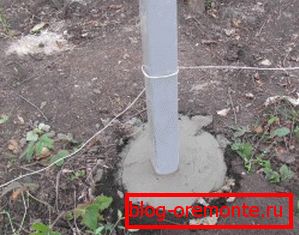
Fill the pillars with concrete
The beams are ordinary wooden beams. They are nailed to the posts. Or screwed screws.
Then go to nailing shtaketnika. First we fix the extreme strips. Then we stretch the thread between them. We will need it to ensure the straightness of the fence.
After that, we beat the rest of the workpiece. In order for the gaps between them to be equal, we put another one between the beaten and nailed bars. It will act as a kind of free-distance pattern.
Beating one board, take out the template and set it in front of the beaten bar. Next we put the next nail on the board. And we do it all the time.
When nailing the picket fence, we hammer one nail at the top, one at the bottom. If the slats are wide enough, you can score two nails each.
You can use and screws. You can clearly see this process on the video posted on our website.

We fix the picket
Having nailed all the boards, we proceed to the coloring. It will not only give the desired shade to the fence, but also protect it from the harmful effects of the environment.
Separately, it should be noted that there is a simpler way of installation. It is called sectional.
In this case, the fence is nailed to the beams lying on the ground. And already assembled section is nailed directly to the posts.
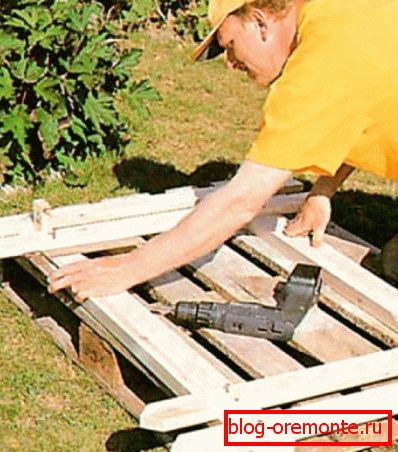
Assembly section
This is much faster than in the first case. In addition, you can purchase ready-made sections. Because of this, of course, the price of your fence will increase, but you will save time. Which option will be more profitable for you - you decide.