How to make a fence from a professional sheet: the correct
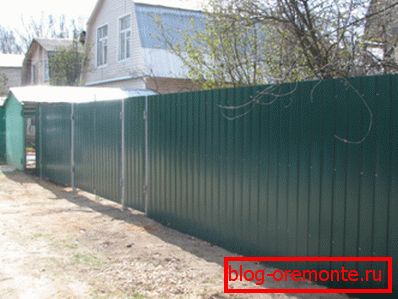
Fencing of profiled sheets
In fact, the professional sheet is a sheet of galvanized steel, with stiffening ribs that do not allow it to bend, to deform.
Today this material is very widely used in construction. In particular, it is usually used for cladding facades, roofing, as well as for cladding fences, gates and wickets.

Roof of the profiled sheet
Features of a professional flooring
Naturally, like any other material, professional sheets also have individual characteristics that must be taken into account during the planning of a project.
How good is the use of professional sheets for the device fence?
Let's see.
Advantages of professional sheets in quality of base material for installation of fences
Here you can highlight the following points:
- Very reasonable price of the sheets themselves. Without exaggeration, we can say that the purchase of this material is available to most people;
- High speed frame plating. No need to wait until something dries out, hardens, etc. Even a very large area can be sheathed in just a couple of days;
- Low weight material. This is a huge plus, as it does not require strong foundations, high load-bearing abilities from the supports (see also the article The Foundation for the Fence from a Professional Sheet - Recommendations and Reality). Yes, and the unloading of such sheets passes quickly due to their low weight;
- Large color range. And this is true - the assortment of colors and shades of professional sheets is so wide that it is possible to choose the material for any home or object.

Assortment of professional sheets
Now let's talk about the other side of the question, so agree that before you make a fence from a professional sheet, it is also extremely important to take into account the negative aspects.
Lack of professional sheets
Here you need to understand that the shortcomings are such only in a certain context, because, for example, for some people, the low weight of the sheets will seem like a minus, and in some situation it will be the other way around.
Therefore, consider not only the features of the materials, but also the nuances of the situation itself, the project. Somewhere one quality is required, but somewhere this same property will be superfluous, isn't it?
So, the disadvantages of the material as a base for mounting the fence include the following points:
- Not very high strength of the whole structure as a whole. If desired, attackers will be able to easily tear off the sheets from the frame. Therefore, if you need a fence in a house where you do not live permanently, and no one is watching the house, then you may think it makes sense to look at another technology;
- If there are no certain skills and experience, then with your own hands such a fence will still be quite difficult to assemble. But basically now it’s not about sheets, but about technology in general. After all, the elements of the frame must be interconnected by welding, but not everyone knows how. Of course, you can connect everything with bolts, but it will be an order of magnitude longer, and not so firmly. Sheets themselves fasten easily.
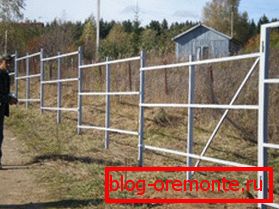
Fence frame example
Are the above points disadvantages? To decide only you.
Let us now consider how to make a fence from a professional sheet, and in what order everything is done.
Mounting the fence
We will assemble the construction on an ordinary metal frame from a square pipe, which will stand on metal supports (see also the article Building a corrugated fence with your own hands, the gardener's guide).
Tip: use steel pipes as supports, at least 2-3 mm. thick If the metal is thinner, it will not be a skeleton, but one name.
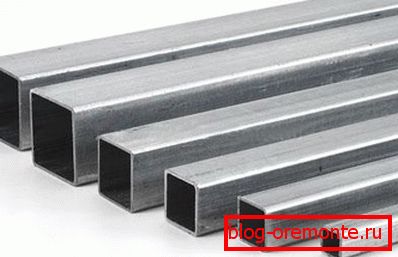
Square tube
And to begin everything, of course you need to markup, here is the instruction:
- we determine the place where the fence will stand, we drive in pegs in all corners;
- connect the pegs with a string.
Tip: use the strongest and most visible rope, otherwise during work you will constantly cling to it and tear it accordingly. This is in principle not scary, but, nevertheless, inconvenient, and time is wasted.
Now you need to determine the distance between the supports. In most cases, the gap between the pillars is from 2 to 2.5 meters. The distance, in principle, can be any, but not more than 3 meters, since the horizontal jumpers, most likely, will begin to sag.
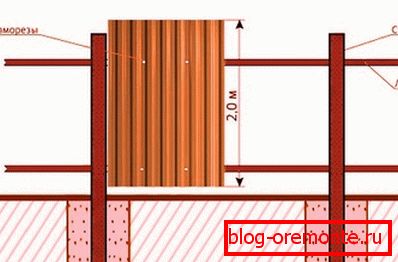
Standard Fence Design
Determined with distance - let it be, for example, 2 meters.
Now we need to mark the points where the supports will be located.
From the corner to the corner we measure a distance of 2 meters, then we will put the pillars. If it is impossible to make all the spans of 2 meters due to the length of the span, then just calculate the average value and arrange the columns on it.
Approached the digging of holes for the insertion of supports and their concreting. You can dig as a shovel, and the usual garden auger - that is available, so and use. The optimal depth of the pits for the pillars is not more than two meters in height - it is 50-60 centimeters.
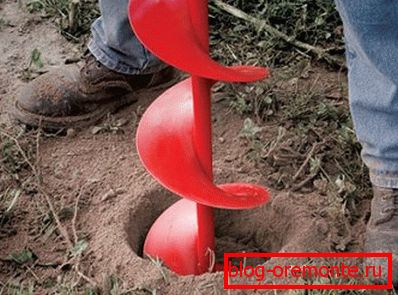
Photo of a garden boom
After the pits are ready, we drive racks into each of them, stretching the “beacon” between the corners — we will align the line of the future fence with it so that the zigzag is not obtained.
So, the racks are inserted, vertically aligned, prepare the concrete and fill all the pits.
Tip: for making concrete as a stone filler, it is best to use crushed stone, as it is inert. Expanded clay, brick battle - quickly collapse from moisture.
Now you need to wait until the concrete completely hardens, since if you continue to work right away, without waiting for the mixture to harden, there is a risk that the correct vertical supports will break.
If the concrete has stiffened, then it is possible to weld or fasten the horizontal bearing jumpers. It is on them that we will subsequently fasten the professional sheets.
But before attaching the sheets, something else needs to be done ...
It is important to protect the entire metal frame against corrosion. To do this, the metal must be cleaned with sandpaper, and then treated with a special primer and, if desired, painted in any color.
If everything is ready, then proceed to the last stage.
We take a tape measure, a pencil and a grinder, cut sheets, if necessary. Then we put them to the frame and with a drill we drill holes in the attachment points to the pipes. We remove sheets and drill at marked points, holes for bolts or screws in the frame.

Mounting sheets
In general, that's all. Now we attach the sheets, fasten them and admire the result!
Conclusion
We have briefly examined how the installation of a standard fence from professional sheets is carried out, and what special features exist here (see also the article How to build a fence from corrugated board with your own hands). If you want to get more information, then watch the video at the end of the article - it will not be over 100%.
Happy installation!