How to make a fence from a professional sheet: a review of
To date, the fence of the profiled sheet is a very popular technology. And indeed it is.
After all, the material has such a rare quality as versatility.
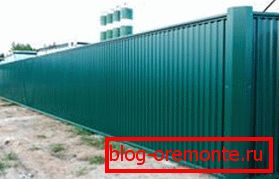
Photo fence professional sheet
It can be safely used for fencing:
- private and multi-storey houses;
- kindergartens and schools;
- government and sports facilities;
- and even building sites.

An example of a beautiful fence with a professional sheet
Let's look at the main, specific properties of corrugated board, and then we will get acquainted with the correct sequence of works.
Please note that the installation instructions below are suitable for general use. In your particular situation, perhaps there will be nuances because of which it will be entirely possible to depart from the general rules.
So, properties of a professional flooring.
Material Features
In fact, the professional sheet is a steel product coated with special compounds that protect it from corrosion. In addition, each sheet has stiffeners, which give it a unique appearance, as well as high strength.
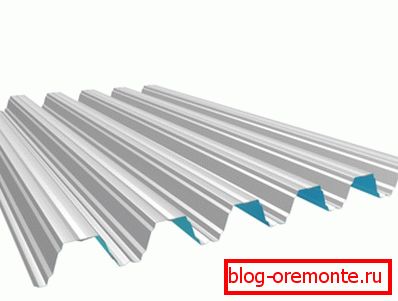
It looks like a professional sheet with stiffeners
At first we will sort advantages which barriers from a professional flooring possess.
- Long service life. This quality is possible due to the fact that the material is not afraid of water and temperature changes.
- Pretty good level of resistance to mechanical stress. The surface of the sheet, of course, can be scratched and dents can be left, but on the whole it will be hard to ruin it or even fill it altogether;
- Possibility of quick and relatively easy installation. And this quality is especially important in the case when it is planned to do the fence with your own hands, without attracting hired brigades. Here, of course, there are nuances (for example, it is desirable to have skills of working with a welding machine), but in principle, you can “get around” if you wish;
- The price of any, even large and complex construction of a profiled sheet, will be quite reasonable due to the relatively low cost of the sheets themselves and all related materials. And due to the fact that the sheets weigh little, you do not need a strong foundation for the fence from the profiled sheet. By the way, the low estimate for such a fence is often the main criterion for choosing the technology of building fences;
- Due to the large assortment of material in the stores, it is possible to choose any desired color, and this, you see, is a very weighty factor.
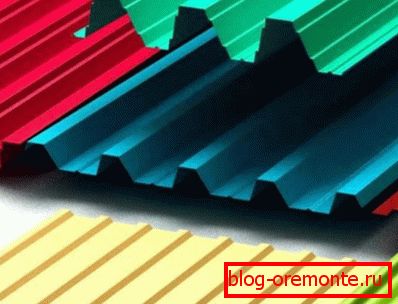
Possible colors of sheets
Advice: it is not worth saving and buying a professional flooring unpainted in factory conditions, with the aim of painting it yourself. This idea is meaningless, because the material is very smooth and the paint, if it lies on its surface, will not last long.
Now let's talk about the shortcomings, which has a fence of corrugated board.
Here, it is probably worth highlighting just a couple of moments.
- The material is not suitable in the case when the appearance, style of the house or the fenced building in general does not combine with the type of sheeting. And it happens. For example, if a country house is made of gorgeous stone, everything in it is massive and it is clear that only very expensive materials were used, then the fence from the profiled sheet will look somewhat ridiculous. In this case it is better to build fences made of stone or forged metal - this will be more solid.

An example of a house for which the fence of corrugated is clearly not suitable
- The main disadvantage of such a fence (as well as any in general) is its improper installation. Many people do not do everything efficiently and do not take into account important points, and then “suddenly” it turns out that the fence glanced, for example, and “the material is to blame.
Here, so that everything goes well, and there were no “jambs”, let's consider the sequence in which the installation of such fences is performed and what is important to pay attention to.
But first you need to take care of something.
What you need to work
We remind you that we will consider the general principle of assembly and will join the metal together by welding. Of course, you can do everything manually, for example, use a clamping profile for fencing and other similar elements, but it will be long.
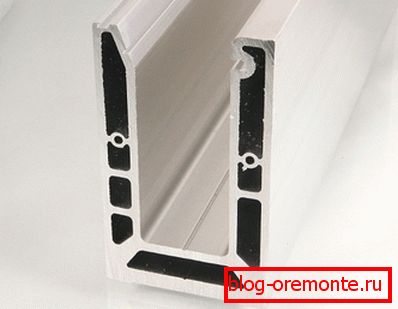
Clamping profile
We will not enumerate the equipment necessary for welding, since it will be easier not to learn this on our own, but simply at a certain stage to hire a welder - he will cope with such work in just a few hours.
So, the standard "gentleman's set."
Tool
Prepare this:
- grinder, drill and screwdriver;
- rule with level, tape measure and pencil;
- upholstery cord with paint and construction thread;
- shovel, bath for preparing a solution and a bucket.
By the way, you can save money and not buy a power tool, but to rent it - you won't need it for a long time. Because the device of the fence from the professional sheet is a matter of several days.
Now about what material will be required except the sheeting itself.
Consumables
For a standard installation, you will need the following materials:
- profile pipes for supports and lintels;

Profile tube
- sand, cement and crushed stone for pillar foundations;
- various screws, drills, bolts and other hardware - most likely all will come in handy.
In general, if all this is, then you can start work.
Mounting the fence
- Determine the perimeter, the line of the future fencing and all its corners.
- In all corners we dig holes 50–70 cm deep.
- Prepare the angular support of the desired size and insert them into the pits, align vertically and fill with concrete.
Now you need to wait a bit and do not touch the installed pillars of the fence before the concrete hardens. But in order not to waste time in vain, you can insert small pegs into the solution directly near the supports, pull a thread between them, and then mark along the place where the intermediate supports will be located.
As a rule, the width of each span can be from 150 to 300 centimeters. If this distance is larger, horizontal jumpers will be bent..
If all the markings have been done, then make holes for all the pillars, and when the foundation of the corner supports has dried, you can stretch the thread between the pipes (on several levels: in the middle, below and above the supports) and, focusing on its position, install and fix all the intermediate posts.
When the concrete dries under all supports, you can call the welder - let him weld the horizontal lintels and when this is done, all that remains is to screw the professional flooring itself.
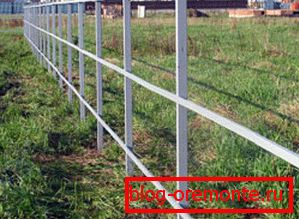
Frame example
In general, the installation is complete.
Conclusion
We examined the good and the bad of the corrugated board, and also got acquainted with the approximate sequence of work. If you want to learn more useful, be sure to check out the video in this article!
We wish you a successful installation!