How to make a carved fence of wood with your own hands: what
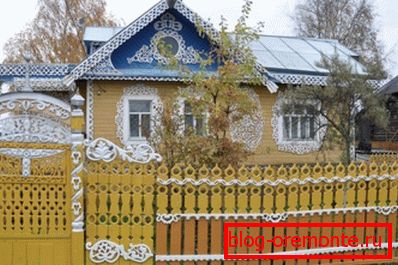
Photo carved fence
Probably, almost every owner of a private house wants to make a beautiful and durable fence, but at the same time it is not too expensive. And in most cases, fences of corrugated board or so-called “eurofences” appear around the perimeter of the territory. And such fences as forged or made of natural stone, as a rule, are simply not affordable for many.
And here it turns out that you have to sacrifice beauty because of the limited budget possibilities. Of course, decking or concrete slab with patterns looks pretty good, but you can't call fences made of these materials very beautiful after all.
But why not pay attention to the rather simple, inexpensive and most importantly very beautiful technology of fencing devices - carved wooden fences?
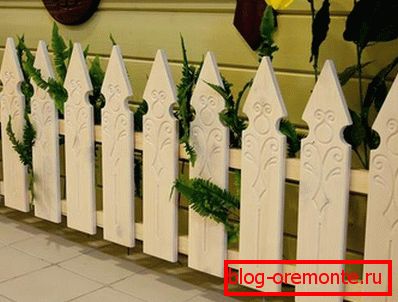
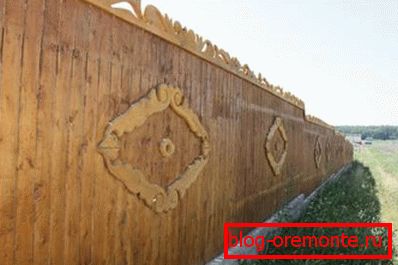
An example of a simple but beautiful carved fencing
After all, for the construction of such a fence of money you really need a little, since wood is not yet an expensive material. Yes, and the assembly technology is very simple, the threaded fence can be put on its own in just a few days without the use of an expensive power tool.
Of course, in order for such a wooden fence to serve for a long time, you need to know about some secrets and understand what is being done and in what sequence. But we'll talk about this a little later, but first we will look at how wood carving is performed directly - after all, this is the most important moment, since it is the carving that gives the design beauty and originality.
So, let's start the review.
Ways of carving
There are several basic methods of carving on the tree, with which you can create beautiful patterns on the walls:
- Geometric thread. This is a rather complicated and painstaking work, which consists in the fact that with the help of chisels and special knives, a drawing is created on the surface of the wood, the elements of which consist of geometric shapes. The photo below shows an example of such an unusual fence.
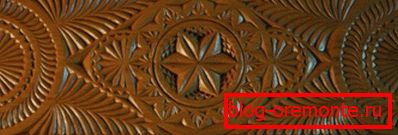
Geometric wood carving technique
- Contour threads. This is also exclusively handmade - a picture is drawn with a pencil on the plane of a wooden product, for example, it can be leaves, birds, and in principle anything, and then along both sides of the lines drawn, recesses are cut with a chisel. That is, in fact, a carved fence made in this way will look not only beautiful, but also volumetric. Moreover, to enhance the effect, you can paint the recesses in one color, and all the projections in another. Decor options here are actually a lot.
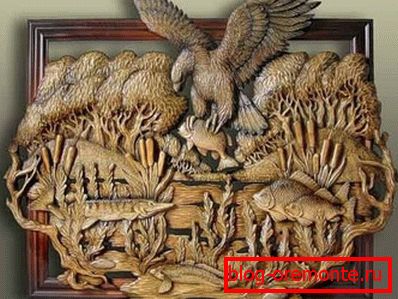
Drawing on a wooden surface made in the contour way
- Lace carving. In principle, this is the easiest technique for the implementation of their own hands, since here the patterns and drawings are made quickly and even some automation of the process is possible (due to the possibility of using power tools). The essence of the method is that a wooden element is taken, a pattern is drawn on its surface, and then a hole is drilled in some place of the line, into which a jigsaw is inserted. And already a jigsaw cut pattern on the contour of the picture.

An example of the fence made with the help of lace technique of woodcarving
Now let's see how to apply the above described techniques for decorating wooden fences.
But in reality there is nothing complicated.
The first option is to carve directly on the fence itself, the boards, that is, on the future trim of the fence. It turns out that the pattern is made on the boards one way or another, and after that they are mounted on the frame.
The second option is when the skin on the fence is already there, and fragments with thread are fastened directly to it, that is, quite simply, you make a pattern on small planks, and then nail them to the ready fence.
An example of how threaded fragments are attached to a finished, conventional fence.
As you can see, everything is really quite simple, and most importantly the price of such decor is literally accessible to everyone.
Note! Before painting the pattern fragments, all wood should be treated with an antiseptic. This is a special and very effective tool that is absorbed into the structure of the tree and does not allow it to rot.

Wood preservative
In principle, we have familiarized with the techniques of carving, now we will briefly review what the sequence of works should be when installing the fence.
Mounting construction
To work, in addition to the jigsaw and chisel to create a pattern, you need the most simple and standard tools and materials:
- hacksaw for wood;
- rule with level;
- hammer and nails;
- shovel and garden drill for digging holes for supports;
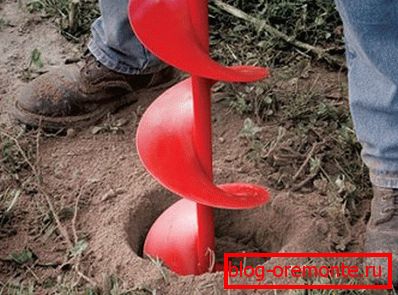
The principle of the garden drill
- tape measure, pencil, construction thread;
- bar for supports and horizontal lintels;
- buckets and trough for the preparation of the solution;
- crushed stone, sand and cement.
Even with such an elementary "gentleman's set" you can make a high-quality fence.
We begin the work, before you a brief instruction.
Installation of supports and installation of jumpers
- We determine the line, the perimeter of the future fence and place wooden pegs in the corners.
- We stretch the thread between them.
- We put points along the thread, pegs for intermediate pillars of the fence;
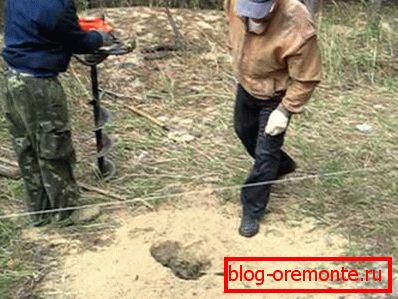
Installation of intermediate fence posts
- We dig holes in the place of pegs with a depth of 60 or 70 centimeters (this is if the height of the supports will be about two meters);
- We process the corner supports (or all at once) with an antiseptic, insert them into the pits, level and fill with concrete.
- When the foundation gains strength and hardens, you can stretch the thread between the corner posts (in the lower part, in the upper and in the middle).
- Focusing on the threads, we put in the pits and adjust all intermediate pillars and fill them with concrete.
Tip: Wrap the bottom of the pillars with ruberoid to prevent water from penetrating the tree. As a rule, with this approach, carved fences are very long.
Now you need to wait until all the concrete completely hardens and after that you can proceed to the next stage - the installation of jumpers.
In fact, the jumpers - this is a normal timber, which is mounted between the supports in a horizontal position. They, as it were, bind the pillars between themselves, impart rigidity to the structure, and it is to the bridges that the casing of the fence is attached.
Fix the jumpers to the posts as you like - with staples, nails or even screws.
After the frame is ready, it remains to nail the boards to it.
Frame casing
Boards are attached to the lintels, as a rule, vertically, and the methods of joining here are classic - in most cases, they are nails or self-tapping screws.
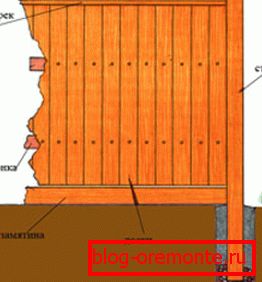
The scheme of the wooden fence
In principle, as we have said, carved elements can be made directly on the picket fence, and can be attached to the casing as a last resort.
So do here as you wish, focusing on the conceived design.
Let's sum up.
Conclusion
We got acquainted with how carved fences are usually made and how to install them. If you want to learn more, we recommend viewing the video for this article - there is interesting and useful information.
Happy installation!