Gates from the profiled sheet: 2 completed projects
This article is about how to make a gate from a professional sheet with your own hands. In it, I will talk about two projects implemented in my house and in the house of my close relatives. In addition, I will touch on a couple of technical problems that may arise during the implementation of the project, and will prompt their solutions. So let's get started.
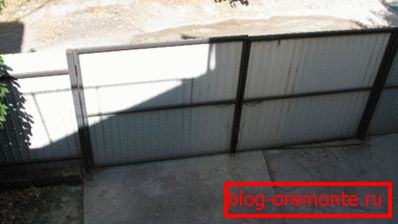
Entrance gate in the courtyard of my house: a general view from the balcony.
My project
Before me was the task to fence a small front yard of the house and organize the most convenient entrance and entry to it. As a way to accomplish this task, a fence was chosen from a profiled sheet on a welded frame made of a professional pipe with a swing gate and a wicket.
Why professional sheet
Here are the arguments that guided me in choosing the material.
- Thanks to the zinc coating and polymer layer, the professional sheet is quite durable, surpassing in this parameter any wooden fence with a wooden gate;
- It is significantly cheaper than a concrete eurofence or stone fence. with all-welded gate from rods or steel sheet (especially with forging);
- It requires almost no maintenance.. Care is reduced to the periodic lubrication of canopies and bolts. I use used engine oil for this purpose, which reduces costs to zero;
- And the fence, and the gate, and the gate is completely impenetrable to the views of others. Exposing my yard for everyone to see, with all my sympathy for the neighbors, was not in my plans;
- To overcome the fence of the professional sheet - a rather non-trivial task thanks to its sharp edges.

The sharp edges of the professional sheet protruding beyond the frame will prevent the attacker from overcoming it.
By the way: at the door leaves the frame is surrounded by a profile sheet around the perimeter, so that it is much easier to force the gate itself.
Dimensions
Swing gates have a total width of 4 meters, which is enough for a car at an angle. Each flap, respectively, has a two-meter width.
The height of the fence - 2 meters. The width of the gate is 90 cm. It allows you to carry a carriage without any inconvenience, to drive into the yard by bicycle or scooter.
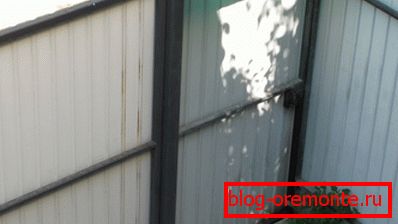
Swing gate near the gate.
Main nodes
Since the installation of the fence was done more than three years ago, I do not have the opportunity to upload photos showing the sequence of actions for its creation and installation. However, I will try to compensate for this defect by taking pictures of all the main components of the structure.
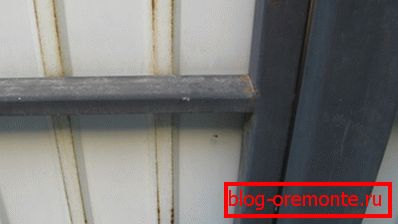
The frame of the gate.
The frame of the valves is made of proftruby 40x40 mm in size. The jumper in the middle does not perform the bearing functions and is needed only to ensure the horizontal rigidity of the structure (simply speaking, so that the sash does not bend by the wind). Its size is 20x40.
Note: the sash will not sag even without stiffeners. Unlike the board upholstery, the professional sheet in itself provides rigidity in the vertical plane.
Pillar.
Supporting pillars - from professional pipe section 80x80. This section eliminates the deformation at any reasonable load and with strong gusts of wind (winter in Sevastopol is the season of winds).

The upper end of the post.
From above, the pillars are covered with 3 mm thick welded plates. The plugs eliminate the accumulation of water inside the column and its accelerated corrosion. The vertical uprights of the frame of the sash are open from the bottom and from the top: the water inside does not stay in the pipe.

The handle on the sash gate.
The handles are made of ordinary smooth 12 mm reinforcement. The design was designed with a tight budget limit, immediately after the move and was purely functional: beauty had to be sacrificed for saving.
The pillar on which the right wing of the gate and the gate are supported is concreted in the ground.
Concreting is performed as follows:
- Dig or drill a hole at least a meter deep;
- The pillar is installed strictly by a plumb line and covered with rubble;
- Crushed ramming with continuous control of the position of the pillar;
- The pit is filled with a liquid cement-sand mortar in a ratio of 1: 1.5 - 1: 2. A large amount of binder compensates for the excess water and the inevitable filtration of the cement milk into the soil.
In addition: this instruction will allow you to quickly start using the gate - a strong solution seizes faster. When the ratio of sand and cement M400 1: 1, you can open the gate the next day, a more massive door leaf - after 3 days.
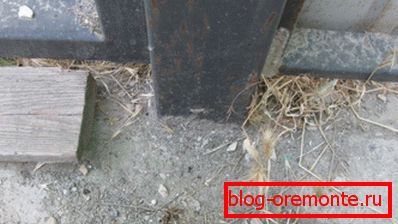
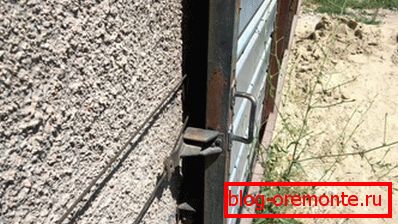
The second pillar is mounted on the anchor.
The second pillar with the left wing hung on it fell on a slab covering the cesspool.
The mounting method was drawn by itself:
- A steel platform 4 mm thick is welded to the end of the pipe;
- Four anchors measuring 100x12 mm were used for fastening.
This method of installation is attractive because it allows you to use the sash immediately after installation, without pausing for the mortar to set.
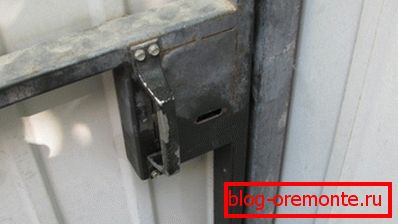
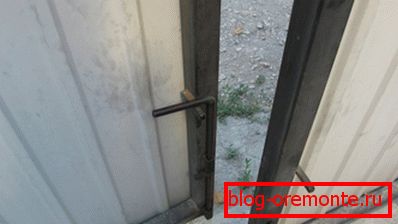
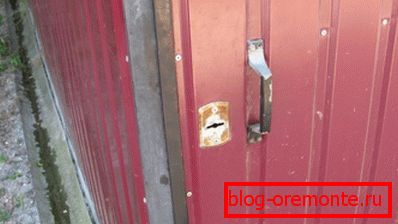
Lock inset.
In the gate installed mortise flat lock under dvuhborodochny key. The box protects it from water in rain and snow. Alas, it does not completely protect: in rare frosts in the Crimea, the mechanism froze a couple of times and needed warming.
The handle is installed directly on the lock box and secured with metal screws.
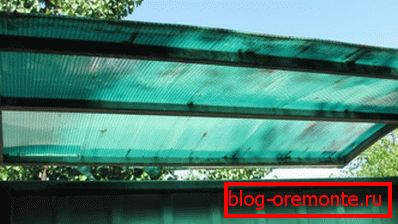
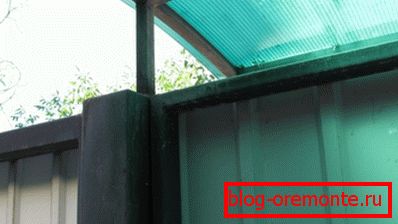
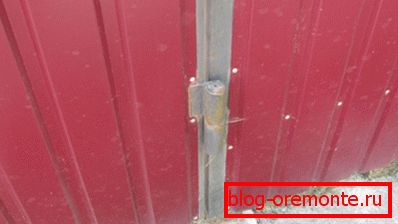
Canopy over the gate.
From above, the lock and the gate itself are protected by a compact (50 cm) canopy of cellular polycarbonate on a welded frame made of 20x20 mm profiled pipe. Alas, the material was not chosen very well: the lack of full protection from ultraviolet radiation led to the fact that in the third year of service the polycarbonate began to deteriorate.
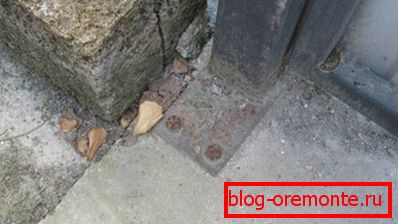
The lower bolts of the valves.
Bolts are made of the same smooth 12-millimeter reinforcement. The stops, allowing to fix open bolts in the top position - from a square bar of 10х10 mm in size. The hinges are made of a three-millimeter steel sheet bent in the shape of the letter “P”.
Curiously, since with the shutters closed, the deadbolts are located above the slab covering the cesspool, for them a couple of holes were simply drilled in the concrete.
Top bolt.
The upper bolt connects the doors of the gate between themselves and closes only in a strong wind. It eliminates the rattling of the valves when gusts.
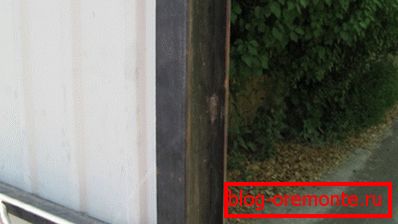
Corner on the outer sash.
Pressed on the frame of the outer door leaf corner closes the gap between the doors from prying eyes outside.
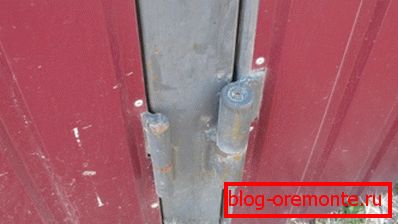
Canopy gate leaf.
The fold under the professional sheet weighs a little; however, massive sheds machined from a thick bar on a lathe are still preferable to her. The canopies are welded to the full height with the subsequent cleaning of the seams. Mounting on several tacks is unacceptable here: it collapses in one or two seasons.
The gate opens to the outside.
An important point, which seems to be self-evident: in the small courtyard the gate doors should open outwards. Even on a narrow street. Otherwise, when the sash has pulled in, the machine simply cannot be closed.
I focus on this attention only because initially my project drawing included inward-opening sash, which would create a minimum of interference with vehicles passing down the street. How such a scheme will work if you have your own car, it did not come to me right away.

Fastening extreme rack to the stone wall.
The extreme fence post is fixed to a stone wall that borders my yard in an extremely simple and exceptionally reliable way:
- Holes are drilled in the wall by a 10 mm drill;
- Then they are expanded to 11 mm with a concrete drill. Alas, boers of such diameter are not on sale;
- Rods of 12-millimeter smooth reinforcement, sharpened on one side, are hammered into the holes;
- The rods are welded to the extreme front of the fence frame.
Hint: it is much easier to fasten a rack to a smooth vertical wall with two to four anchor bolts.
Wicket canopy.
For the gate used the same canopy for welding, as for the gate, but smaller.
Cover plate under the key.
The standard pad from the lock is fastened on top of a profiled sheet with a pair of rivets - the same ones that fastened the fence and gate trim.
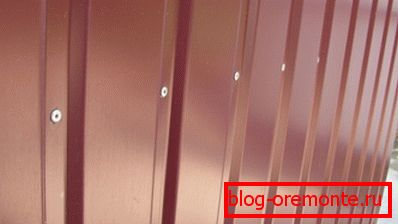
Professional sheet fastening.
In my case, not metal screws, but rivets were chosen for fastening the profiled sheet to the frame. An important point: you need to fix every wave. Otherwise, in windy weather sheet will rattle.
For narrow street
The length of the fence did not allow me to install a sliding gate. Meanwhile, for a narrow street, this is an ideal solution: in the open position, the sash (or sash) does not interfere with traffic either inside or outside the courtyard.
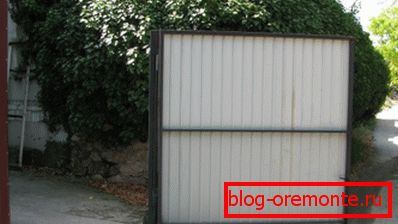
Here is a sample of such a construction, implemented (albeit rather clumsily) in the house next to me.

Retractable doors from the profiled sheet: a general view.
The width of the single sash is 5.5 meters. With a small margin, it bridges the gap in the stone fence.
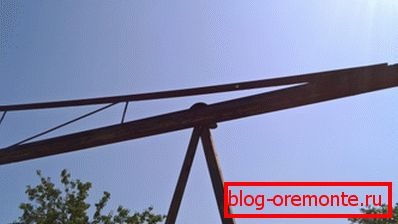
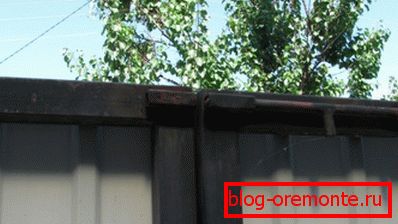
View of the suspension leaf from the street.
The weight of the sash is distributed over two suspensions with rollers that rest on the truss above the opening.
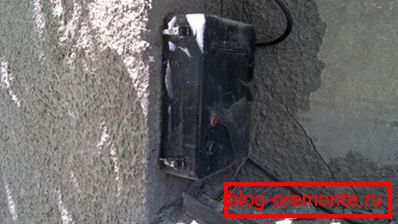
Remote Control.
The gate is electrified and opens with a remote control. It has only two buttons; no limit switches are provided.
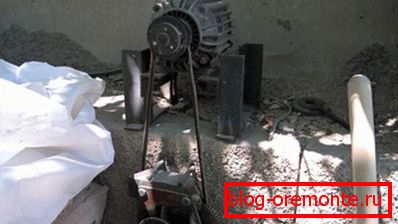
Drive sash.
Motor power - 2 kilowatts. Rotation on the pulley, winding on a steel cable to drive the sash, is transmitted by a belt.
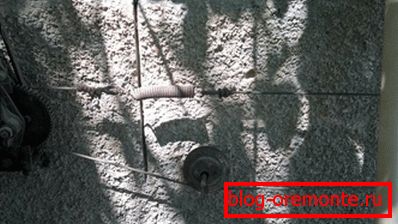
Tension knot.
To eliminate sagging cable, the owner provided him with a stiff spring and an additional support roller.
Fastening the cable to the sliding gate.
At the point of attachment to the sash, the cable is pulled together with a pair of steel plates 4 mm thick and an ordinary bolt.

Suspension: inside view.
Each suspension is equipped with a pair of rollers. Together they eliminate any displacement of the sash relative to the guide.

Lower support roller.
The bottom roller does not allow the sash to deviate from the vertical position towards the wall and rest against the edge of the opening. Deviation from the vertical position in the opposite direction excludes the gate's own weight.
Technical problems
If no welding
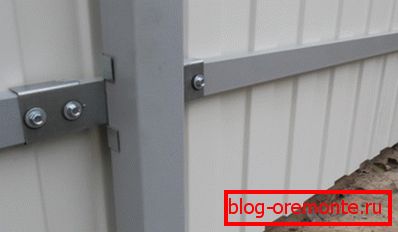
I shall immediately state: a solid gate on a metal frame with professional sheeting cannot be made without welding. And the frame, and suspensions are attached only and exclusively with its help. But the frame of the fence is easily assembled on galvanized fasteners using screws or bolts.
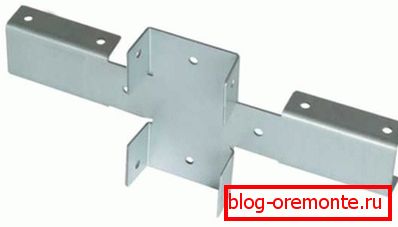
X-bracket designed for mounting the lag.

Fastening logs to the pole on the screws.
Ready plot fence: inside view.
Tip: for mounting use screws with rubber press washers. They will not allow fasteners to get out of vibration due to wind gusts. An alternative solution is to mount on countersunk head bolts and lock nuts.
Make me beautiful
Wrought iron gates with a professional sheet look much more spectacular than the utilitarian construction of a professional pipe. However, manual art forging does not differ in cheapness: the minimum cost of custom-made gates is about 80,000 rubles.
Compromise will be the manufacture of the gates of the pipe with forged elements welded into the frame.

Forged decorations for fences, gates and fences.
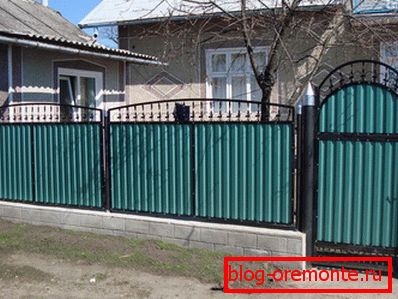
In the photo - the gate with the design of wrought iron details.
Conclusion
I hope that my humble experience will help the respected reader in creating their own project. You can learn more about how gates can be made from a profiled sheet by viewing the video in this article. I will appreciate your additions and comments. Successes!