Garden wickets and gates - how to make them yourself
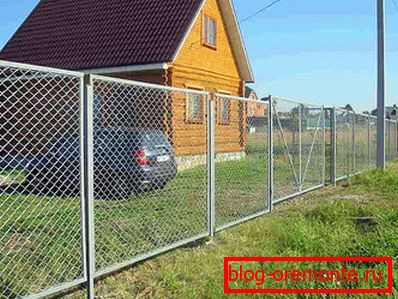
Garden gate and gates from a grid of the chain-link are the most acceptable option in terms of price and quality.
Each owner of a country house or garden plot wants to protect their possessions with a reliable fence. And here there is a fairly large number of options. The choice of modern materials and designs of fences is so great that you can get lost in such abundance.
If you choose a garden fence and want it to be reliable and inexpensive, as well as easy to install, then the netting chain link would be the best option, since this material has a whole set of advantages over its counterparts and is an excellent choice for garden fencing.
About garden fences
If we are talking about a garden fence, then most often the owner wants to build a transparent fence that will not cast a shadow on the plants. Therefore, many stop on the fence of the chain-link mesh. Having built a reliable frame for such a fence, you can easily make a gate and gate with your own hands, while the price of such products does not “hit the wallet”.
Some install a sectional garage door with a wicket door on such a fence, but they look out of place here, and it would be much cheaper to make them out of a chain-link mounted on a frame. Consider how to build such a fence with a gate and a wicket.
Material
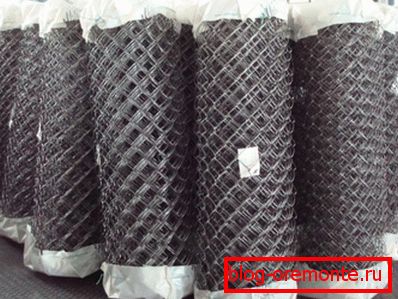
Rolled mesh chain-link.
Materials for the production of mesh fence stands metal profile and rolled mesh chain-link (pictured above). Naturally, there are sectional mesh fences, but why pay for ready-made sections, if you can easily make them yourself. Our fence option is the most economical, allowing you to get a neat and reliable garden fence.
In order to choose a quality grid, there is a simple instruction:
- The smaller the cell, the stronger the fence.
- The quality of the material should be determined by weight. The heavier the roll, the better the material. And if the roll is too light, it means that the manufacturer decided to save on something and it is better to refuse to purchase such material.
- A roll of standard width of 1.5 meters will be enough for a good garden fence. In length, this canvas can reach 10-20 meters.
Tip! Purchase only a network that has a zinc coating. The thicker the layer of this coating - the more durable is the fence. Consult on this issue with the seller.
Speaking of the metal profile, here you need two types of material:
- Square tube size 4 to 4 cm for the installation of supports.
- Pipe 4 by 2 cm for arranging the lag and creating a gate with a gate.
Installation
How to make a gate? Read the article to the end and everything will become clear to you.
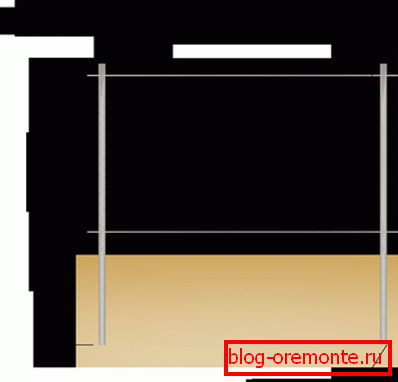
Schematic image of the installation of the fence of the chain-link.
Making the gate
- The width of the gate will be 98 cm, so the Bulgarian will cut off two pieces of the profile of 98 cm each. These will be the upper and lower transverse profiles of the gate.
- To strengthen the structure in the middle should also provide a transverse profile, the length of which is equal to 90 cm.
- Cut out the side parts of the gate with a length of 142 cm.
- We clean the welds, if the profiles were painted.
- We lay out the structure on a flat surface and weld it by spot welding.
- To give strength, we weld the corners to the corners of the gate. As a result, you should have such a construction, as in the photo below.
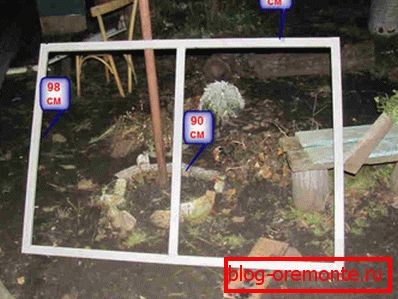
Garden gate with his own hands - ready frame.
- The next stage of work - welding loops. It is best to use garage hinges designed for the gate.
- Disconnect the hinges, so that one part is welded to the gate, and the other to the support pole.
Tip! So that during welding the hinge does not twist, you should fasten them with screws to the profile, and then weld.
- Grind the seams with a grinding wheel and paint the gate with enamel against rust.
- Now we will stretch the grid on our frame. To do this, you should measure 1 meter of the canvas and unscrew the wire from the net in order to detach the piece from the roll. We attach the net to the frame and fix it on it using wire or plastic clips (in the photo below).
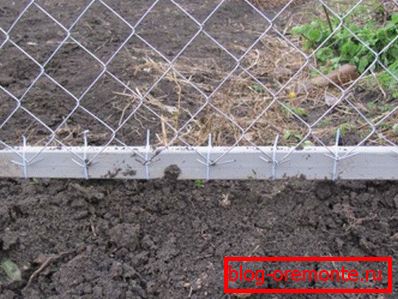
Fastening the mesh with plastic clamps.
- Repeat the same steps when creating the gate, because garden wickets differ from them only in size.
Now you can proceed to the installation of supports and installation of sections of the fence.
Preparatory stage
At this stage, you should mark the area for the installation of support pillars. Here we look at not only the stages of the production of the gate, but also the features of the construction of the mesh fence.
- Between those columns where the gate will be located, it is enough to provide a distance of 1 m. It is better to make the gate spacious, 3-3.6 meters wide.
- Experts recommend to follow the step between the fence posts of 2-2.5 meters, but we are dealing with a light construction, and therefore this distance can be increased to 3 meters in order to save time and materials.
- The frame for the fence can be either welded or bonded with bolts. For the frame, we will choose a simpler bolting, and therefore you should pre-drill holes in the posts for fixing the log.
Tip! Movable elements of the construction - the gate and the gate should be welded, as the bolt fastening is loosened over time.
Only one section will have two lags: upper and lower. Accordingly, the upper hole is drilled, stepping 2 cm from the edge, and the lower one is indented 75 cm (since the post will go 70 cm to the ground).
- Holes should also be drilled at both ends.
Pillar installation

Concrete pole.
- Dig holes 70 cm deep.
- Install a pillar in the pit, placing it vertically on a level.
- Fix the pole with wooden supports.
- Fill the pit with cement solution.
- Within three days, the cement should take, after which you can continue to work.
Installation lag
- Lags are attached to the posts by means of bolts below and above.
- Horizontal lag is set through the building level.
Installation сетки
- Empty the roll from the wrapping paper and unwind the grid 1 meter.
- Lean the net against the first pole, firmly secured in several places with aluminum wire.
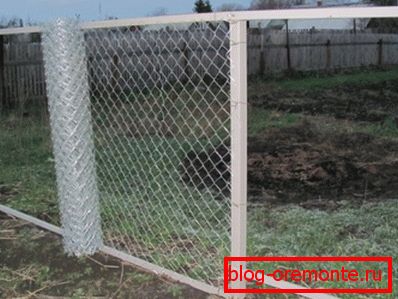
Unwind the roll, well pulling the net.
- Start unwinding the roll. For this work, it is desirable to have an assistant. While one person holds the roll, the second secures the canvas on horizontal lags.
- It is possible to fasten the net in two ways: either by pulling the wire through 1 cell, like a stitch when sewing, or to use plastic clips for electrical wires for this purpose. In the same way we fix the grid on a vertical support.
Conclusion
As you can see, there is nothing difficult in such constructions and it will not be difficult for even a beginner to build them yourself. Do not forget to watch the video in this article to get more information about the construction of garden fences.