Forged wickets and gates: samples and doing it yourself
No private house or cottage can do without a gate and gate - the first is used to enter the courtyard, the second for the entry of cars. Some owners prefer to use the gate as their main entrance.
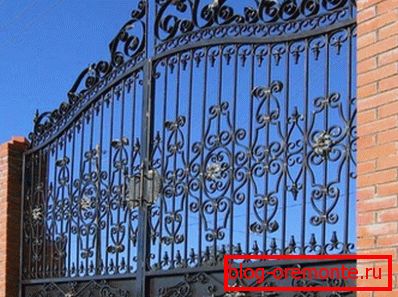
Most often forged wicket and gates are made of metal and decorated with patterns of iron rods and plates.
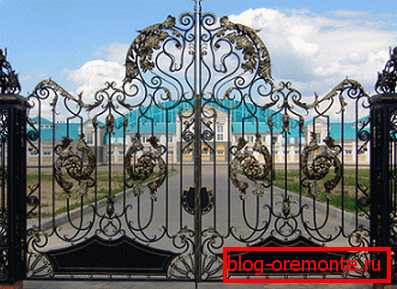
Carved patterns on metal pillars
Any forged entrance group consists of certain details:
- Installation part - metal elements, which are used for fixing support pillars and doors.
- Frame - The basis of the structure, which determines the basic shape and rigidity of the structure.
- Canopies - the element that is the connecting between the installation profile and the door.
- Latch or lock - an element that allows to prohibit the opening of the gate from the outside.
- Patterns - forged metal elements that not only act as decorations, but also support the rigidity of the structure.
If desired, and a wealth of experience in working with metal, you can make forged gates and wickets with your own hands according to sketches or according to an arbitrary design. It should be remembered about the constant vibration of the gate with a wicket and their great weight.
Therefore, it is important that the design is hung on solid pillars.
Note! When using brick pillars, the classic size of one and a half bricks may not be enough - it is better to use a brickwork in two bricks, otherwise the pillars will be shaken quickly.
The quality of the metal pillars depends on the depth of penetration, the strength of the concrete and the form (Learn also how to concrete the pillars for the fence). Metal pipes vibrate more - less square vibration, and in particular a rectangular section.
Installation part
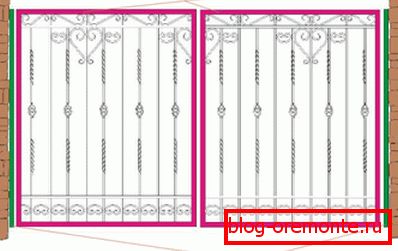
Photo of construction and scheme of elements
Frame ворот сложно прикрепить напрямую к кирпичному столбу, поэтому используется промежуточное звено – установочный металл. Представляет собой металлический профиль, скрепленный с основанием кирпичного столба, на который устанавливаются навесы, а в последствие навешиваются дверцы.
The installation metal becomes its place in the process of laying the pillar, and to perform this step, the instruction provides the following algorithm:
- The metal profile is cut to the required dimensions. You need 4 pieces of the profile (for the gate, for the gate - 8) of such a size that when fastened to the metal base of the pole, 2-4 cm of the profile remain outside. You also need a piece equal to the size of the height of the frame - with the gate device - 2 pieces, gates - 1.
- When laying the pole, the 4 short parts are attached to the metal base by welding and lined with brick. Required bricks falling on embedded parts, cut grinder.
- When the column is ready and gained the necessary strength (from 2 to 4 days to a week depending on the weather), a long profile is attached to the mortgages by means of welding.
Tip! At the time of welding, close the brick pillar with tin - otherwise the brick will turn black from sparks.
- Welds are cleaned with a grinder (circles - on metal, then with sandpaper).
Frame
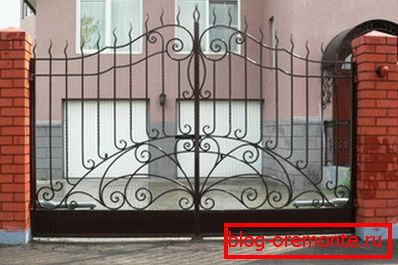
Swing gates on brick pillars
Any wrought-iron gates and wicket doors are complete without basic rigid construction.
The classic form of the frame is a rectangle consisting of 4 parts of a metal profile. Such a form looks more original when the side profiles and the bottom plate are even and the top is carved.
Exclusive designs imply that only the bottom of the frame is used as flat profiles, the rest are carved or patterns.
To clearly understand the difference between the options described - see samples of forged gates and gates in the illustrations.
The classical basis is carried out on the following technology:
- Metal profiles (lengths - individually according to measurements) are folded on a flat surface in a square or rectangle.
- The ends are slightly welded so that the structure does not “walk”.
- Alignment is performed, a perfectly even form is achieved.
- Final durable welding is carried out.
- Welds are cleaned by the grinder.
The basis of the frame after these manipulations is ready, but in order to later install the structure in place, you need to attach canopies to the frame.
Canopies
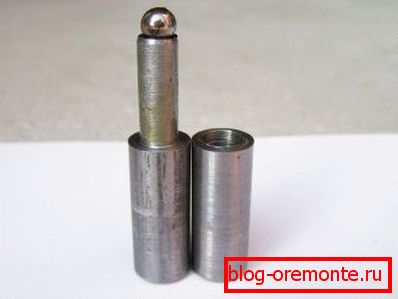
Point canopies
The classic version of the canopies consists of two parts - the first is equipped with a pin, the second - with a groove.
This part is installed in this way:
- Half canopies, equipped with a pin, are welded to the vertical profiles of the frame.
- The other half, equipped with a groove, is similarly mounted on the mounting part.
- Welds are cleaned.
Note! It is better to install canopies on parts before they are fastened (on the frame and on the installation part until they are fixed to the main place) - when welding locally, brick columns can be damaged.
Particular attention should be paid to the size - both parts of the sheds should be located at the same height, otherwise the entrance group will hang crookedly. It is better to first fix the canopy on the installation metal, then measure the dimensions and transfer them to the frame, the cost of the error can cost all the work.
Patterns
Patterns из прутов и пластин
To create patterns used conventional fittings, it is better to use a sleek profile. Patterns of square section fittings look even nicer (see also the article Beautiful Patterns on Fences).
The beginning of the creation of any pattern consists in drawing it. It is desirable to strictly observe the scale, in order to find out the necessary length of the patterned reinforcement.
The simplest scheme for creating patterns:
- The armature is cut to the required dimensions with the help of the grinder.
- The rods are heated to the scarlet state in the hearth or gas burner. The fastest and most convenient option is to use a gas horn.
- With the help of various devices, the bars are given the desired shape.
To have an idea of the variety of forms of patterns, pay attention to the sketches of forged gates and gates - you can draw your favorites on your own sketch.
For self-creation of patterns for forged gates and wickets, special devices are used:
- Squeezing the ends of the rod - an “eccentric” machine is used, consisting of two rollers between which the reinforcement is inserted.
- The goose foot pattern is performed on the ribbed part of the same machine - the rod is inserted between the rollers and the reinforcement takes on a ribbed shape.
- The bending of the rods is carried out on the machine “snail” - the device is designed to bend the reinforcement to a cold one, but by heating the metal it is possible to achieve a more even pattern.
- The torsion machine is used to tighten the rods around its axis — the armature is clamped at one end, and the other is inserted into the twisting part.
For fastening parts it is more profitable to use clamps - thin strips of metal of small width. Fastening patterns to the frame - welding, followed by careful cleaning of the seams.
Finally
The self-made creation of forged structures is a serious hard work. For example, even large garage sectional doors with a wicket are easier to make than wrought iron.
But, believe me, the result of the works will amaze you with beauty, and will remind you for a long time about the fascinating creation of a structure (see also the article Beautiful wickets and original gates). In the presented video in this article you will find additional information on this topic.