Experience and practice how to paint your own eurofence
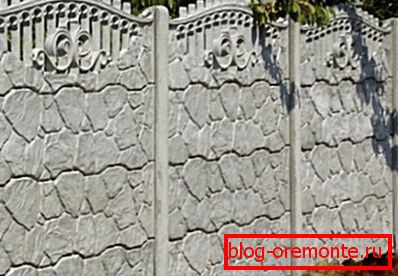
The photo shows an example of an eurofence as it is, from the manufacturer
Actually, what we have after the installation of the eurofence is a composing concrete structure. Not anything not trimmed has the usual gray color. Not every owner is satisfied with this appearance. But it does not matter, such designs are perfectly amenable to the processing and application of decor. So let's see together what the painting of the eurofence is with your own hands. What materials to use and how to do it in normal home conditions.
What you need to know before starting work
For a start, I want to decide what this eurofence includes. As a rule, it is a type-setting concrete structure, made using forms for eurofences. Easy to install. Consists of a set of plates that have a different pattern. The assembled has a very aesthetic and original look.
Basically, such structures are supplied from the manufacturer as is, that is, you just buy slabs of concrete. And, as a rule, additional decoration falls on your shoulders. But this may be for the better, because the painting of eurofences is a purely individual matter. After all, you should know that the taste and color of comrades is not. So the fact that to please the neighbor does not mean that you should like it. What are the eurofences? You will learn about this in other articles on our website.
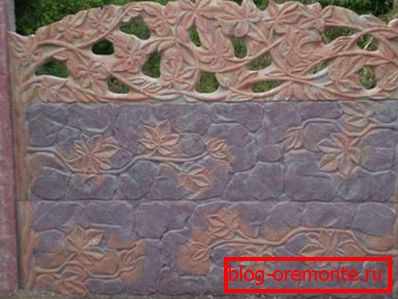
In the photo is an example of a fence decorated by the manufacturer.
Preparation for painting
Of course, to decorate and lead the appearance of such a structure is easiest when it is already mounted. Thus, we have a complete picture of what we want to see at the end.
Basically, all the panels that are produced on the building materials market have minor defects. This may be roughness, air shells, formed during the production process. All of these defects you have to remove to ensure the highest quality further processing.
Here is what you need to do:
- First of all, treat the entire surface of the fence with soil. This can be done with a spray gun or a conventional wide brush. Of course, the automatic method in this case is better, since the soil penetrates more thoroughly into the irregularities and shells. Allow the primer to dry completely.
- The next step is to seal all defects with putty. This is very convenient to do with a rubber spatula, it perfectly bends around all the irregularities of the fence pattern, and the material gets to where it should be. Although it takes a lot of time, but to find out how to paint the eurofence yourself, you have to go through this laborious process.
- Seal the joints of the plates and abutments to the posts. This can be done using ordinary sand-cement, the composition is recommended to do in the ratio of one part of cement and three parts of sand. But you can use other similar building mixtures for these purposes.
- After the putty has dried, it usually takes about 24 hours, sanding all places where you put the putty with emery cloth.
- After it is recommended to once again treat the surface with a primer, and preferably several times. So you maximally protect the structure from the effects of precipitation in the form of rain and snow.

Careful treatment of uneven ground
Tip! When preparing the surface for painting, use mixtures for exterior work. They should be well tolerated by moisture and low temperatures. Only such material will protect your fence from the premature destruction of decorative trim.
We start painting
In practice, your fencing device is already ready to be transformed and you can start painting it. It remains only to decide what paint to paint the eurofence, because not all the paint is suitable for these purposes.
The recommended material is acrylic paints. A prerequisite is that they must be for facade work. Such paints resist moisture well, have dirt-repellent properties.

Silicone paint, very effective material
You can also use silicone paints for outdoor use. Such coatings will create a film on the surface and will not allow moisture to penetrate the concrete. It also has the properties of preventing the occurrence of fungus on the surface. Although the price of such a lacquer coating is slightly higher than the acrylic equivalent, we still advise you to turn your attention to this material.
When you have chosen the paint and, accordingly, the color, you can safely start painting your fence. To facilitate the task, it is recommended to use for this purpose a spray gun that copes with the coating of irregularities much better than a regular brush.
Tip! Usually before the main painting, you can make a preliminary application of color to the surface. This is done at the time of coating the finished surface with primer. To do this, a little paint is added to the primer, and the final application of the primer gives the surface a shade of future color. Such a method is expedient only if it is planned to paint the entire fence in the same color.
If you chose an automatic method for painting, apply the paint evenly without creating smudges. Do not hold the sprayer for a long time in one place, and then the paint will fall evenly and evenly.
We emphasize the structure, we highlight the elements of the decor
Before that, we talked about the monochromatic coloring of the surface of a type-setting construction. But there is still a decorative painting eurofence. It differs from the single-colored painting and the method of application and materials used.

Here's how to decoratively paint your fence.
This way really creates a unique surface decor and emphasizes the individuality of your building. You as if for a while become an artist and paint your fence with different colors. Personally creating the uniqueness and uniqueness of the eurofence on your site.
Here is our instruction for carrying out such work, more precisely, what you will need to decorate the surface in this way.
- Set of brushes
- Several colors of paint
- Spray Bottle
- Soil, to cover the finished surface
- Your imagination is perhaps the most important part.
Now that you have prepared everything, you can proceed, first of all set the tonality of the surface. Do not forget that light tones will go well on dark tones and vice versa.
When the base tone is dry, you can decorate the individual elements of the fence structure with tassels. Thereby emphasizing each seam and pattern. Watch this video, there are some original decorating solutions. It is possible that you will have your own original idea (read also how to make a fence from the netting of a chain-link on your own).