Installation of vertical siding itself
For finishing new buildings, as well as for covering old buildings, in order to give a more aesthetic look to the facade, vertical siding is used. Installation of vertical siding should be carried out exactly according to the instructions. It is important when using this material to use all the elements as intended.
Little about the upcoming work
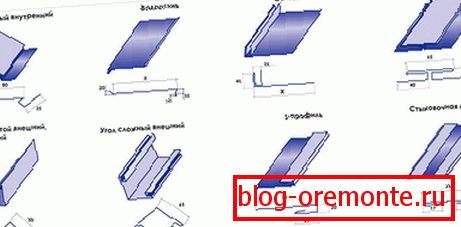
As in the version with the house trimming with a horizontal profile, the work must begin with the installation of additional elements.
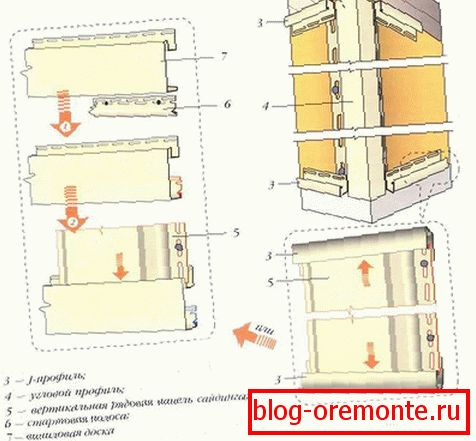
- The first step is to install the door and window trim, corner and J-profiles.
- Then a basement (starting) panel is installed, which can be replaced by a border profile.
- The final stage of the preparatory work - the installation of a low ebb.
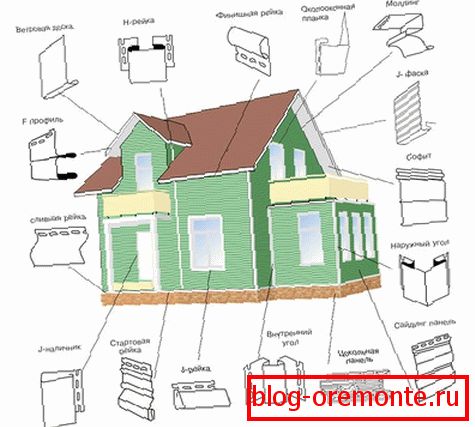
Note! If you want the skin to stand out visually, replace the J-profile with a universal casing.
Vertical siding installation methods
By execution, there are two ways to trim the house with this material.
Option number 1. From the corner of the building.
First, a corner profile is installed in the corners of the house, and the siding, cut into dimensions, is brought into it by hooks. Specialists (knowing that there are no hooks in the corner profiles) additionally equip it with final profiles in advance.
Note! To ensure that the result of the work looks neat, the masters recommend sticking with the symmetry of the installation of profiles relative to the middle of the vertical axis.
Option number 2. From the center.
In this embodiment, as the name implies, installation is carried out from the middle. To ensure symmetry of work, at first, one or two starting strips are set strictly along the central axis. Alternatively, you can select an H-profile with two J-profiles inserted in it.
Be sure to prepare the tools
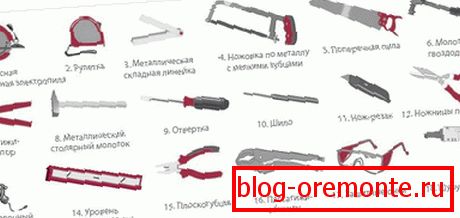
Before you start installing vertical siding yourself, prepare all the necessary tools. You will need the following:
- hammer, for fastening crates;
- a hacksaw for wood and for cutting metal will greatly facilitate the work of a jigsaw;
- square and tape measure;
- spirit level for precision control of horizontal and vertical elements;
- screwdriver
Note! If the work is carried out in the warm season, then you will not experience problems with sharp siding. In cold weather, experts advise to use fine-toothed tools instead of ordinary metal shears.
Getting Started
Installation of vertical siding can be carried out on any option of finishing (stone or wood), the difference will be only in the preparatory process. For example, on smooth wooden walls installation can be carried out without additional preparation, and before installation on brick or concrete walls you have to make a batten.
Before starting to set up the crates, remove all extraneous fixings from the surface. It is absolutely necessary to cut the joints in the wooden walls, and if necessary, lay insulation.
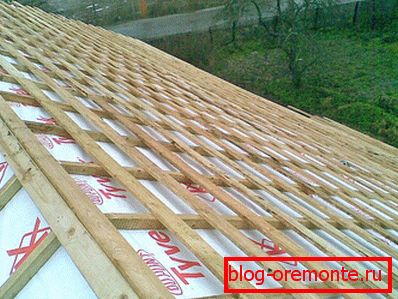
Metal profiles or wooden bars are used as material for the batten. If the second option is used, then the tree must be dried, because it can "lead." This will violate the accuracy of siding. You also need to take care of the safety of the material and process the tree with special protective compounds.
Note! It is better for work to choose a bar of such length that it completely, without joints, covers the length of the wall. This especially needs to be taken into account when finishing log walls, where it will be very difficult to align individual pieces.
Mounting the grid
First, beacons are nailed along the edges of the wall. Then between them you need to tighten the control cord: below, in the middle and at the top, and mount the rest of the straps along it, adjusting them along the cord.
How to cut siding
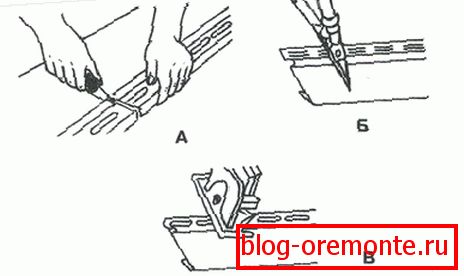
When finishing the siding of the blank walls you will not have any special problems, but when you need to finish the wall with a window or doorway, you have to work hard to cut it properly.
Two rules for cutting siding
- If you are using metal shears, then to get even edges, do not completely close the cutting edges of the shears.
- When cutting with a knife, substitute a wooden block under the workplace and cut it by placing the siding on it.
Mounting technology
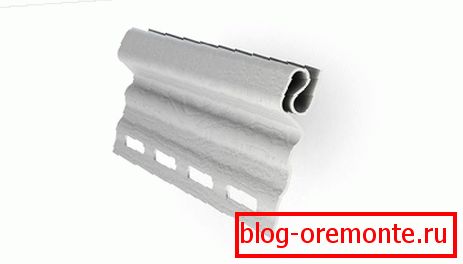
- The first panel is pushed into the pre-installed channel of the angular profile. After inserting, the panel should be hooked with the lock hook on the starting plate and pulled up to the characteristic click.
- Make sure that the fastener is secure by pulling it from side to side, check whether the panel slides in the lock, slide it so that there is a temperature gap between the receiving groove and the edge of the siding.
- Fasteners set strictly in the center of the hole.
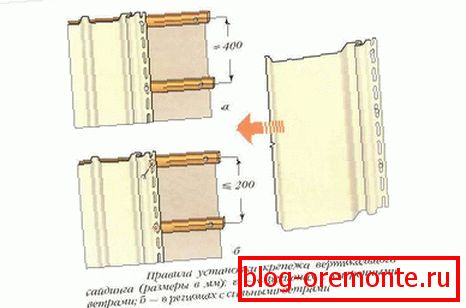
- When mounting the panels, make sure that they do not sag, observe the tension tension of all edges. Distortion in the installation of at least one panel will affect the result of all the work.
Note! If there are any obstacles on the working wall (power line traverse, watering crane), in the stacked panels it is necessary to cut the notches so that they follow the contour exactly to the place.
Facing corners
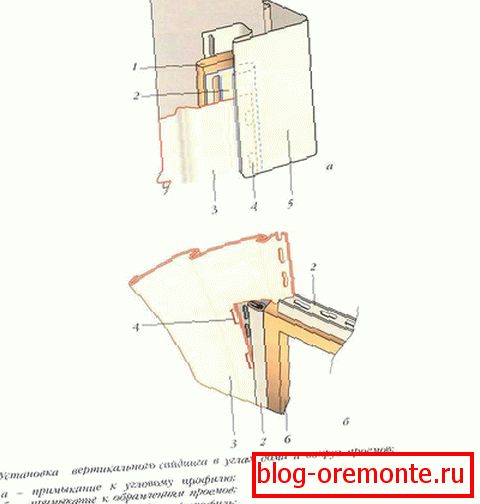
If the angular plank exceeds the height of the wall, then it is necessary to measure a distance equal to the height of the angle (plus 3 mm), it is attached to the corner of the building, leaving a gap of 2-3 mm, fixed. After produce alignment vertically and fix along the entire length. The fasteners are arranged in increments of 20 cm, and it is important to leave a gap of 1 mm so that they loosely press the profile to the wall.
Finishing items and additional tips
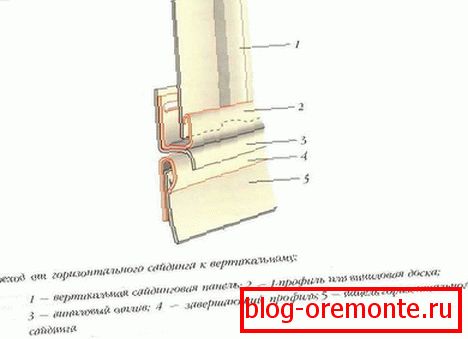
To do this, use the J-profile. To bend in the nail bar you need to make cuts. With a larger required bend radius, more cuts are made. Be sure to lay waterproofing under the profile.
Before installation, you need to measure the bevel angle and cut exactly on it. Installation is carried out in the usual way: one edge is inserted into the corner strip, then the other into the arched frame.

When carrying out work, also take into account the advice of experts who will help to carry out all the work better.
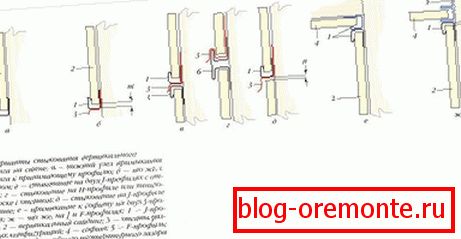
- Because the service life of siding is about 50 years, it is advisable to use anti-corrosion mounts.
- All fastener elements should be of sufficient length so that they enter into the wooden sheathing at least 3-4 cm, it is also better to choose nails with a large cap diameter, and to purchase screws with a press washer.
- When mounting the screws, screw in only straight. Small distortions can lead to surface deformation under temperature exposure.
- Consider the temperature gap should be relying on the air temperature during installation. For example, in the heat of vinyl material expands, and the gap in this case, you need to make a small one.

After reading the work tips, you will be able to install the vertical siding yourself. To consolidate the information obtained, watch the video how to install vertical siding.
Video
Installation instructions for vertical siding: