How to set the starting level for siding
In order for the first siding panel to be well secured, a launch pad is specially mounted. It is from this element begins trim paneling. In this article we will describe how to set the starting level for siding with different types of basement and about the individual features of the use of the starting level.
Specifications
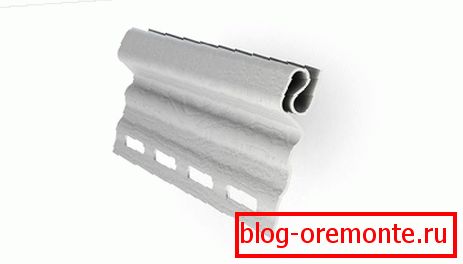
Starting bar can not be seen, as it is closed by the first panel. For this reason, its main technical parameters are length. As a rule, this figure will depend on the size of the length of the siding panel. Starting bar should be selected immediately when buying a siding, so that there are no discrepancies.
As for the dignity of the starting bar, several aspects can be distinguished here:
- Start plate не деформируется, не поддается коррозии и растрескиванию.
- With the negative effects of precipitation does not lose its technological properties of strength and integrity.
- No special tools are required for mounting the starting plate.
- Planck is not flammable.
- When exposed to sunlight or when the temperature drops, the starting bar does not lose its strength.
Installation Features
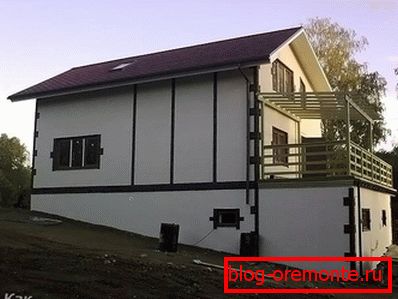
As mentioned above, this strap is mounted just before the siding paneling. Based on the fact that the base can be of a different type, the mounting of the bar is done differently. The cap can be of three types:
- Smooth.
- Falling away
- The speaker
When installing the starting bar on the falling and flat base - one mounting principle. The speaker base requires a different approach. In some cases, the installed crate on the wall can make a protruding base of the protruding base.
Обратите внимание! Start plate устанавливается не только для начала установки сайдинга. Ее также используют при обшивке мансард, отделке фронтонов. Также планка может монтироваться со второго или третьего этажа.
Installation on the falling and equal socle
The level of the wall between the base and the wall is often called “zero”. It is this boundary that must be found before starting work. To do this, you can use the water level, which is checked every corner of the house. They need to determine the lowest point to set the start profile. For example, take a starting profile, whose width is 6.4 cm. Measure the width from the bottom point found on the wall and hammer a nail into the wall. Around the perimeter of the house at every corner, the nail is hammered at the same height level.
Note! Sometimes the trim can be made with a small overlap on the base. For this, retreat is not 6.4 cm, but 5 cm. The overlap can be of any width, but it should not overlap the middle of the bar itself.
Connect nails with one cord. This cord indicates the upper limit of the starting plate. So that the cord does not interfere with the installation of the plank, you can rub it with chalk and beat off the line along the entire perimeter of the house.
Next, check the entire length of the house crates. It should be enough to install the starting bar. In some cases, it may be necessary to increase the crate, especially if the base is far from horizontal and some corners are strongly tied up.
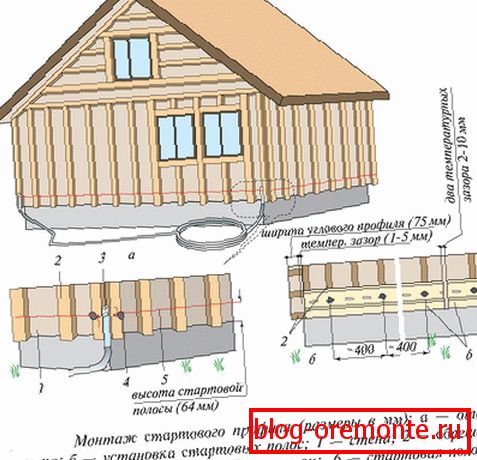
After these works, you can proceed directly to the installation of the strip itself.
Note! Any unevenness of the starting plate can lead to siding defects in subsequent rows.
For installation from the corner of the house, a distance is measured that will be the same with the width of the corner profile (75 mm) or j-profile (46 mm). In this case, you must not forget to take into account the presence of a temperature gap of up to 5 mm.
Обратите внимание! Start plate для обшивки сайдинга может быть выполнена в любом цвете, так как она будет полностью закрыта обшивкой.
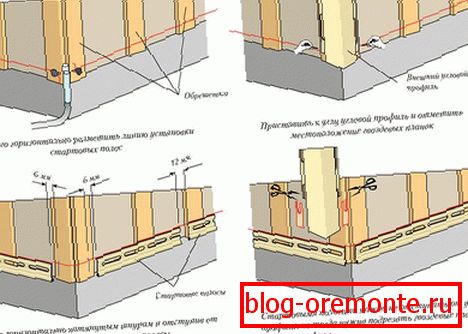
Now retreat from the corner to the width of the profile plus the temperature gap. At this place, you attach the starting level and fix it. All this should be done on the implemented markup. The top edge of the plank should coincide completely with the mark along the entire perimeter of the walls. The bar can be fixed with nails or screws. They are inserted into a special perforated hole. After installation, the bar should be moved from side to side, returning to its original place. Nothing should interfere with these movements. After installing the first plank also retreat to 10 mm for the temperature gap and set the next starting bar.

According to this principle, installation is carried out around the entire perimeter of the facade. In the process, from time to time you can check the bar for horizontalness with the help of a level.
Installation on the protruding base
Before installing the starting plate on the protruding base, it is necessary to install a drain. It will protect the base from moisture. For this, it will be sufficient to use a 10 cm wide tide. Before mounting it, the surface of the base, and it can be made of brick, stone or concrete, must be leveled. If the base is wooden, it is treated with an antiseptic. The search for the lowest point of the wall or occurs in the same way as with a flat or falling plinth. Also bounces line around the perimeter of the walls.
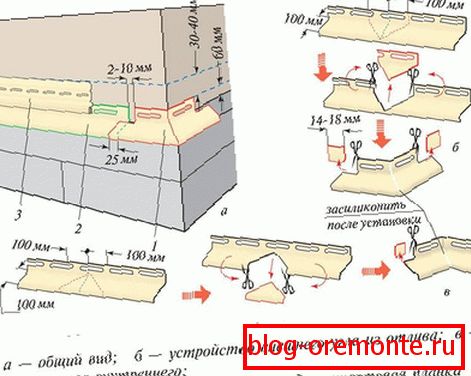
Ebb is mounted from the corner. Cut off a meter piece of low tide. It is necessary to make a cut so that the desired angle is formed external or external. Each subsequent outflow is set with an overlap of 2.5 cm.
When the tide is fixed around the perimeter of the facade, you can begin to install the starting bar. To do this, measure 4 cm from the low water bar and beat the line again with chalk. Next, the installation of the starting plate is carried out according to the same principle as with an even or falling plinth.
Follow all the recommendations and you can do all the work correctly. Contact our experts to ask questions.
Video
Setting the start bar is very simple: