How to fix siding on the house
In modern construction use a variety of materials for the exterior walls. Each of them has its pros and cons. One of such materials is siding. That it is most often used today. Siding gives the house a beautiful appearance, and besides it performs other practical functions. This finishing material will protect walls from atmospheric moisture and thereby prolong their service life. But all this will work if you make the right installation. In this article, and will talk about how to properly mount siding on the house.
What to do before installation

Any big work, including installation of siding panels, begins with preparation. First, the required number of panels is purchased. The required volume is easy to calculate, making a diagram of the house. Each wall with all windows and doors is drawn on paper to scale. Then the area of the entire surface is calculated, which will be covered with the material and divided by the area of one panel. To this figure you need to add 10–15%, this additive is useful if something goes wrong.
Note! Calculations may vary if vertical siding is installed.

Secondly, prepare the tools and additional materials:
- screwdriver or screwdriver set, hammer, pliers;
- hacksaw and conventional, circular saw, metal shears;
- plummet, building level (better to take longer), tape measure, ruler, square;
- piece of chalk or marker.

Now you need to prepare the walls themselves. All unstable areas of the old finishing material are removed from the surface. If the wall decoration is made of wooden planks, it is desirable to remove rotten parts. Of course, siding will hide all the flaws, but the remaining rot can spread to other wood. If the rotten boards are not removed, this can lead to the destruction of the wall.
Note! Removed all protruding parts. The slopes of the windows, door jambs, decorative elements, drainpipes and everything else that may interfere with further work.
Now it’s worth checking the walls for verticality. For this level is used. If the deviations are less than 1 cm, then you can not do the crate for a wooden house. But often this is far from the case.
Fitting darts

As a material for crates, you can use wooden slats or bars, or use metal profiles. In any case, the main task in this operation will be to achieve a flat plane.
If wooden structures are used, they are nailed to the wall with nails of a length of 10 cm. Reiki are mounted 40–60 cm apart. When using metal profiles, fasteners are galvanized with self-tapping screws on pre-mounted brackets. The distance between them is the same as when using wooden slats.
Note! Lathing allows you to install an additional insulating layer. Polyfoam or mineral wool is laid between the slats or profile.
The entire crate before installing the siding process with anti-corrosion coating. This will increase the service life of the finishing material.
Siding installation

Siding is a material that can be installed in almost any weather. But there are still some limitations. At temperatures below 10 degrees below zero, cutting the siding with metal shears is not recommended. At these temperatures, the material becomes brittle and breaks easily. Therefore, it is better to work on warm days.
Before starting the installation, it is necessary to install water drainage. This design is installed around the perimeter of the house, exposing strictly on the horizontal level. How to do this, you can find out by watching the video. Water drainage does not allow the water falling from the roof to penetrate the foundation and thereby prevents it from destruction.

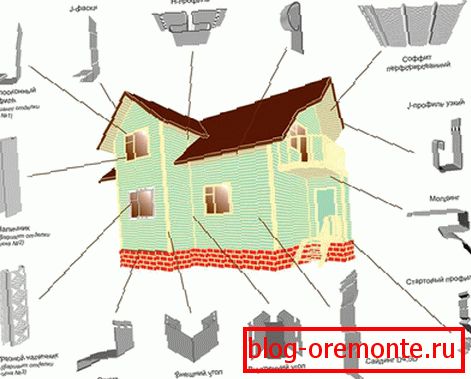
Now proceed to the installation of the starting bar. Since the drainage is already set correctly in the horizontal plane, the bottom edge of the panel is set on it. Next, with the help of screws and a screwdriver, fasten the starting siding bar to the crate.
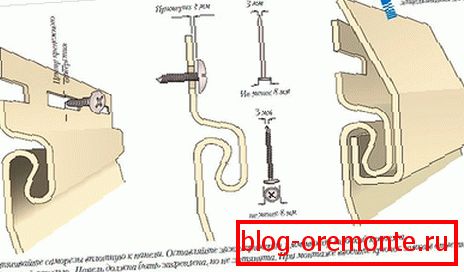
Here it is worth remembering about one particular material. When the temperature changes, the siding can “walk”, it will either expand or decrease. So that during such a “walk” the material does not break, the screws are not fully screwed in. It is necessary to leave a gap of 1–2 mm. If you use a screwdriver with a reverse, then make such a gap is very easy. It is enough to screw the screw to the end, and then unscrew it half a turn.

After installing the launch pad, proceed to the installation of the rest. Each subsequent is inserted into the previous one before the characteristic click. Then the panel is attached with screws.

For finishing of corners special corners are used. They cover the siding panels by 10 mm. When installing the corners are not allowed their tight contact with the main panels. This is connected with the same property of the material "walk" with a change in temperature. The same special accessories exist for the decoration of windows and doors.
At the highest point of the wall is a finishing rail. It has a decorative edging that gives the finish a finished look. Then, you should install the spotlight. This design provides ventilation, which prevents stagnation of moisture in the interwall space.

Video
This video describes the technology of performing work when covering the facade with siding: