Facade siding itself
The popularity of siding for finishing facades of buildings can be explained not only by the low cost and high quality of the material, which make it possible to give the building an aesthetic look for a long time. The undoubted advantage is the fact that finishing the facade with siding with your own hands will allow you to save considerably, without resorting to the services of builders. How to carry out the installation will be described below.
In fact, installation of siding is considered a dry finish option. It is suitable for all types of buildings, regardless of material. Such a finish would be very useful if you need to quickly and inexpensively transform the look of an old house.

Before you begin, you need to prepare all the necessary tools. So, we will need:
- hacksaw (preferably with small teeth) or grinder;
- scissors for cutting metal;
- crossbat screwdriver;
- roulette and square;
- hammer;
- a large stepladder to reach the roof of the building.
Note! If you do not have a stepladder of a suitable height, and you consider it inappropriate to buy it for the duration of the work, you can make temporary scaffolding, which, after lining, can be easily dismantled. The main thing is to use a thick board and carefully carry out the assembly so that in the process of construction the construction does not collapse.
Material selection
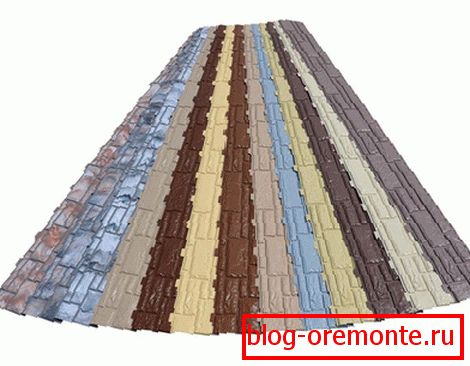
Today, siding manufacturers offer a wide variety of panels in color, as well as all sorts of connections, which can be used to finish a building of any complexity.
You only need to come to a specialty store with a schematic floor plan and dimensions. The seller will calculate the required number of panels and connecting elements.

In order not to feel like a black sheep in this matter, it is better to get acquainted with the components of the structure that are necessary for plating.
Corner for external mounting

This connecting element is used not only as a decorative finish, it is used to close the ends and give the structure a finished look. Depending on the height of the building, the mounting options can be divided into two ways:
- The maximum length of the corners is 3 meters, therefore for the one-story structure, whole elements are used.
- If you want to finish a higher design, then acquired a few corners that need to dock with each other, given the stock 5-7 cm.
Angle for internal mounting
Selection of this connection occurs on the same plan as in the variant with an external angle. It should be added that such fastenings are used for finishing the eaves. If you do not sheathe this part of the building, then to complete the finishing strip is used.
Eaves trim
For the decoration of this part of the building are used such compounds as wind board and spotlights. To calculate the required length, the initial size of the starting bar is taken, from which the length of the building gables must be removed.
J - profile

This connecting element helps in those cases if the building has visible elevation differences.
Window trim
To do this, you need to purchase a window bar. To begin with, measurements of all windows are carried out so that the junction points are not visible, you will have to cut it at an angle, so you need to take a margin of about 2–5 cm on each side.
Base finish
For lining this part of the building, a drain plate is used, as a rule, it is produced in a width of 40 mm. If this is not enough, the structure can be completed by reflux.
Panel connection
The maximum length of siding panels is 3.66 meters, and if this is not enough to close the entire side of the building with one segment, then H-profiles are used for the joint.
Note! In order to preserve the proportions of the building and not violate the visual integrity of the structure, the junction must be thought out in advance.
Panel calculation

Before siding sheathed the facade of the building, you need to calculate the number of panels required for this. There is the following formula: you need to multiply the length and width of the walls of the house, so you get the total area. From the area you need to take away the area of all window openings and doors. Then we calculate the area of one panel, knowing its width and height, and divide the area of the facade by the area of the panel. As a result, we obtain the required number of panels, to which we need to add 10% of the costs for trimming and docking.
Mounts

To fix the panel, you need to use galvanized screws. The maximum length is 35 mm, the minimum is 25. Calculation of the approximate quantity: per 1 m2 It will take about 2–4 screws (they are also best purchased with a margin).
Note! Screws with a rubberized press washer will allow better fasten the panel, protect it from cracking, and over time, the joints will not appear rust.
Preparatory work
Facade siding is made only on the prepared surface. What do I need to do?
- To begin with, all the protruding elements of the building are dismantled: grilles, door trim, etc.
- All visible slots around the window and door openings are sealed with foam.
- If the old building is finished, then all traces of dirt must be removed from it. On the plastered facade cleaned up all possible places of flaking.
- Before work, wooden walls are better treated with antiseptics, and foam concrete structures with a primer.
Installing crate

The basis for the installation of siding is crates. It can be made of metal profiles or wooden bars 50? 50.
Crate options
- For brick or concrete walls, the best option would be a galvanized profile.
- For wooden or frame construction is better suited wooden lath (processed and dried).
How to make a crate: phased work
- At the beginning with the help of level and roulette along the entire perimeter of the building you need to mark straight lines.
- The following procedure should be carried out with maximum accuracy. In the corners of the house from the drawn line, you need to measure the distance to the basement and, putting it down, draw another circle in order to get another circuit, the starting bar will be mounted along it. This measurement should be carried out as accurately as possible, if you deviate a little from the level, all panels will be skewed.
- Next comes the turn of fixing the guides of the U-shaped profiles, you need to start from the corners of the building. The recommended distance between fasteners is 35–40 cm. In those places where a large load will be placed on the profile (places of fastening of lamps or corners), they can be built in with more frequent steps.
The crate is ready. Go to the next step.
Waterproofing and insulation

Waterproofing is required for aerated and wooden houses, in all other options, you can do with insulation. From the material recommended moisture windproof membrane. If the insulation is not made, it is attached to the wall with the necessary distance for natural ventilation. When installing insulation, it is placed on top of it.
Guideline fastening instructions
- It is necessary to begin work with installation of water outflow to a socle of the building. Fastening is made the top edge to the previously marked line. This design has more rigidity than the starting plate, and therefore it will be easier to fix it.
- Then set the corner profiles. You need to start on top of the eaves, fasten screws. If necessary, the connection is made overlay subsequent profile to the previous one.
- Having established profiles, it is necessary to mount the starting level along the line previously marked above the ebb line. It is mounted above the bottom of the corner profiles by 5-7 mm.
- J-profiles or window trims should be attached around doors and windows. This is done so that the edge, which will be outside, is slightly lower than the inside (2–3 cm).
- When installing vertical H-profiles, it is necessary to foresee and mark places. As with the installation of other vertical joints, with their installation, you must leave a gap between the eaves and the socle of the building of 5 mm. This is necessary so that during thermal expansion the planks do not arch.
- Finishing strips are installed under the roof of the building and in those places where the installation of siding will end.
Now everything is ready for the last stage.
Installation of panels

Installation of siding panels starts from the starting plate. The first panel is inserted into it to the characteristic click of the lock, and the top is fastened with screws. They need to be screwed exactly in the center of the oblong holes.
All subsequent panels are mounted on the same principle, if necessary, they must be carefully cut off at the joints or finishes of window openings. Do not pull the panel up, it should walk a bit in the lock. The last top row should be closed finishing line.
Here are the main rules for working with siding. Take them into account and you will be able to make their own installation. Below are some small expert tips to help you avoid unnecessary mistakes in your work.
- The material from which siding is made has the properties to contract and expand with temperature changes. Actually, for this, manufacturers and provided oval holes for mounting. Therefore, during installation, you should not try to fasten the siding as tightly as possible, leave a gap between the screw and the 1 mm bar.
- When attaching siding to the guides, you also need to leave gaps to avoid bending the panels in hot weather. It will be enough 5 mm.
- You can work with siding in any weather. It is only important to remember the following: at a temperature of -10 ° C outside, the elements of the joint and the panels themselves can crack when cut. Therefore, this procedure should be taken very seriously - it is better to cut the siding with a grinder.
Correctly having carried out work on the house siding with siding panels, you will transform its appearance by at least 30 years, the material manufacturers say exactly this service life.