Clinker facade decoration
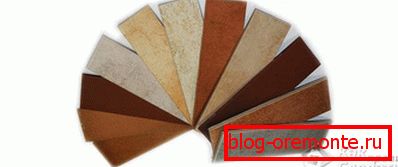
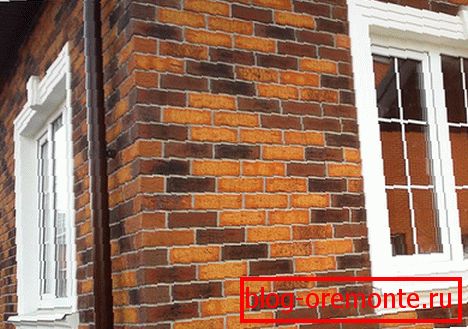
Along with artificial and natural stone, which revet the walls of the dwelling, clinker tiles are quite popular. It imitates brickwork and looks good. In addition, it is much cheaper.
Initial finishing work
Work on the preparation of the walls before finishing with clinker tiles is carried out in the same way as before facing with artificial stones. Concrete and stone walls, as well as wooden surfaces and plinths, are tiled with baked clay tiles.
Since the basis of the tile is clay of a plastic structure, this allows you to create recesses on the back of the product under a press, even with sharp corners. Thanks to these grooves and adhesive mixture, which completely fills the back side of the tile, the product adheres to the wall tightly.

The clinker product, which is called hog, is made as a tile under a brick This factor allows you to create a facade of this type, which imitates brickwork on the wall surface.
In addition, when installing a clinker tile, it is not necessary to adhere to a visual ligation, which is mandatory for masonry, hence - this type of lining is made much easier.
- The glue solution is applied to the wall surface with a trowel.
- The adhesive is leveled with a notched trowel. Trowel with teeth, up to 8 mm high, is used for lining tiles of light weight. For lining heavy ceramic products choose spatulas with a tooth height of up to 12 mm.
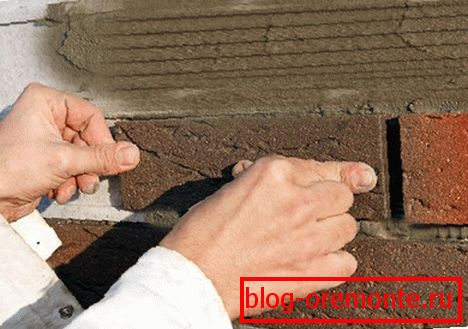
- Facade tiles, when being veneered, should not have any voids under their working surface. In this regard, before starting work you need to do a certain test. A layer of adhesive must be applied to the surface of the tile, flattened with a notched trowel, and then glued to the tile. Without long expectations, the product must be torn off from the composition and ensure that the solution remains on the surface of the tile without voids forming.
- Sometimes the question arises, put the mixture on the tile or on the surface of the wall. One can guess that there is no big difference for high-quality bonding of surfaces. The main thing is that the tile went flat and tight.
- Applying the adhesive mixture and leveling it on the wall surface with a notched trowel contributes to the formation of a layer of uniform thickness. Without a doubt, this method will make it possible to flatten the tile only on a pre-prepared wall, which in the end should be even. If the adhesive is applied not to the wall, but to the tile, the result should be the same - the glue on the product should lie flat.
- In principle, finishing works are the final stage of the surface cladding with clinker tiles. Regardless of what material completes the construction, the main thing in them is not to beautifully assemble the last layer of the multi-structural construction, but to make thoroughly the preparatory work. They will not be noticeable to the eye of every passer-by, but these works will determine the quality of the entire system. If the walls are rid of bumps, are well plastered, the surface is smooth, then the final layer will be laid much easier.
Recommendations for the installation of clinker tiles

- Under optimal climatic conditions, taking into account the humidity and temperature, the optimum quality of the adhesive mixture is ensured for half an hour, therefore, the adhesive should be applied to a wall area that can be glued in with the required amount of clinker tiles.
- The edges of the glue that extend beyond the finished lined surface should not remain idle for a long time. They should be a quality start of the next portion of the applied mixture.
- If there is not enough time to create such working conditions, the edges of the solution should be removed and a new adhesive mixture should be applied. If the delayed installation of ceramic products is of a chronic nature, it is necessary to switch to applying glue to the tile with the spatula leveling the mixture on it, and not on the wall.
Note! Add water to the adhesive, which began to seize, it is impossible. This will not return those high-quality adhesive properties that were at the initial stage. If a film has formed on the surface of the mixture, such a solution should be removed from the wall and discarded.
Here are some more valuable recommendations:
- To increase the preservation of the quality characteristics of the solution, it can be sprayed with water from a spray bottle no later than 10 minutes after application. But using this method is risky, as the mixture can simply be rejuvenated, which is prohibited.
- The greatest enemy that reduces the time it takes to maintain the quality of the mortar on the surface of the wall is the wind and the sun's rays. With their presence, the area of the applied solution should be halved.
- If the clinker tile is installed incorrectly, it is possible to correct its location after installation within the first 15 minutes, but not later, otherwise the facade in this place will have to be redone.
Stages of facade cladding

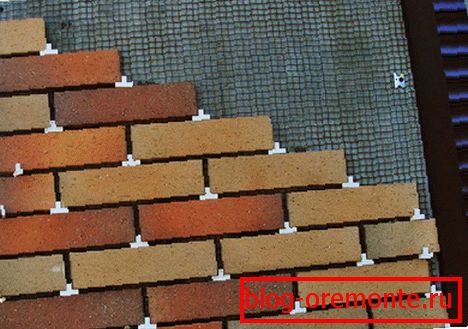
- The marking and cladding of the facade starts from the doors and windows. All sizes are counted from them. Laying clinker tiles is carried out from these points up and down. It is possible to install cut tile near the eaves and plinth. Another direction of installation - from the corners of the building.
- In order for the clinker to lie flat, the shoelace is stretched across the odd rows. The remaining rows and seams vertically are made without any special devices. This is reminiscent of brickwork, which is never perfectly flat.
- To avoid the formation of voids during installation, the product is tightly rubbed. Bows and spoons should alternate.
- После того как поверхность стен облицована плиткой, швы затираются. Clinker tiles практически не поглощает влагу, но плохо заделанные швы могут стать причиной попадания воды в них, а она замерзнет там в зимний период времени. Это будет угрожать надежности и устойчивости всей облицовочной поверхности. Чтобы междуплиточные переходы были плотными, их заделывают раствором с помощью «расшивки».
- After the grout is dry, you must use a stiff brush on the facing surface to remove excess mortar.

In the near future it is impossible to wet the tile. In addition, in the first days it should be protected from frost and sun.
Video
This video demonstrates the process of laying clinker tiles: