Led lighting shelves do it yourself
If you want to refresh the design of your home, you can use the modern chip of many designers - illuminated glass shelves with LED tape. For example, they can be installed in the bathroom, living room, kitchen and not only. LED lighting glass shelves with their own hands is done very quickly.
Features of illuminated glass shelves
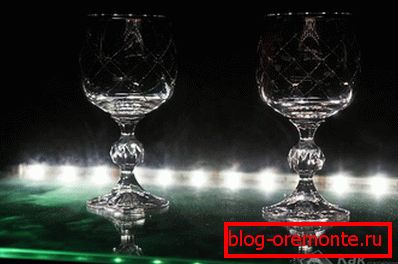
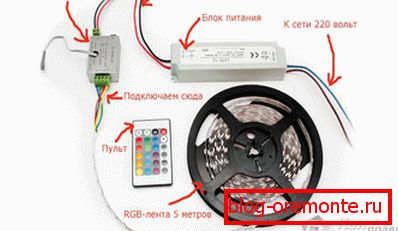
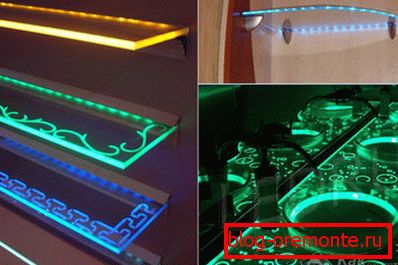
Although to a greater extent the illumination fulfills a decorative role, in practice it visually expands the space of the room. The color of the backlight can be completely different, ranging from white to purple. It is possible to change the shades of the lighting of the shelves of glass to your liking, using an RGB tape. So, the backlight will smoothly change according to your desire. Manage is very simple. It is enough to install a special radio transmitter or controller, which is connected to the lighting system using wires. Using the controller, you can change the colors of the backlight and add different effects, for example, change the brightness or add flicker. This is especially effective when there is a desire to constantly change the image of the room depending on the time of day. As a rule, LED lighting does not take up much space and is very light in weight. This allows you to use it in other elements of the interior, for example, on crystal figurines.
If you are using glass shelves for storing flowers, then the LED light does not hurt them at all. It does not overheat the flowers and will last for many years.
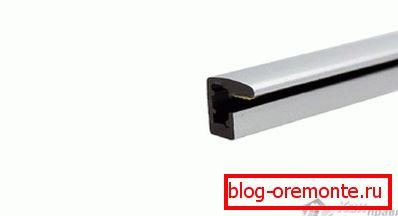
In order to build lighting for shelves made of glass, a special anodized aluminum profile is often used. The thickness of this profile, which is inserted into the glass, is 8 mm. Thus, the light will "flow" through the glass, reflecting from the edges of the surface. At the same time, the tape itself remains invisible. The advantage of this technique is that the LED strip does not emit UV, so it can be used as an alternative or addition to the main lighting of the home. In addition to ribbons, you can also use a spotlight, which is much simpler, and for complex options, you can use a modular LED backlight.
Types and methods of mounting the backlight
It is possible to make the backlight of the shelves independently in the most different versions. In this case, work in most cases is simple. Consider the types of LED backlight installations for glass shelves:

End lights. To the backlight was from the end of the glass shelf, the tape is installed on the back of the shelf holder. In another case, it can be glued to the plane of the shelf holder.
Traditional lighting. In this embodiment, made the usual lights for objects located on a glass shelf. The tape is glued to the wall in the upper or lower position.
It is important to choose a position so that the tape does not shine in the eyes.
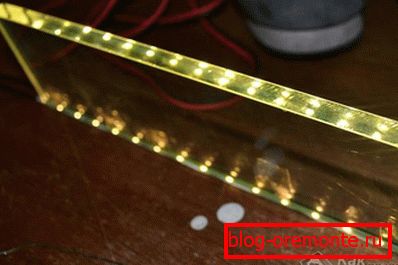
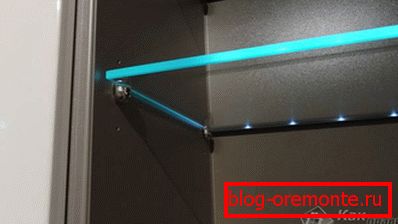
Illumination from the end of the shelf. In this version of the backlight, it turns out to make a uniform glow from the outer end of the shelf.
Frosted glass backlighting. If frosted glass is used in your interior, you can mount the LED strip in any of these options. For example, stick in aluminum profile.
Installation of LED backlight in 4 steps!
The whole process of gluing the LED strip to the glass shelves can be done in four steps. The work is performed in the following sequence:
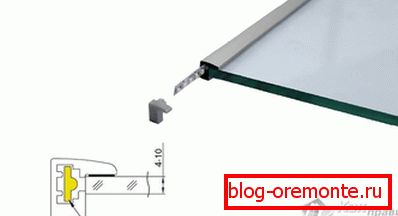
 The first step is cut off the aluminum profile to illuminate the shelf. Pre-purchased profile corresponding to the thickness of the glass. After cutting off the required length from the profile, it is important to remove all the projections, otherwise it will be extremely difficult to insert the backlight.
- Further, holes are drilled in the profile. To attach it, you can use the usual plastic dowels and screws. When attaching the bar, check its level.
- When the profile ends are open, the LED illumination is very simply inserted into a special groove. If the groove is closed, the tape itself can be slightly bent over the entire length of the house, and after gluing it can be leveled with a wooden ruler.
- At the final stage, glass is tightly inserted into the profile. If the glass is tight, then with the help of a rubber hammer and a wooden guide you can hammer it into the profile.
Usually in such profiles there is an insert made of plastic. You can not delete it. This insert will protect the tape from contact with aluminum. Otherwise closure will occur.
The whole process consists of simple technological steps. Therefore, the work will be able to cope anyone who is planning to make the light for the glass shelves. Most importantly, properly connect the LED strip to the electrical network. Well, this is another kind of work. If you have any personal experience in making lighting for a glass shelf, you can write about it in the comments to this article!
Video
This is how the installation of the glass side illumination is carried out:
We also recommend reading:
- how to make LED ceiling lighting;
- how to connect a pass switch;
- shelf in the bathroom;
- shelves in the garage.