How to move the switch
Once you began to notice that the switch in your house is too high or not in the place where you would like. Every time you have to either lift your hand up high or make your way to the other end of the corridor to turn on the light. In this article we will explain how to move the light switch to another place, consider the options, both with the use of wall chaser and without it.
Where to begin?
Возможно, вас пугает сама мысль о том, что перенос выключателя связан со многими проблемами. Это сверление нового отверстия для выключателя, резание в стене канавки (штробы) под новые провода, где их необходимо потом скрыть под слоем штукатурки, соответственно, выдалбливание старой проводки и т. п. Все эти проблемы напрягают. Но все они преодолимы, если этот самый перенос делать последовательно, не спеша, с необходимым инструментом и, главное, не бояться. И вот, подавив в себе все страхи, вы решили перенести выключатель самостоятельно. Where to begin? Прежде всего, нужно определиться с новым местом, где вы желаете установить выключатель. Например, вы хотите перенести выключатель света пониже или в сторону.
We select the desired tool:
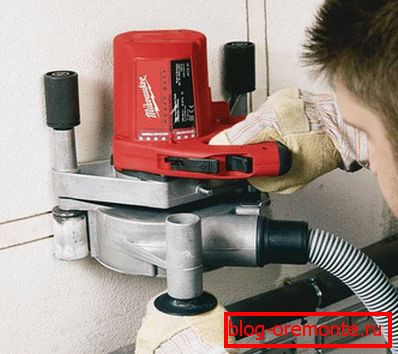
- We will need a wall chaser (something like a small circular saw that looks like a grinder). Strobe cutter no? Then we will manage a perforator or a hammer drill.
- Crown on concrete. It is clear that you do not drill holes in concrete every day. Therefore, you probably do not have concrete crowns. In any hardware store you can buy it. The price depends on both the diameter and the material from which the crown itself is made. However, do not take too expensive.
- You will need three screwdrivers - one with a cross sting and the other two with a flat (narrow and wide).
- Special tool for cutting cables. What and this is not? Suitable in this case assembly knife, pliers or nippers. And here, when the tool is assembled, it is necessary to purchase alabaster, electrical tape and, of course, cable.
If you have an old cable made of aluminum, then you should not buy copper. The difference in materials will lead to corrosion in a twist, which sooner or later will cause the destruction of the contact itself with all the problems arising from this. Also, the wires to be connected should not be of a different cross-section or, otherwise, you will have to use soldering, welding, or a terminal connection, which personally complicates the task of transferring the switch. If the electrical wiring in the house is aluminum - we buy aluminum cable with a cross section of 2.5 mm2, if copper - we buy copper cable 1.5 mm2.
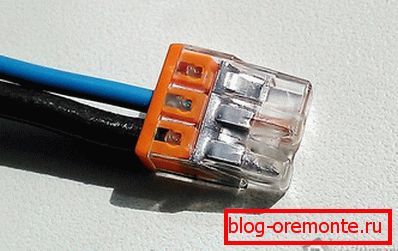
Terminal strips can be used to connect dissimilar wires.
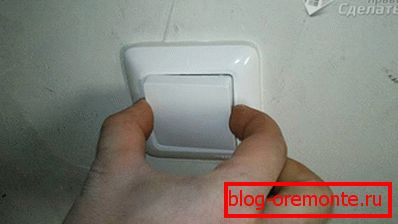
In addition, you still need a flashlight, since it will be necessary to de-energize the entire house and may have to work in the dark. So, everything we needed to transfer the switch we collected. After the house is de-energized, proceed to disassemble the switch. First we remove the keys. To do this, use your thumb to press the lower part of the key to the switch, and with the index finger we catch its upper part and pull it towards us. Do not worry, such manipulations should not lead to damage. Although, of course, it happens that you cannot do without a flat screwdriver, nevertheless, it is better to do it with your hands.
And the keys are removed. The next stage is a decorative frame, which is pressed against the black insert. This is a kind of latch. And here we need a flathead screwdriver. Gently and gently hook the insert, and it should be snapped off with ease. Only a little remains: remove the switch core from the wall. To do this, loosen the mounting feet. We can do this by starting to loosen the screws on the sides. Do not have to turn long. Just turn the screwdriver once and the legs are loosened.
The entire core easily stretches out of the box, just loosen the screws of the mounting feet and slightly pull it towards you.
And the switch is removed from the wall. First of all, we check if there is voltage in the contacts. This can be done using a voltage indicator (screwdriver-probe). If everything is in order, proceed to the final stage - disconnecting the supply wires by unscrewing the fastening screws..
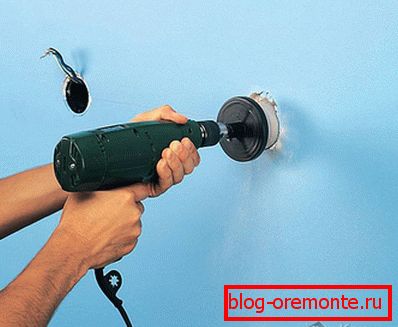
It will be just fine if the disconnected wires, now protruding from the old socket, end up being quite long (at least 15 cm) so that they can be easily connected to the cable prepared in advance. Then the role of the junction box will play the old hole of the removed switch. It will remain to interconnect the wires and push them back into this box. Now let's move on to another process - to drill a new, pre-labeled hole for a bottom plate, where we plan to install a switch.
When drilling a hole for a podrozetnik a perforator or a hammer drill, it is imperative that you switch to the drilling mode and in no case use the “combined with slotting” mode.
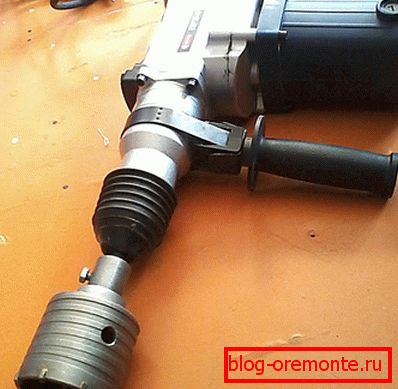
For this case we have a crown for concrete (diameter 68–70mm). Now you can begin shtroblenii grooves in the wall under the wiring. However, before hammering, you need to make sure that there is no other cable in the wall, say, from the junction box to the outlet, otherwise, solving one problem, you will inevitably create another. How to find out about this hidden wiring? With the help of a non-contact voltage detector, which “will tell you” with the help of a light indicator about all in-wall surprises.
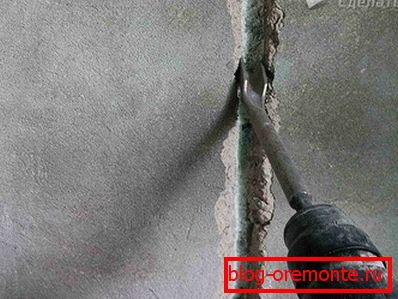
We assume that those were not - you can safely cut through the groove, do not forget to switch the punch in slotting mode. Since we are dealing with one cable, and not with a bundle of these cables, we will not have a wide strobe (the depth and width of the groove should not exceed 25 mm). It can be made to fit the width of the wiring itself. The advantage of such a narrow channel is that the wire in it does not need to be specifically fixed, and the plaster mixture itself needs quite a bit to seal the grooves. And now our cable is already hidden, and the next step is to gloss over the mounting box in the hole. For this process, we already have alabaster. After the alabaster mixture has dried up, and the underside sits tightly in the “mink,” proceed to the installation of the switch core.
If the switch did not work well, then you can try to repair it.
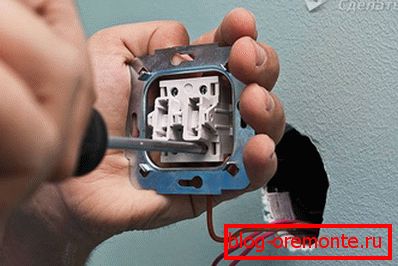
We perform the installation on the same principle as dismantling, only in the reverse order:
- Fasten the wires with fastening screws.
- We fix the tabs through the side screws and check how tightly the switch core is fixed in the box.
- We install the mechanism together with the decorative frame, which should effortlessly snap and press the frame to the wall.
- Fasten the keys (by inserting until it clicks into place).
Most often, a two-button switch should be installed so that in the end the common contact (phase) is at the top. Contacts in the core of the switch can be defined as follows: the phase is on one side of the switch, and the two terminals that go to the lamps - on the other.
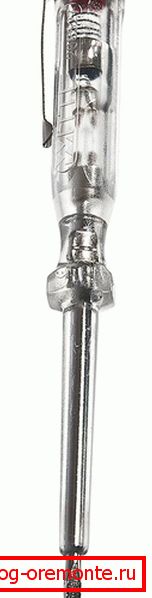 Now with the three wires going to the switch, you need to determine the phase. To do this, turn on the voltage for a short time and with a screwdriver probe, - but not with an ordinary screwdriver, - check which of the wires has voltage. That wire, from touching the probe, will give a light signal, and there is a phase signal. It can be accurately marked with a specific color.
Do not forget to turn off the voltage again and only then proceed with the installation!
Now that we have “resettled” the switch and secured it in a new place, we will deal with the old hole. There are two options. First, you can use a decorative cover purchased in the same hardware store. As a rule, the holes on the lid coincide with the holes in the bottom plate. Therefore, it will not be difficult to fasten the cover and thus close the old hole. Secondly, you can use all the same alabaster and just cover the hole with this mixture. Which of the options you like - choose for yourself.
If you need to move the switch to another place - not lower, not higher, but generally on the other side of the wall or corner - we can say that all these recommendations and tips are applicable in this case.
When installing the switch to a new location, it is necessary to remember that the new location of the device should be close to the junction box, since the length of the horizontal strokes should not exceed 3 meters.
Cable channel usage
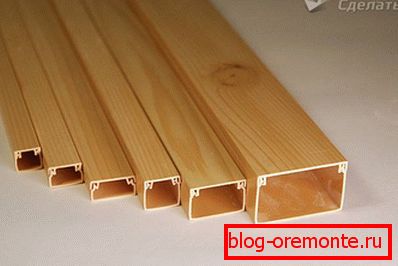
But what if you want to move the switch without shtenirovaniya walls. Is it possible? Maybe. But only in the event that to use the laid on equipment.
It should be understood that the main advantage of overhead switches is that it is possible to do without complex operations, because of which, as a rule, you have to sacrifice something. Firstly, cleanliness in the house, and secondly, facing materials (wallpaper, tiles, wood panels, textile coverings, etc.), which, one way or another, will have to be barbarously torn off, broken off, torn off. It is important to note that the applied equipment, if necessary, will always be easy to move to another place convenient for you. But what about wiring? Where to hide it, so that it is aesthetic and at the same time protects the wires from damage?
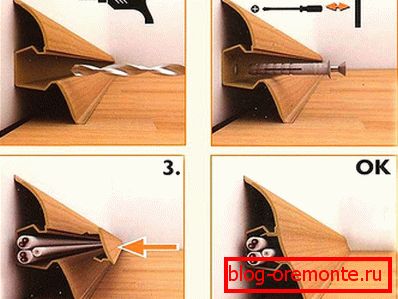
In this case, you can use a cable channel or a special plinth, which can also play the role of a plastic decor, in which you can easily lay the wiring. Such plinth easily understands.
Do not install the circuit breaker in the immediate vicinity of heating appliances and heating systems, as well as in those places where there is a danger of water ingress. For durability, it is best to use screws at least 2.5 cm in length when mounting an electrical overhead unit. When installing the switch on the tile you need to use a special drill for tile.

Follow the guidelines from the article, and you will see that there is nothing difficult in doing such work.
Video
Watch a video on how to move a switch in a drywall:
Thanks to this video, you will know how to move an outlet or switch in a concrete wall: