How to connect the wires in the junction box
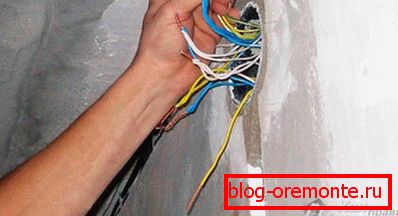
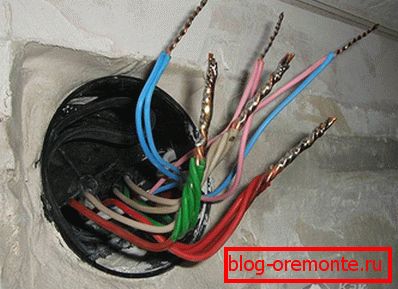
No electrical circuit can not do without any connections, branching wires or cables. For this is a special box. It is located under the ceiling and is a round or square box made of polymer material.
In this article we will describe how to make the connections correctly, we will demonstrate the diagrams, photos and video instructions.
Why use junction box
There are cases when the installation of electrical wiring neglect the installation of such distributors, considering that this is just a waste of time, since the box must first be installed, then it must be connected to it, which will lead to additional difficulties. It's easier just to twist, insulate and trite plaster the wall. But here you need to think a little ahead, because in this case important points are missing:
- No free access to the wires. For example, if the socket does not work in your room or the light disappeared, and after checking it turned out that the problem is the absence of voltage. How to make a check? Completely clean the finish? Tear off the wallpaper, plaster to get to the twist? This will ruin your repair.
- If you want to install an additional outlet. It is not always convenient to connect it, laying the wires from the previously installed outlet. Thanks to the junction box, you can easily make new connections.
- The regulatory code for the OES says that “the places of connections and branches should be available for inspection and repair,” therefore, the installation of such a distributor cannot be neglected.
- The absence of such distributors is contrary to fire safety standards.
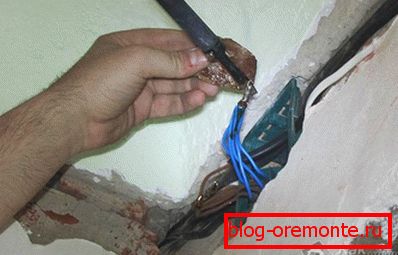
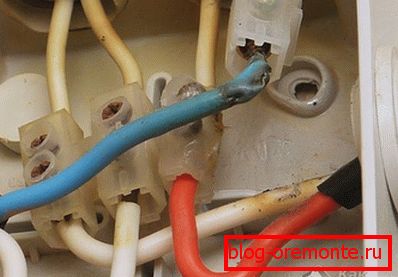
As you can see, the distribution box plays an important role. But its installation is just the beginning. It remains to connect all the wires in it. What is the best way to do this? Let's look at some ways.
Types of compounds
What is the problem when connecting wires? Ensure good contact lived together, so that the chain does not break, and there is no risk of a short circuit. In order to ensure this, you can act in several ways:
- Twist.
- Pressure testing.
- Welding.
- Soldering with a soldering iron.
- The use of screw terminals.
- Bolted connections.
- Self-tightening terminals.
These are proven methods over the years that you can use to ensure reliable contact. Let's take a closer look at each of them. You will learn how to properly connect the wires to any of these options.
Twist
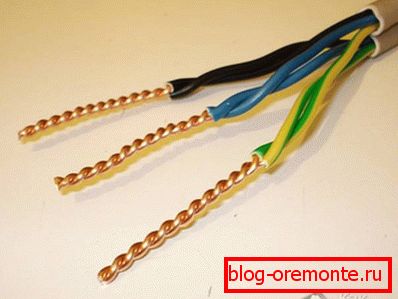
Such twisting in the junction box is officially prohibited. The seventh edition of the EMP regulatory document, Chapter 2, clause 2.1 / 21 lists all types of permissible connections, but they are not twisted. And this is not surprising, since such a contact is sensitive to the pulse current and has a large contact resistance. Over time, the contact will deteriorate and just burn out. Due to the fact that the contact area is small, with a heavy load, heating occurs and the contact is further weakened.
It is not recommended to use this type of connection, despite the fact that some masters still use it. If you choose a twist, all responsibility falls on you.
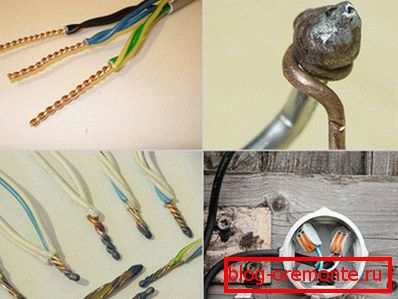
This option is chosen because of its simplicity. It is enough just to strip 10–20 mm of insulation and to twist the wires with each other with pliers. So did our fathers and great-grandfathers. But such a connection is often unreliable, especially if an aluminum core is used.
Crimp Coupling
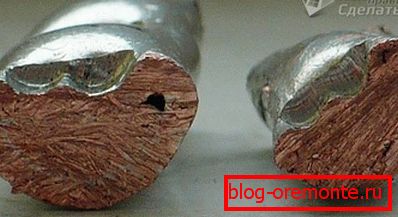
Quite a reliable method for which you will need to purchase a connecting sleeve. You need to pick it up based on the diameter of the beam being connected. Depending on the wires that you connect, the material of the sleeve itself is chosen. For copper wires, the sleeve should be copper, for aluminum - aluminum. To make the connection reliable, the sleeve is compressed with a special tool called press-tongs. This technology is quite effective and is, along with other methods, in normative documents.
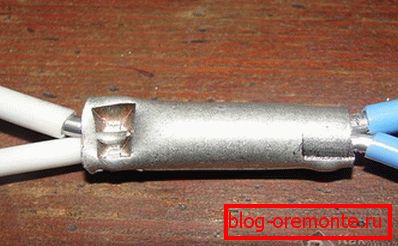
To connect in this way you need:
- Remove the insulation, given the length of your sleeve.
- Twist the wires into the bundle and insert them into the sleeve.
- Crimp the liner with the press tongs.
- Insulate the place of twist with shrink or insulating tape.
In this work, use of pliers is not recommended, as the connection will not be sufficiently reliable. It is much better to buy press tongs or borrow them from good neighbors.
Welding
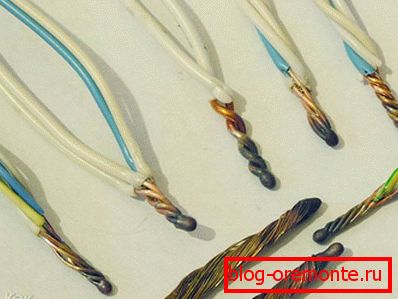
This method can be called the most reliable and safe, because the wires are connected using fusion and become one. Due to the fact that welding will not oxidize, over time, this contact will not weaken. But in order to carry out such work you will need skills in working with welding equipment
In addition to skills, you must prepare:
- 24 volt welding machine with a capacity of more than 1 kW;
- welding gloves to protect the skin;
- goggles or welding mask;
- sandpaper for stripping wires;
- clerical knife for stripping;
- carbon electrode;
- flux, due to which the melt will be protected from exposure to air.
After all the tools and materials are ready, it remains only to do the welding, which is not difficult. Work can be divided into several steps:
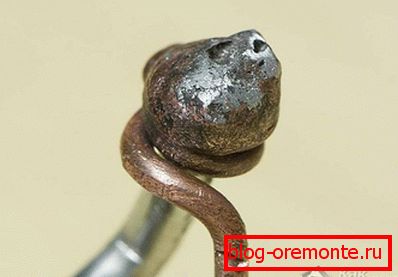
- Remove insulation 60–80 mm and sand them using sandpaper. The veins should shine.
- Connect the wires by twisting, winding one over the other so that the ends are level with each other. It is recommended to do a length of at least 50 mm.
- Pour the flux into the recess of your electrode.
- Put the "mass" of the device on the bare wire, turn on the welding machine and press the electrode to the top of the twist.
- Hold the electrode until a ball is formed, called a contact point. It usually takes 1–3 seconds.
- It remains to clear the point of flux and insulate the place of welding with a shrink tube or tape.
This type of compound will last a long time. In some of the old Khrushchev such welding kept for 50 years and stably performed its function.
Soldering with a soldering iron
The method is very similar to welding, only in this case the wires are connected using solder. For this work you will need a soldering iron. For work you will need:
- soldering iron;
- fine sandpaper;
- канифоль (flute);
- brush for applying rosin on;
- tin-lead solder.
The procedure is the same as when welding:
- Stripping insulation and sandpaper stripping.
- Twist.
- Application of flux.
- Directly soldering. A soldering iron melts the solder, which must flow into the twist itself, firmly connecting the wires to each other.
Often this method solder copper wires, but if you buy a special solder for soldering aluminum, then you can also solder copper from aluminum.
Soldering is quite reliable, but not recommended in those places where there may be strong heat. Moreover, under mechanical action the joint may weaken.
Use of screw terminals
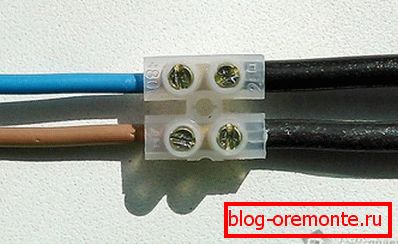
This method is quick, simple and effective. And most importantly, such clips can combine dissimilar metals. For example, if you need to connect aluminum and copper conductors, which in itself is known to be contraindicated. These clips are very simple and compact, and their value may surprise you.
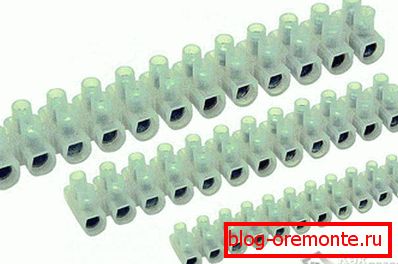
To connect the wires with clips, you need to perform only 2 steps:
- Remove 5 mm of insulation.
- Insert into the clips and tighten the screw.
That's all, as you can see, everything is very simple and fast. It is only important to control the force with which you clamp. Tightening the screw too much can damage the wires. Especially you need to be careful when working with aluminum wires.

The only drawback of the screw connection is that when working with a multicore cable, it must be crimped with a special nozzle in order to ensure normal contact and wire integrity.
Bolted connections
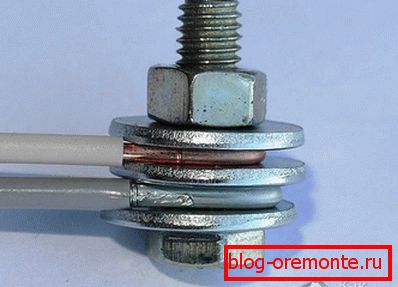
Such a connection is quite reliable, but cumbersome. For modern distribution boxes, it will not work because of its size, but for large old-style boxes - just right. This method can combine both homogeneous and dissimilar metals. Work is performed as follows:
- A steel washer is put on the bolt.
- Insulation is removed from the conductors, and they are formed as a ring.
- The first ring is put on the bolt.
- Then on turn there is another steel washer, which is placed on the bolt after the first one.
- From above puts on the second connecting wire.
- This whole “sandwich” is clamped with a nut.
- In the end, all you need to insulate.
It is this design that makes contact bulky. If you need to connect several pairs of wires, then this option will not be the best.
Self-tightening terminals
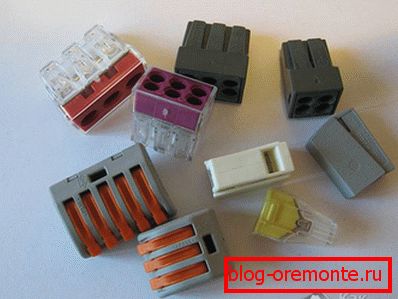
This method can be called the most modern, popular and easy to use. All you need is to buy special terminals in the store. Inside these terminals there is a special paste that prevents metals from oxidizing. Due to this, various metals can be inserted into such compounds.
The job is as follows:
- 10 mm of insulation is removed from each wire.
- The lever, which is located on the clip, rises.
- Conductors are inserted into the connector.
- The lever is lowered to its original position.
If your clamps do not have levers, they need to be inserted before the clamp is latched.
We considered the most reliable methods by which you can connect the wires in a junction box. This is a very important stage of the electrical work, since 70% of the errors in the work is precisely in the wrong connection of conductors. But if you, even without having experience of similar works, will use the methods that are described in this article, you can easily do everything according to the requirements of the standards. But which of these methods to choose depends on your capabilities and desires.
Video
This video shows how to wire the junction box:
You will learn all about the crimping of wires or the crimping of the tips from the material provided in this video:
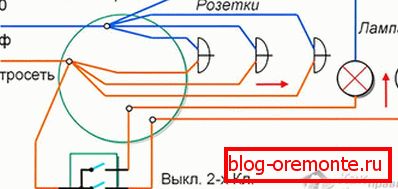
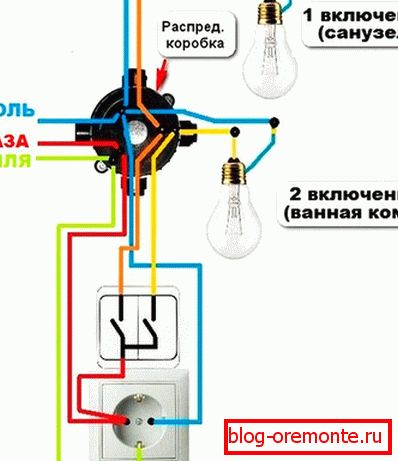
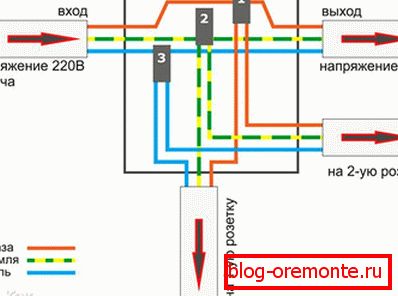
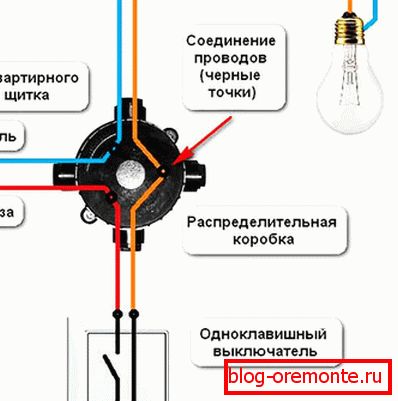
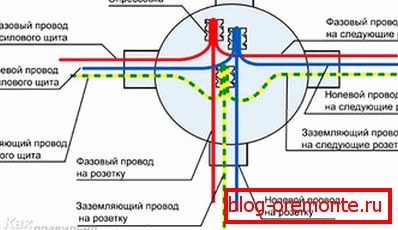
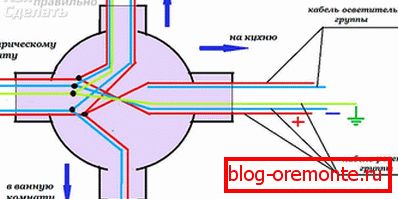
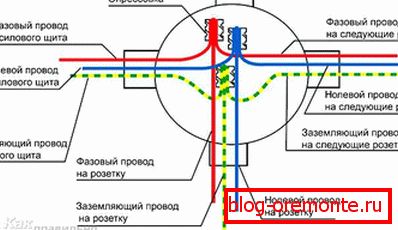
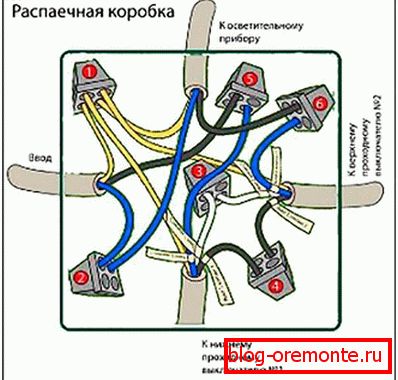
Scheme