Ceiling lights do it yourself
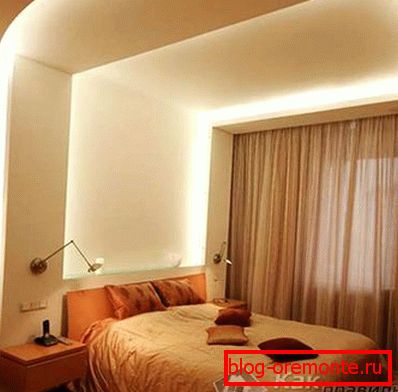
Ceiling lights will create a special atmosphere in the room. Properly installed and adjusted lighting in a multi-level ceiling is a source of real self-made magic. If you additionally make a plinth and a ledge with LED backlighting, the effect will be simply amazing.
However, if you overdo it, you can spoil everything. Therefore, before undertaking such work, you must first disassemble the various types of ceiling lighting and how to install it.
Types of illuminated ceilings

Before you make a ceiling light, you need to understand one fact: this design can significantly reduce the height of the ceiling. On average, 10–15 cm will be lost in height. Therefore, it is better to immediately take into account these figures when setting up the structure.
 All ceilings with lighting come in two types:
- multilevel;
- single level.
The latter type of ceiling is great for small rooms. With this design, the height will not decrease significantly. Of course, to create something complicated this way will not work.
For a really beautiful and bright lighting, large rooms with high ceilings are better suited. However, in a small room you can create a miracle, if you approach the matter with love and fantasy.
Lighting materials

Ceiling lights are created using special professional materials. There are three main technologies for creating such lighting:
- LEDs.
- Neon.
- Rope.
Another interesting method of illumination is the use of a regular chandelier with several lamps. What type of lighting to choose depends on the preferences of the apartment owner.
Material comparison
Rope
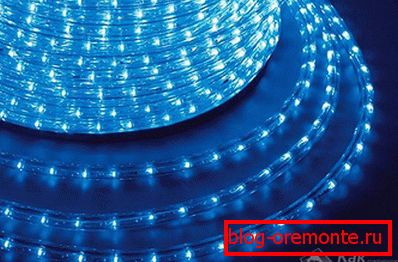
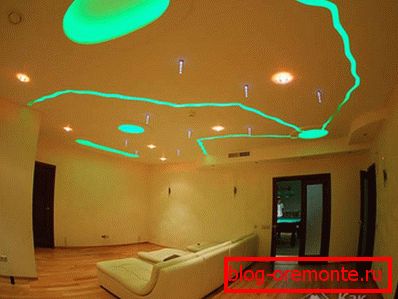
Rope — это отличное решение в том случае, когда владелец помещения хочет создать нечто необычное. Rope имеет ряд достоинств: он яркий, гибкий, имеет множество цветов и оттенков. Если хозяин вдруг задумает подсветить не только потолок, но также декоративные элементы интерьера, то с помощью дюралайтовых трубок он легко решит эту задачу.
LEDs
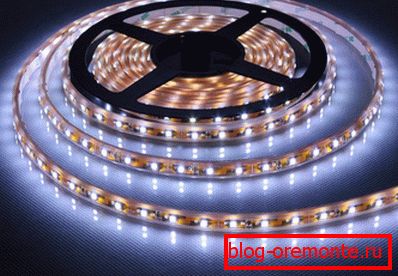
At the moment, this type of backlight is the most popular solution. LEDs can be installed in the form of lamps, and in the form of tapes. LED tape has the same advantages as duralight. It is extremely flexible and colorful. She can perfectly highlight both the edge of the ceiling and various solutions in the interior. True, the tape needs additional protection.
Lamps allow you to arrange in the apartment spot lighting. With their help, you can create a starry sky effect and much more. Working with lamps is easier than with tape.
The principle of operation of the LED backlight is shown in the following video:
The process of mounting LED backlight LED RGB is presented in the following video:
Neon

Одно из самых лучших решений, однако, установку таких трубок лучше все-таки доверить профессионалам. Neon способен изменить саму атмосферу в помещении. И, в отличие от дюралайта, такое освещение работает очень долго.
How to create a ceiling with lighting

The ceiling with lighting is created in several stages.
Before making a ceiling with lighting, it is necessary to replace all the wires on the ceiling, as well as on the walls. If any problems arise in the future, you will have to re-mount the ceiling. Therefore, it is better to do everything in advance. For some lighting fixtures, additional cables must be put.
Illuminated ceiling is made of drywall or other similar materials. Drywall has several advantages, so this material is used more often than everyone else. It should be noted such features of the plasterboard sheet as ease of sawing, the ability to change the shape, ease of installation, as well as additional noise and heat insulation. Drywall is simply indispensable in many cases.
To make a ceiling with lighting, you must first carefully measure the surface and make a drawing of a future design. Only after that you can buy the necessary materials, otherwise there is a chance to buy too little of the necessary.
 To install the plasterboard ceiling you will need:
- profiles;
- suspensions;
- fasteners (screws).
It is also better to carry out all work using the level.
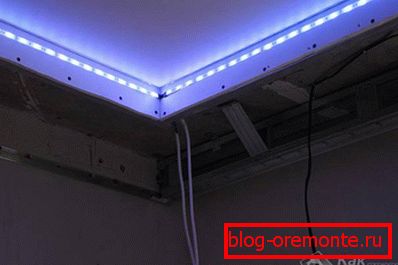
After installing the batten on the ceiling, you can mount the drywall on the profiles. However, you first need to cut it. This is exactly what the drawing was made for. Here it is important to consider every little thing. It is especially difficult to perform work when mounting spotlights, where every hole must be taken into account. By the way, such holes will have to be cut in plasterboard sheets.
When installing, it is necessary to leave a small gap between the wall and sheets of drywall.
Multi-level ceiling
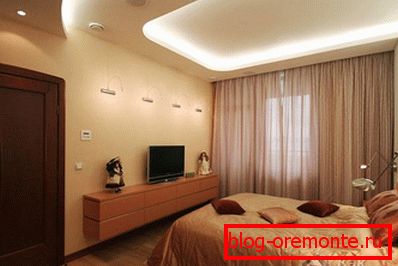
Multi-level ceiling of gypsum can be created using only one drywall, and in combination with plastic, suspended ceilings and other materials. Just looks fantastic drywall with a stretch ceiling. Only this will require a special tool, namely, a heat gun.
 The first thing you need for a multi-level ceiling is, of course, a drawing.
- Then the individual elements of the drawing are transferred to the ceiling. The surface must be leveled in advance, so that later there will be no problems.
- Plasterboard elements are mounted on the profiles. The merits of the GCR here are fully manifested. Sheets can be bent and even assembled in pieces. If the installation was made with kinks, then the corners can then be sanded.
- When the plasterboard base is made, it is possible to fix the stretch ceiling fabric in the gaps.
- If the same drywall is used, then it is simply mounted in the intervals to a higher level.
- It is important to take into account the location of lamps or LED strip. In multi-level ceilings, you can afford more variety.
- The final touch is a special putty that will not allow the ceiling to go cracked. With it, you can hide many defects.
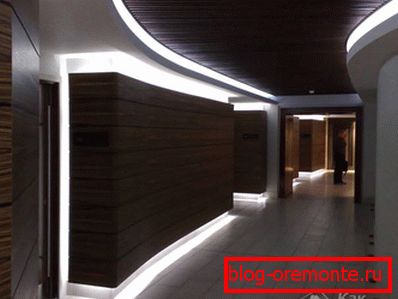
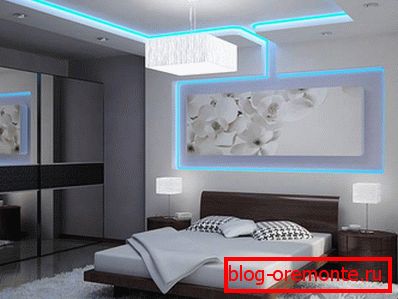
A photo


Video
Demonstration of stretch ceiling lighting: