We make door slopes of plasterboard
When replacing door blocks at the entrance or inside the house, inevitably there is a problem facing slopes. To do this, use the same technology as for leveling the walls in the premises: plastering or plasterboarding.
However, plaster slopes are technically much more difficult for independent execution, and besides, this option is not always possible to apply. But to make the slopes of the door of drywall on the strength of each.
That is why we decided to draw the attention of our readers to this method. With the help of the video in that article, you will be able to veneer the openings with your own hands - and do it no worse than any master.
Ways of forming doorways
By and large, the slopes, like the walls, can be leveled and frame, and adhesive method. The choice of method is influenced not by the price of the materials used, but by the design features of the aperture. Sheathing on the batten reduces its size by at least 3 cm on each side. If this is a wide passage without a door, then there is nothing terrible about it, and the difference of several centimeters does not matter.
- But when this is a standard opening with a door installed in it, the skeleton version of the formation of slopes may be generally unacceptable. And at the same time, there are situations when it is impossible to make a beautiful opening in an adhesive way, and drywall can only be installed on a batten.

- This can happen when a standard-size box is installed in a non-standard opening. In this case, the gap, which inevitably turns out between the wall and the frame of the door, is compensated by wooden or brick inserts. Because of this, slope surface drops are often formed, which need to be brought into a single plane.
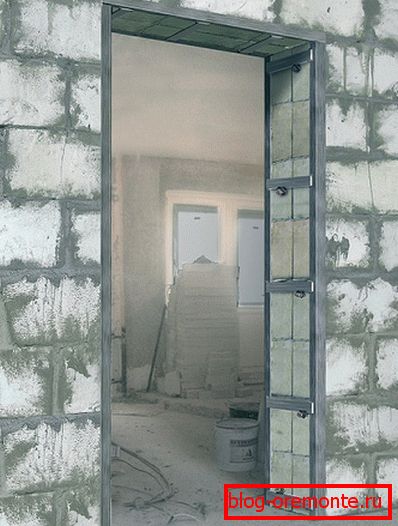
- To do this on such a slope, which we see in the example below, can only be done on the batten. Firstly, with its help, it is easy to form any kind of slope - and a big difference in this is not a hindrance. Secondly, the insulating material is laid inside the frame: foam plastic or mineral wool (see Insulation for doors: types and parameters).

- This layer perfectly isolates the sound, and also eliminates the formation of cold bridges, which is especially important if it is an entrance or balcony door. And yet: the formation of a slope on the crate - in any case, its upper part, is performed in the case when the opening needs to be given a curvilinear shape.
Note! When installing interior and balcony doors in a standard rectangular opening, plasterboard is mounted directly to the base, and minor irregularities are compensated for by the thickness of the adhesive layer.
This is a simpler and more popular way in the people, so we’ll dwell on it in more detail. Instructions explaining what and in what technological order to do, presented to your attention in the next chapter.
Installation of slopes adhesive method
It is possible to start facing facing of slopes with plasterboard only when rough alignment of walls has already been performed in the room - moreover, there is no difference in the way it is performed. The opening itself must be freed from old plaster or other coatings, dust free and primed. Shrunk assembly foam, which is filled with slots around the perimeter of the door unit, must be cut flush with the base surface.
What you need to work
Of the tools for facing slopes need a drill with a 10 mm drill and nozzle "mixer", screwdriver, hammer, knife for plasterboard, peeling plane, narrow and wide spatulas, long ruler, tape measure, pencil, rule. Naturally, the container will also be necessary for mixing the spackling and glue solution.
So:
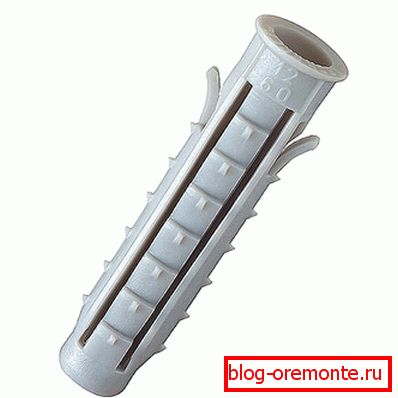
- From consumables, you need to prepare a universal plaster putty - for example: Knauf Fugenfuller or Perfekta Ecocraft. These options are suitable for gluing plasterboard to the base, and for preparing its surface for painting. In addition, at hand you need to have foam with a gun for its application; polypropylene expansion plugs and perforated plaster corner.

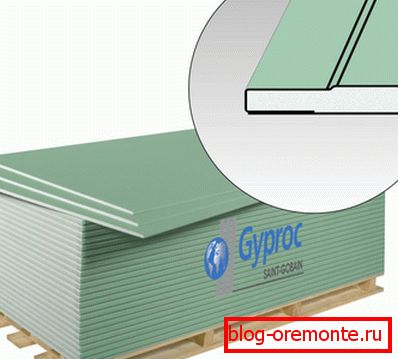
- As for the drywall, the sheets should be taken with a thickness of at least 12.5 mm, and preferably not with straight, but with thinned edges - type UK. Such an edge is necessary so that the angular profile mounted on it does not stick out. As a rule, one sheet of GCR is enough for a doorway.
- Its size is selected, depending on the height of the opening: if it is 2 m, then take a sheet of 1200 * 2000 mm. When the opening is higher, it is better to take a sheet of 1200 * 2400 mm in size, since you need to cut out whole strips on the slopes.
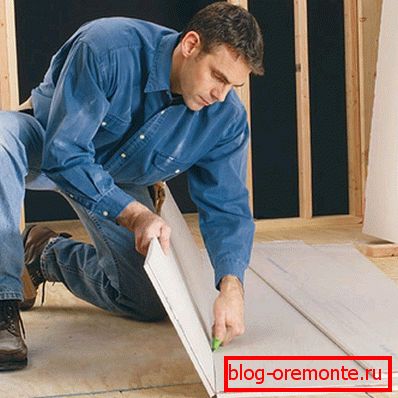
- We think that with their measurement, markup, as well as cutting, no one will have problems. To make a straight cut on a sheet of drywall is easy. Along a long metal ruler they lead with a stationery knife with a reinforced blade, only cutting the cardboard casing and slightly going deeper into the core.

Then the sheet is turned over to the other side, folded over in a slice, and the second shell is incised, as shown in the photo above. The most convenient way to perform straight cuts on drywall when it lies on the table.
It is much easier to break a sheet by aligning the cutting line with the edge of the tabletop. The cut edges of the gypsum board need to be processed with a peeling plane - otherwise the parts will not fit to the base and to each other.
Billet fitting
First, the cutting and adjustment of the side walls of the opening. It is desirable to cut the stripes for them so that the edge, thinned in factory conditions, is outside - then a protective corner profile will be mounted on it.
Billets need to try on the aperture, and try to make sure that between them and the door frame there are no slots.
- The cracks can be formed both due to the inaccuracy of the cut, and due to the unevenness of the internal angle of the opening. It also happens that the slope is slightly unfolded - that is, its walls are not a straight, but an obtuse angle. In all these cases, in order to fit the cladding element, it is necessary to trim its inner edge with a plane.
In the process of fitting the cladding element, you will see where it closely adjoins the base, and where a gap forms between them - after all, rough slopes, especially on a brick wall, are almost never even. Take note immediately of the places where it will be necessary to compensate for the gap formed with a thicker layer of plaster glue.

Installation of plasterboard elements
The mixture is applied with a narrow spatula directly on the wall, in small portions, arranged in a checkerboard pattern. If there are gaps around the perimeter, they need to be filled with foam. While the putty and foam retain plasticity, the lining element should be installed in its rightful place and lightly pressed.
- Further, it is necessary to add a rule to the outer corner, and to level the position of the drywall strip on it. After both side walls are aligned, they must be firmly fixed to the base. For this you will need expansion plastic dowels. Mounts are made vertically, also in a checkerboard pattern, at a distance of 30-40 cm from each other.

- The holes are drilled right through the drywall and the expansion dowels are driven into them, leaving their heads on the surface. Spin more or loosen the screw, you can, if necessary, slightly change the position of the cladding parts. Excess putty, which is squeezed out when fitting the side false walls, is distributed with a spatula at the outer corner of the slope.
Note! Holding the drywall in a predetermined position until the plaster mix hardened, the dowels already played their part. After a couple of hours, when the glue and the foam harden, their heads can finally be pounded with gentle blows of the hammer to vpata.
- The upper element of the slope should be installed only after the side walls are fixed. Next, proceed to the installation of the protective profile on the outer corners of the slopes. To do this, they first put a thick layer of putty, and then embed it in the corners.

- Excess mixture, which is squeezed out through the perforations, is distributed along the corner, and is used for sealing fixing points. The sequence of installation of protective corners is the same: first two vertical, and then a horizontal element. As soon as the glue, on which the profile has been planted, dries, you can proceed to pulling the surface of the slope into a single plane.
- Do not try to do it all at once - you will have to apply at least three layers, giving each of them time to dry, until the thinner edge of the drywall with the corner stuck on it is equal to the rest of the lining surface. Check its plane, setting across the slope of the blade wide spatula.
Only when you are convinced that everything turned out as it should, small roughness and shells on the screed are ground with fine sandpaper or abrasive mesh. After this, it remains only to remove the dust, to prime the surface - and the slopes are ready for finishing (see Finishing the slopes of the front door: step-by-step instruction).