Trim door slopes: step-by-step instructions
Finishing slopes after installing the front door, this is a mandatory stage of finishing the opening. Much depends on him.
This and the appearance of the design and hermetic finish that will help keep the heat indoors. This article will offer step-by-step instructions for performing this work and the rules for its conduct.
Also you will be able to decide on the right material from the photo and video and do the work correctly.
Door slopes and work stages
Like any work, this requires certain rules for its implementation. Everything is built from several stages, which should be performed in a certain sequence.
Sealing the box
Sealing of the inserted box is carried out; this process is typical for any kind of finish. It will not allow penetration of extraneous noise into the room and will not let the damp air through, and accordingly will contribute to the insulation of the entire room.
So:
- To begin with, the opening near the box is completely cleared of debris and dust. Not even be superfluous to vacuum it. The better the surface, the better the connection with the insulation;
After doing this work, we have two options for carrying out insulation:
- With the use of foam. Before filling it, the surface should be slightly moistened with water using a spray bottle.

Attention: We should not forget that the foam after contact with the surface increases three times and after expansion can ruin the front surface, especially if the coating of varnish. So do this job carefully enough.
Now we are waiting for the foam to dry completely and cut off the excess with a sharp knife.
- The second option is the treatment of the cavity with insulation for the front door. It should be said that synthetic is more suitable for this.
It rather weakly changes shape and does not sag against time, unlike natural components. The material should be cut and placed in the holes.
Do not push with force, but carefully place. It should stand tight, but not clamped. From a strong deformation, it will lose its properties.
Surface preparation
After the box has been sealed, a surface should be prepared for further work. This is done for any kind of finish and is an obligatory stage of work.
So:
- The entire plane is cleared of the former coating and a brush on metal is used for this. We also look at the plaster, if it has begun to exfoliate, then it should be removed with a chisel and hammer;
- We do a surface inspection and look at the manifestation of the fungus or darkening of the surface. If this is visible, then it is necessary to carry out the treatment with an antifungal antiseptic, which is eaten in retail. Even if there is nothing on the surface, it is still worth doing the treatment for the prevention of the disease;
- After that, the surface should be treated with a primer, which will strengthen the bonding of surfaces. To do this, use a roller or brush. Apply a layer a couple of times. Prefer deep penetration fluid. After that, let the surface dry completely.
Slope Trim Types
After complete sealing of the box, you can choose how to make slopes. For this there are several materials that are most acceptable.
It all depends on your taste and door manufacturing material.
Остракуатривание
This is probably the most traditional and inexpensive way to finish, which is used most often. Therefore, we will start with this option.
It can be completely done by hand. And the issue price is quite low.
To begin with, everything that was said before is done, this is the box's insulation and surface preparation, and then everything is done in the following order.
So:
- Make a cement mortar, which consists of sand and cement in the ratio for M3—3: 1. To do this, pour the cement into the tank, for this it is best to use a bucket of paint, it has an even bottom and here it is fashionable to prepare a high-quality solution. Add cement here and add sand;
- Now mix it up dry, so that the dry matter is evenly mixed;
- We start to add water and at the same time do stirring;
- When water is added, we need to achieve mass homogeneity. For this it is best to use a drill with a nozzle. It can be used to make the whole mass homogeneous. Stir;
Attention: In the process of work the sand settles to avoid this, it is worth adding one hundred grams of any laundry detergent to it. Then uniformity will be maintained for a long time.
- Now we take a spatula and begin to apply the solution. The jamb in the slope is made at an angle. Therefore, to start it is worth using a narrow spatula. Immediately it is not necessary to apply a large layer. Apply it in layers;
- When we have the main part of the plane filled, then take the spatula wider, which should be longer than the width of the slope. Take the solution and impose it on a plane with a thin layer.

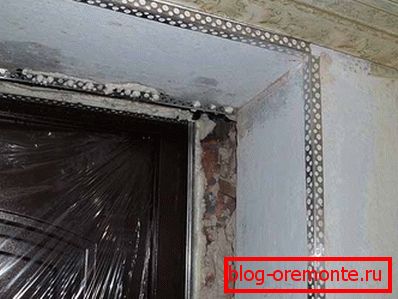
Note: When finishing the corner, apply serpyanka. It is attached directly with the mortar and makes the edge of the corner more durable and smooth.
- Give the surface to dry. Take a grater, soak it in water and begin grouting the solution. Periodically wet the surface of the grater;
- If in the process of work the shells appear with greater depth, then add the solution to this place;
- Give the plane to dry completely. Apply a coat of primer and do the painting.
Such slopes are quite practical. It is easy enough to repair. Coloring can be done in any color.
Facing the slope frame method
Finishing the slope of the entrance door can be performed and materials that should be mounted on the surface of the plates that have already been made in the right size. This and drywall and other materials.
Here, the entire mount is performed on a properly prepared frame, which will be discussed now. Here the mount is made on wooden slats, which should be installed around the perimeter of the slopes.
From the door you should choose the thickness of the strip, such that after fixing the panel you get the desired height. From the beginning of the slope is taken the height of the rail, as low as possible.
Attention: Before starting the work, the treatment of wooden surfaces should be done with antiseptics. Which are in the free market. This will protect the surface from the occurrence of fungus or rot. You should also know that you should not put the material is not dried. Prefer rails with humidity up to 12%. They must be completely dry before installation.
- Measure the size of the perimeter of the rails with the help of a tape measure and cut it to the desired size;
- Now we make the connection to the base plane. To do this, use a punch. A hole is made and after that the fixing on the dowel is performed. Do not use the plug from the kit. Get plastic pacifiers and then to them screws with a diameter of two mm. more from the cross section of the hole. We make a mount;
Materials for the slope
After the fastening of the slats is completed, it is possible to make the lining, i.e., to fix the necessary panels. The principle of installation is about the same, but still has its own characteristics.
So:
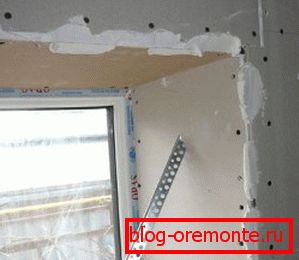
- Drywall panel, it replaces the surface plaster and is applied when required, causing a rather thick layer of mortar. Before installation, remove the desired size and cut the workpiece from the sheet with a sharp knife. After that, make the connection on the screws, but in this case it is necessary to immobilize the cap a couple of mm in relation to the surface of the material. After installation, the panel is puttied with a finishing finish and painted (see. Paint for doors: choose and make painting);

- Panels MDF perfectly complement the door aperture, especially if the canvas itself is made from this material. Fastening is done with screws. First, a hole is made with a drill, after which the impurity is drilled under the cap of the screw, so that it is lower from the surface. And after making the connection, the hole is closed with plastic plugs, which do not forget to purchase in advance.
Attention: When choosing this material, make the correct measurements. This coating is ordered from the manufacturer and therefore you will not make a replacement if the part does not fit. Pay attention to this.
- Some use laminate for decoration, which also does not look bad. To do this, first measure and cut the plates from a single piece of material. After this, the fastening is done with a screw. The sequence of which is exactly the same as in MDF.
Now you will know how to finish the slopes of the entrance doors. After fixing any plates, close the holes that are on the box side.
This can be done with the help of a plastic corner, which you buy in the store. It can be purchased in the desired color.
As can be seen from the above, all the work is not so difficult. The most important thing is to do everything slowly and remove the correct size.