Telescopic trim on the door: choose and install
The door trim does not carry any functional load. The purpose of its use is purely decorative: to close the gap between the wall and the box. But sometimes you also have to close the end of the wall, that part of it that the box has not blocked. And in such cases, there is nothing better than telescopic platbands on the door.
What is it, where does this name come from and how to install these elements?
Device and species
Distinguishing, in fact, the simplest design, such a jamb is very easy installation and dismantling for repair of doors. What is special about it?
As you can see, it is an ordinary corner, it has no retractable parts that allow you to adjust the depth of the installation. Where does the name come from - telescopic?

And the thing is that the box for such a casing has a special shape and is equipped with grooves into which the corner shelves are inserted. They can be pushed all the way in or only up to the level dictated by the thickness of the wall.

However, the standard frames telescopic on the door, have a small width of the corner strip - about 2 cm. This is not enough with a large depth of slopes. In such cases, you should install an advanced version, complete with additional strips. With their help, you can close any slope.

As you can see, the additional strips are also provided with grooves on both sides for installation in the box and fastening the casing to them. And the depth of the grooves allows you to adjust the width of the frame of the door niche.
And the best part: for the installation does not require any fasteners. Although sometimes, with a slight penetration of the strip into the groove, it is recommended to put it on glue for a stronger fixation.
On the one hand, this makes installation easier with their own hands, but on the other hand, the shape of the casing complicates their trimming and fitting. But more on that later. And now about what parameters the telescopic platbands differ from each other.
Manufacturing material
In this regard, the telescopic platband is no different from the usual waybill.
It can be made from materials such as:
- Wood of various breeds and with different coating - paintwork, veneer valuable varieties, etc .;
- Wood products - Fiberboard, chipboard, MDF, plywood with laminated, veneered, film coating;
- Pressed paper;
- Metals (most often aluminum);
- Plastic of different typesincluding wood-polymer composites.
Council It is most logical to pick up the trim under the door of the same material. But not necessarily. Here the decorative component is more important: form, color, texture. If they are well combined with the door leaf, the material can be any.
Dimensions
It is mainly about the width of the front strips of the product, as the length of the elements in the kit is usually standard: two racks of 220 cm each, and one horizontal part 120 cm.
But the width may be different. Again, sizes from 60 to 80 mm are considered standard, but they can be changed in either direction, either as large or as small.

- Platbands of standard width fit most doors.
- But there may be exceptions. For example, with a massive oak door will look better products wider.
- But those whose width is less than 50 mm look frivolous. In addition, they may simply not close the gap between the wall and the box.
Therefore, before buying, always measure this distance, so as not to be mistaken. Narrow frames in most cases are used only when others are not included in width between the door and the perpendicular wall, or some other structural element of the interior.

The form
Another criterion for the selection of the casing is the shape of the front part. It can be straight, rounded, curly and any other. And it should be combined with the look of the door leaf: the simpler it is, the less embossed the frame should be.
Below are the most common door trim profiles:
Council You can try to pick up trim, in shape, color and width coinciding with the baseboards. Sometimes it looks very interesting.
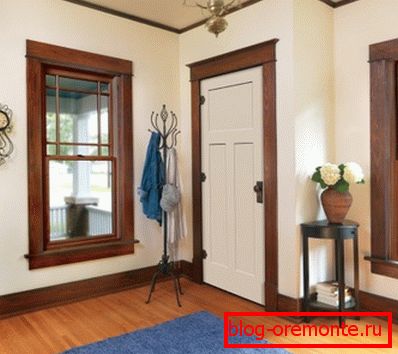
Installation
Install telescopic trim even easier than the overhead. If before this you are carefully measured and carefully cut. And before that you need to take care of the correct installation of the door frame, respect for all levels and right angles. But this is a topic for another article; in this article we will not focus on the preceding stages.
Before describing the process of fitting and installation, it is worth saying that there are two ways of joining the casing elements:
- Classic at 45 degrees. In order for the joints to look neat, you need to comply with high accuracy when measuring and cutting. Moreover, it is quite difficult to cut off the angular profile in the ordinary hive without the loss of the specified angle or without damaging the front side of the product. It is desirable to use miter saw for this.
- Modern at 90 degrees. It is easier to do (it is almost impossible to make mistakes with measurements), does not require the use of expensive equipment, it looks quite interesting. But only under the condition of a flat cross-section of the casing. Joining convex and curly decorative elements at right angles looks unaesthetic.

Let us consider, for example, a simpler version - the one with which even a beginner can handle it himself. And the price of special tools is too high for single use.
| Picture | Description |
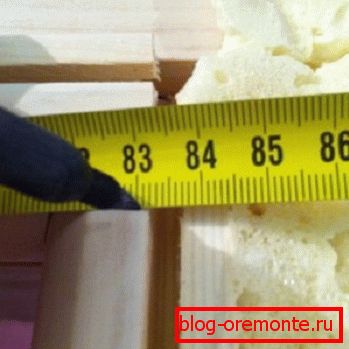 | The first is the horizontal part. To find out its length, you need to measure the distance between the inner walls of the side grooves of the box. |
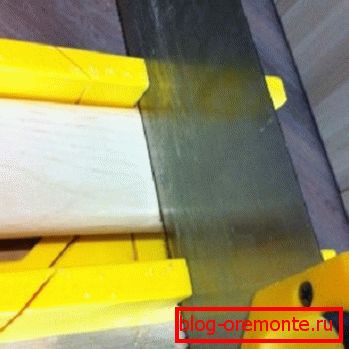 | The measured distance is deposited on the casing, after which it is laid in a steel box and cut with a small hacksaw with a fine tooth strictly perpendicular. Cut better on the front side to avoid chipping. But this prevents the corner strip. Therefore, under the other edge of the casing, it is necessary to enclose a bar of the same thickness in the case. |
 | The cut piece is inserted into the top groove of the box, leveled along the side grooves and slides all the way into the wall. |
 | To find out the length of the vertical elements, you need to measure the distance from the floor (or plinth) to the upper edge of the horizontal casing. To avoid inaccuracies, measurements are made for each rack separately. After which they are cut as described above. |
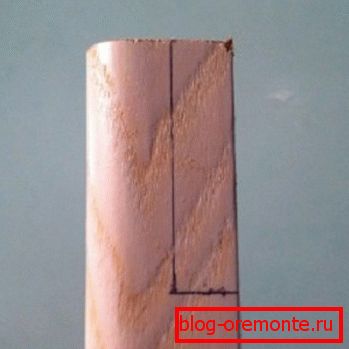 | At the top of each rack, you must make a rectangular cutout so that they fit closely to the wall. In depth it can reach the base of the platband, and the length is equal to the distance from the edge of the door opening to the upper edge of the horizontal part. This size is best removed by placing the rack in place. The cut is done using a jigsaw. |
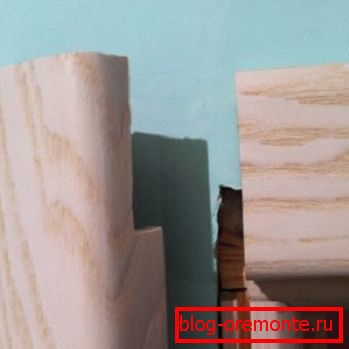 | It remains to insert both casing in the side grooves of the box, and push them all the way down, gently pressing along the entire length. |
If you are using an advanced version of telescopic platbands, then the instruction recommends first installing dobora. If there is an empty space between them and the end of the wall, it is filled with mounting foam, or the walls are wedged into pieces of wooden bars / slats.
It is important. When using foam, it is necessary to install spacers or fix them between doors in any other way so that it does not squeeze them out as the volume increases.
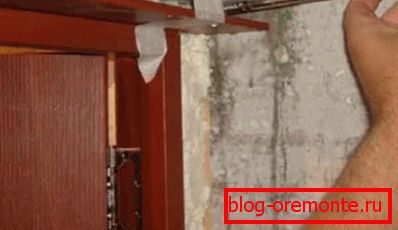
In doori trim are installed in the same way as in the box.
And a few tips at the end:
- If the casing is not firmly held in the groove, the mounting bar can be greased with glue before installation. For example, liquid nails. But note that after this construction will be collapsible.
- Formed due to the curvature of the walls or incorrect measurements of the docking gaps can be masked by applying a sealant that is matched in color to the cashing.
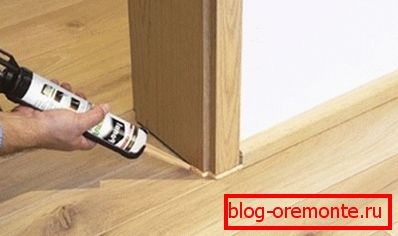
- If the platband needs to be removed from the groove, try not to bend it, but pull with both hands, holding both edges. Otherwise, the mounting bracket just breaks off.
- If the installation of the telescopic platband is prevented by the sheds or the striker plate of the door lock, in them, opposite the obstacles, it is necessary to make cuts, as in the upper part.
- But it is better to remove the awnings, install the casing as a whole, and then re-fasten them through the mounting bar.
Conclusion
As you could see, the trim for telescopic doors in the prescribed form is no different from the overhead variety of decorative solutions. Mount them no more difficult, and in some ways even easier. And if you need to replace or repair the door leaf and box, they are easily disassembled and can be reused.
Therefore, equipping a new house or making regular repairs in the apartment, be sure to pay attention to these products. And if you want to do everything yourself, once again study the topic of the video in this article.