Slopes for entrance doors do it yourself: basic ways
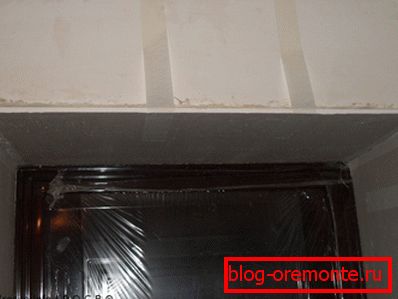
After you have installed the front door, there are always gaps between the doorway and the loot. These are the so-called foam tolerances or, in simple terms, cracks.
The gaps remaining after installation look not very presentable and let through drafts. This negates all the insulating properties of your door, and brings tangible discomfort.
And if the exterior finish can be made by ordinary plastering, then the door slopes require a careful approach and study. In order to give your door a complete aesthetic look and to insulate your home, you definitely need to know how to install the slopes on the door.
Proper installation and finishing of slopes will relieve you of the following troubles:
- with the help of door slopes give a more beautiful appearance of the door;
- heat energy is preserved, which is especially important during the cold season;
- insulation increases (see. Noise isolation of the front door with your own hands: make your life comfortable).
- 1 Kinds
- 1.1 Plaster
- 1.2 Drywall Slopes
- 1.3 Slopes made of plastic
Kinds
The slopes of the door with your own hands can be done in several ways.
Today slopes are of the following types:
- slopes with plaster;
- slopes of plasterboard (see. We make slopes of the door of plasterboard);
- slopes of various panels (plastic, laminate, MDF, etc.).
Consider the most effective and popular.
Plaster
The slopes of the doors with plaster. This is the traditional and most popular way of making openings.
Door soffits made using different types of plaster, it can be a solution:
- lime plaster;
- cement plaster;
- mixed plaster with the addition of glue.
Plastering is the cheapest, fastest and easiest way to make door slopes.
In order to make slopes for the door of plaster, you must perform the following steps:
- Install doors at a certain level, so that the right and left parts of your door frame are located at an equidistant distance from the walls.
- Prepare tow and mounting foam in advance (can be felt) in order to seal the gap. The gaps formed after the door installation, between the door frame and the walls, should be filled with the most suitable material. Lay it as tight as possible in the gap
Tip! If the role of the sealer (see Sealer for metal doors - protection against drafts) you have tow or felt, treat them with a suitable solution of potassium fluoride.
- After the above operations, thoroughly clean the surface of dirt, old paint, dust or soot.

- Install metal strips that perform the functions of special beacons and maximally facilitate surface leveling. Both slats must be mounted at the same distance from the box.
- Apply a layer of plaster several times. Determine its thickness "by eye", depending on the desired result.
- In order to make the slopes on the door, use cement mortar or starting facade plaster.
Tip! If you plaster external slopes, then add water-repellent impurities to the cement mixture. They will extend the life of the solution.
When choosing a mixture for your plaster, consider the fact that not every material is suitable for residential premises. Carefully study the composition of the mixture, it should not be harmful substances. Otherwise, the slope of the front door may be harmful to health.
Plasterboard slopes
One of the most accessible and popular ways to make door slopes is plasterboard slopes. In order to learn how to fix the drywall on the slope of the door, you first need to install and secure the front door.
Remove excess foam. Along the perimeter of the box, press down the foam with a small wooden bar so that it does not look like excess pieces.
We have done all the necessary preparatory operations and are ready to find out how the door slopes are fixed with the help of drywall:
- Cut two parts of plasterboard, which in their length will be equal to the height of your doorway. Note that the width of the cut out parts should be 5 cm greater than the depth of the opening. Pay special attention to the sides of the blanks. The side that you insert into the door frame should be perfectly flat.
- Take the prepared part and place it in the doorframe with the flat side. Align it so that you get a 90 degree angle between the box and the part. To mark the position of the part, draw a straight line on the floor. Do the same from the opposite side.
- Divorced in advance glue is applied on the sides of our opening. Apply glue in small “slides” with a small indentation from the box and the outer wall.
- Insert the item into the box. Squeeze it, and lightly tapping it, align it with the line. Repeat the same operation from the opposite side.
- Mark the lines on the side slopes. These lines will correspond to the top of the box. Cut out an additional drywall part. The length of this part should correspond to the length between the sides, and its width should be equal to the width of the first two parts.
Now we can proceed to gluing drywall:
- Apply adhesive to the top of the opening. Insert and press the blank in such a way that its bottom edge coincides with the line drawn earlier. In order that gypsum cardboard does not fall off while glue dries, think up and establish props.
- When the glue grabs, remove the props. If something bulges - cut.
- If there are voids between the wall and the drywall, cover them with glue. After the glue dries, you can begin to putty the walls.
Now you know how to fix the slopes of the front door with drywall.
Slopes made of plastic
Another way to seal the slopes of the front door, are plastic slopes.
In order to make the design of the slopes of the front door of plastic, you will need:
- plastic strip 6 mm long and 8 mm thick;
- U-shaped starting strip;
- F-shaped plastic strip;
- wooden slats with a thickness of 10-15 mm;
- normal level;
- stapler and staples;
- screws (so-called bugs);
- mineral wool;
- drill or hammer drill;
- scissors and a knife for metal;
- 10-15 pcs. self-tapping screws 95 mm;
- white silicone.

Now we have everything we need and we can proceed:
- Wrap the doors and fittings in a protective film in order not to damage them.
- Tamper with special wooden slats around the perimeter of the slopes. The rake should go flush to our wall and not get out of it. After that, take the drill and attach the slats to the wall with screws.
Tip! Reiki must be mounted exactly vertically. Thus, we can make beautiful slopes. In order to achieve perfect verticality, you must use a level.
- Tamp the start lane along the outer edge of the door. Use for this self-tapping bugs. To get a flat line, designate in advance, using a level, the right and left vertical and upper horizontal. The inner edge of the starting strip should fit as closely as possible.
- Nail the F-shaped plastic strip. After that, take a stapler and attach it to a wooden rail. Fastening should be carried out in one parallel strip.
- Take the plastic and insert it into the starting strip. In order to insulate the slope, we lay a layer of mineral wool prepared in advance, after which we place our plastic in the F-shaped strip.
- Using white silicone, rub out protruding or indented bumps.
Congratulations, we finished and learned how to make plastic slopes. Of course, this is not all methods and materials that can be used in the manufacture of slopes. But these methods are the most simple and optimal.
In that case, if the instructions did not help you to fully answer all the installation questions, you can watch the video, and perhaps this will complement our instructions.
If you have minimal construction skills, then based on our instructions, you will not be difficult to make slopes for the front door (see Finishing the slopes of the front door). The main thing, do not forget the basic rule: treat your work carefully and carefully.