Metal gates do it yourself apart from the gate
Many make wickets in the fence of the house separately from the gate. Metal wickets with their own hands will decorate the appearance of any structure. Here you can let fantasies roam and apply the most unexpected solutions.
Forged items will decorate and give solidity design. And the electric drive will eliminate the need to go out. Ease of manufacture allows almost anyone to do this. Personally selected design can emphasize the individuality of the construction and give your own style.
This design has many advantages:- High strength is very different from other materials;
- The ability to use decorative elements favorably highlight the entrance to the site;
- Installation under the force of any person;
- The process of work does not take much time;
- The simplicity of the design.
Before starting work
Metal gates with their own hands can be made of many types and modifications. There are many decorative elements that will decorate the work done. Forged items complete design design. Therefore, first it is necessary to clearly understand what you want to get in the end.
First, select the installation location, remove all dimensions and display it on paper as a wicket diagram. Carefully calculate the material that is required during the work.
Materials
Try to choose metal blanks with a high carbon content. This material is less susceptible to corrosion and will last much longer.
- Profile or pipe for the implementation of columns with a diameter of at least 100 mm;
- Sheet metal, with a thickness of not less than 1.5 mm;
- Consider when purchasing stiffeners, if they are made of the same material as the frame, consider this in size;
- Corner or profile tube with a cross section of at least 25 mm;
- For anti-corrosion treatment will require gasoline or a special liquid;
- Mixture for priming metal surfaces;
- Paint;
- Lock for the gate (see. Mortise lock in the gate) or electric.
The right tool
Prepare the tool is also in advance, so as not to be distracted while working:
- It all starts with the markup, for this, take a nylon thread;
- Welding, power 220 W;
- To hammer in columns will help the sledge hammer or the manual drill;
- For fasteners metal should take a screwdriver;
- The Bulgarian, will solve questions on cutting and cleaning of metal;
- Scissors for metal, will help in cutting the sheet;
- Shovel.
Caution: Select the correct dimensions of the product, take note of the weight of the structure. It must be free movement of the gate in the winter. Excessive weight of the structure can lead to sagging and improper operation.
Mounting construction
The metal metal gate can also be made at home, with a small amount of tools. This will save money to the owner. When the idea is transferred to paper, there is material available for work, you can proceed to the manufacturing process itself.

Side bars
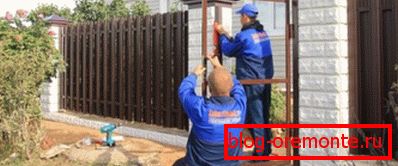
The metal wicket is mounted on the columns, which are mounted to the ground for at least one meter (this will prevent the structure from sagging under its weight).
Make markup and mark the installation location:
- Bulgarian cut off from the workpiece the length of the postplus one meter;
- Produce surface treatment: remove traces of corrosion using grinders and anti-corrosion fluid. After drying, a white bloom forms, remove it with a cloth;
- We drill (with the help of a hand drill), or dig holes in the ground on the ground markings made. The diameter of the hole must be greater than the diameter of the pipe by 10 cm;
- We prepare solution liquid. We take cement brand 300 and mix it with sand in the ratio of 1: 3. We make a homogeneous mass and pour water, bringing to a liquid state;
- We install the pillars in the prepared holes and we fall asleep with rubble (any stones from the site can be used). We ram the rubble;
- We make filling of columns.
Caution: Careful attention should be paid to posting. Using a plumb line, check the perpendicularity of the installation before pouring. Incorrect installation will lead to a malfunction of the structure and will require rework.
Installation of brick pillars
A metal gate with its own hands can be fixed on the pillars, which are made of bricks. For this metal products should be revetted with brickwork. It will turn out reliably and beautifully. Underline the good quality of the structure. Reduce the possibility of sagging.
- As stated above, we prepare the solution, only make it non-liquid;
- We begin the laying of the first row with a whole brick, the second row, starting with three-quarters (this will make a bunch of rows more rigid);
Attention: Do not forget to install mortgages between the rows for wicket fasteners. This is done with the help of steel plates, which are welded to the pillars and laid with bricks (fastening thickness not less than 5 mm).
- Give the solution to dry, make the jointing;
- On top of the pillars you can install metal or decorative caps. This will help to divert water from the product in the rain. It will give the structure a finished look. This product is saturated with the market, you can choose any style;
Manufacturing frame

The gate itself is made of metal with its own hands is executed from the profile or corner. What the frame is made of depends on the needs of any person. It does not matter in principle, installation is the same. Take care of this work, observing the basic rules.
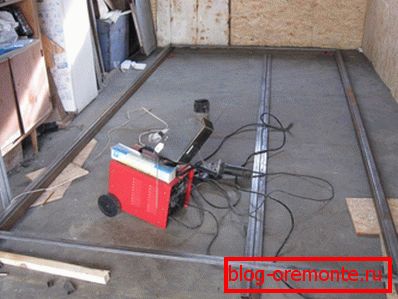
To keep the configuration intact, carefully dimension all dimensions. Good work requires the right place. If there is a welding table, these questions disappear; if it is not there, it is required to prepare a place for welding.
So:
- We select a place for free placement of the structure. We make laying of the channel along the perimeter, the size should be less than the dimensions of the product by 15-20 cm;
- The plane must be perfectly maintained. To do this, apply a level. We make adjustments with the help of gaskets, which we place under the channel;
Note: During the preparation of the site should be kept parallel to the plane. With improper preparation, the frame will acquire a "propeller". When welding, fasten the material with clamps to the table rather rigidly. Be sure to check the diagonal with the help of a nylon thread.
- Cut the profile / corner according to size. With the help of the grinder we remove burrs;
- The resulting blanks lay on the table. We fix. Welding joints;
- For rigidity we assemble the spacers, we will give the required rigidity to the structure. We combine welding side racks or top and bottom;
Attention: The fastening of the struts is made at a distance of at least 50 centimeters between them. Check that their mounting does not protrude above the level of the racks; this is required for further installation.
- All welding work is carried out by the point method. This will reduce manufacturing time and costs;
- We clean the weld seams with a grinder with a grinding wheel. We carry out the treatment with anti-corrosion liquid or gasoline.
Joining the pillars

Mount the wicket to the pillars only with a powerful fastener. This will not allow the product to hang, will extend the stock service. Choose a curtain with integrated bearing, it will give a smooth ride.
Attention: The gap between the wicket and the ground should be at least 10 cm. This space should be provided to avoid the difficulties of the construction in winter, will allow normal operation in bad weather.
Fastener sheet metal
This will be the final stage during installation. To prevent injury, work only in gloves.
- Cut the desired part size from a sheet using a grinder and a cutting wheel;
- Remove burrs at cut points;
- We produce fasteners sheet to the frame of the product. At the junction of the sheets on the plane we make their welding with a solid seam. After its implementation, grinder with a stripping wheel remove the irregularities of welding.
- The finished product is treated with anti-corrosion liquid;
- Krasim;
- Hang on the hinges.
If you like forged products, before painting they should be fixed on the structure. After installation, a lock should be installed. And if you like, connect the electric drive to open the gate at the touch of a button. This is of course who and what will give preference.